Web & CMS
Shopify
Connect and manage Shopify stores from the desktop. Browse admin, products, orders, and customers.
Getting started
Add the Shopify applet, enter your store URL, and complete OAuth in the browser
Adding a Shopify Store
Follow these steps to create the Shopify applet in your project. OAuth happens afterward (see Connecting via OAuth).
Step 1: Choose Shopify in Add Applet
- Open the Add Applet dialog for your project.
- Under Web & CMS, move the pointer over Shopify so the right panel shows the description and feature list (Dashboard, Admin, Products, OAuth Connection, and more).
- Click the Shopify tile to open the add form. If the tile is disabled, your account may be missing a required plan for that build.

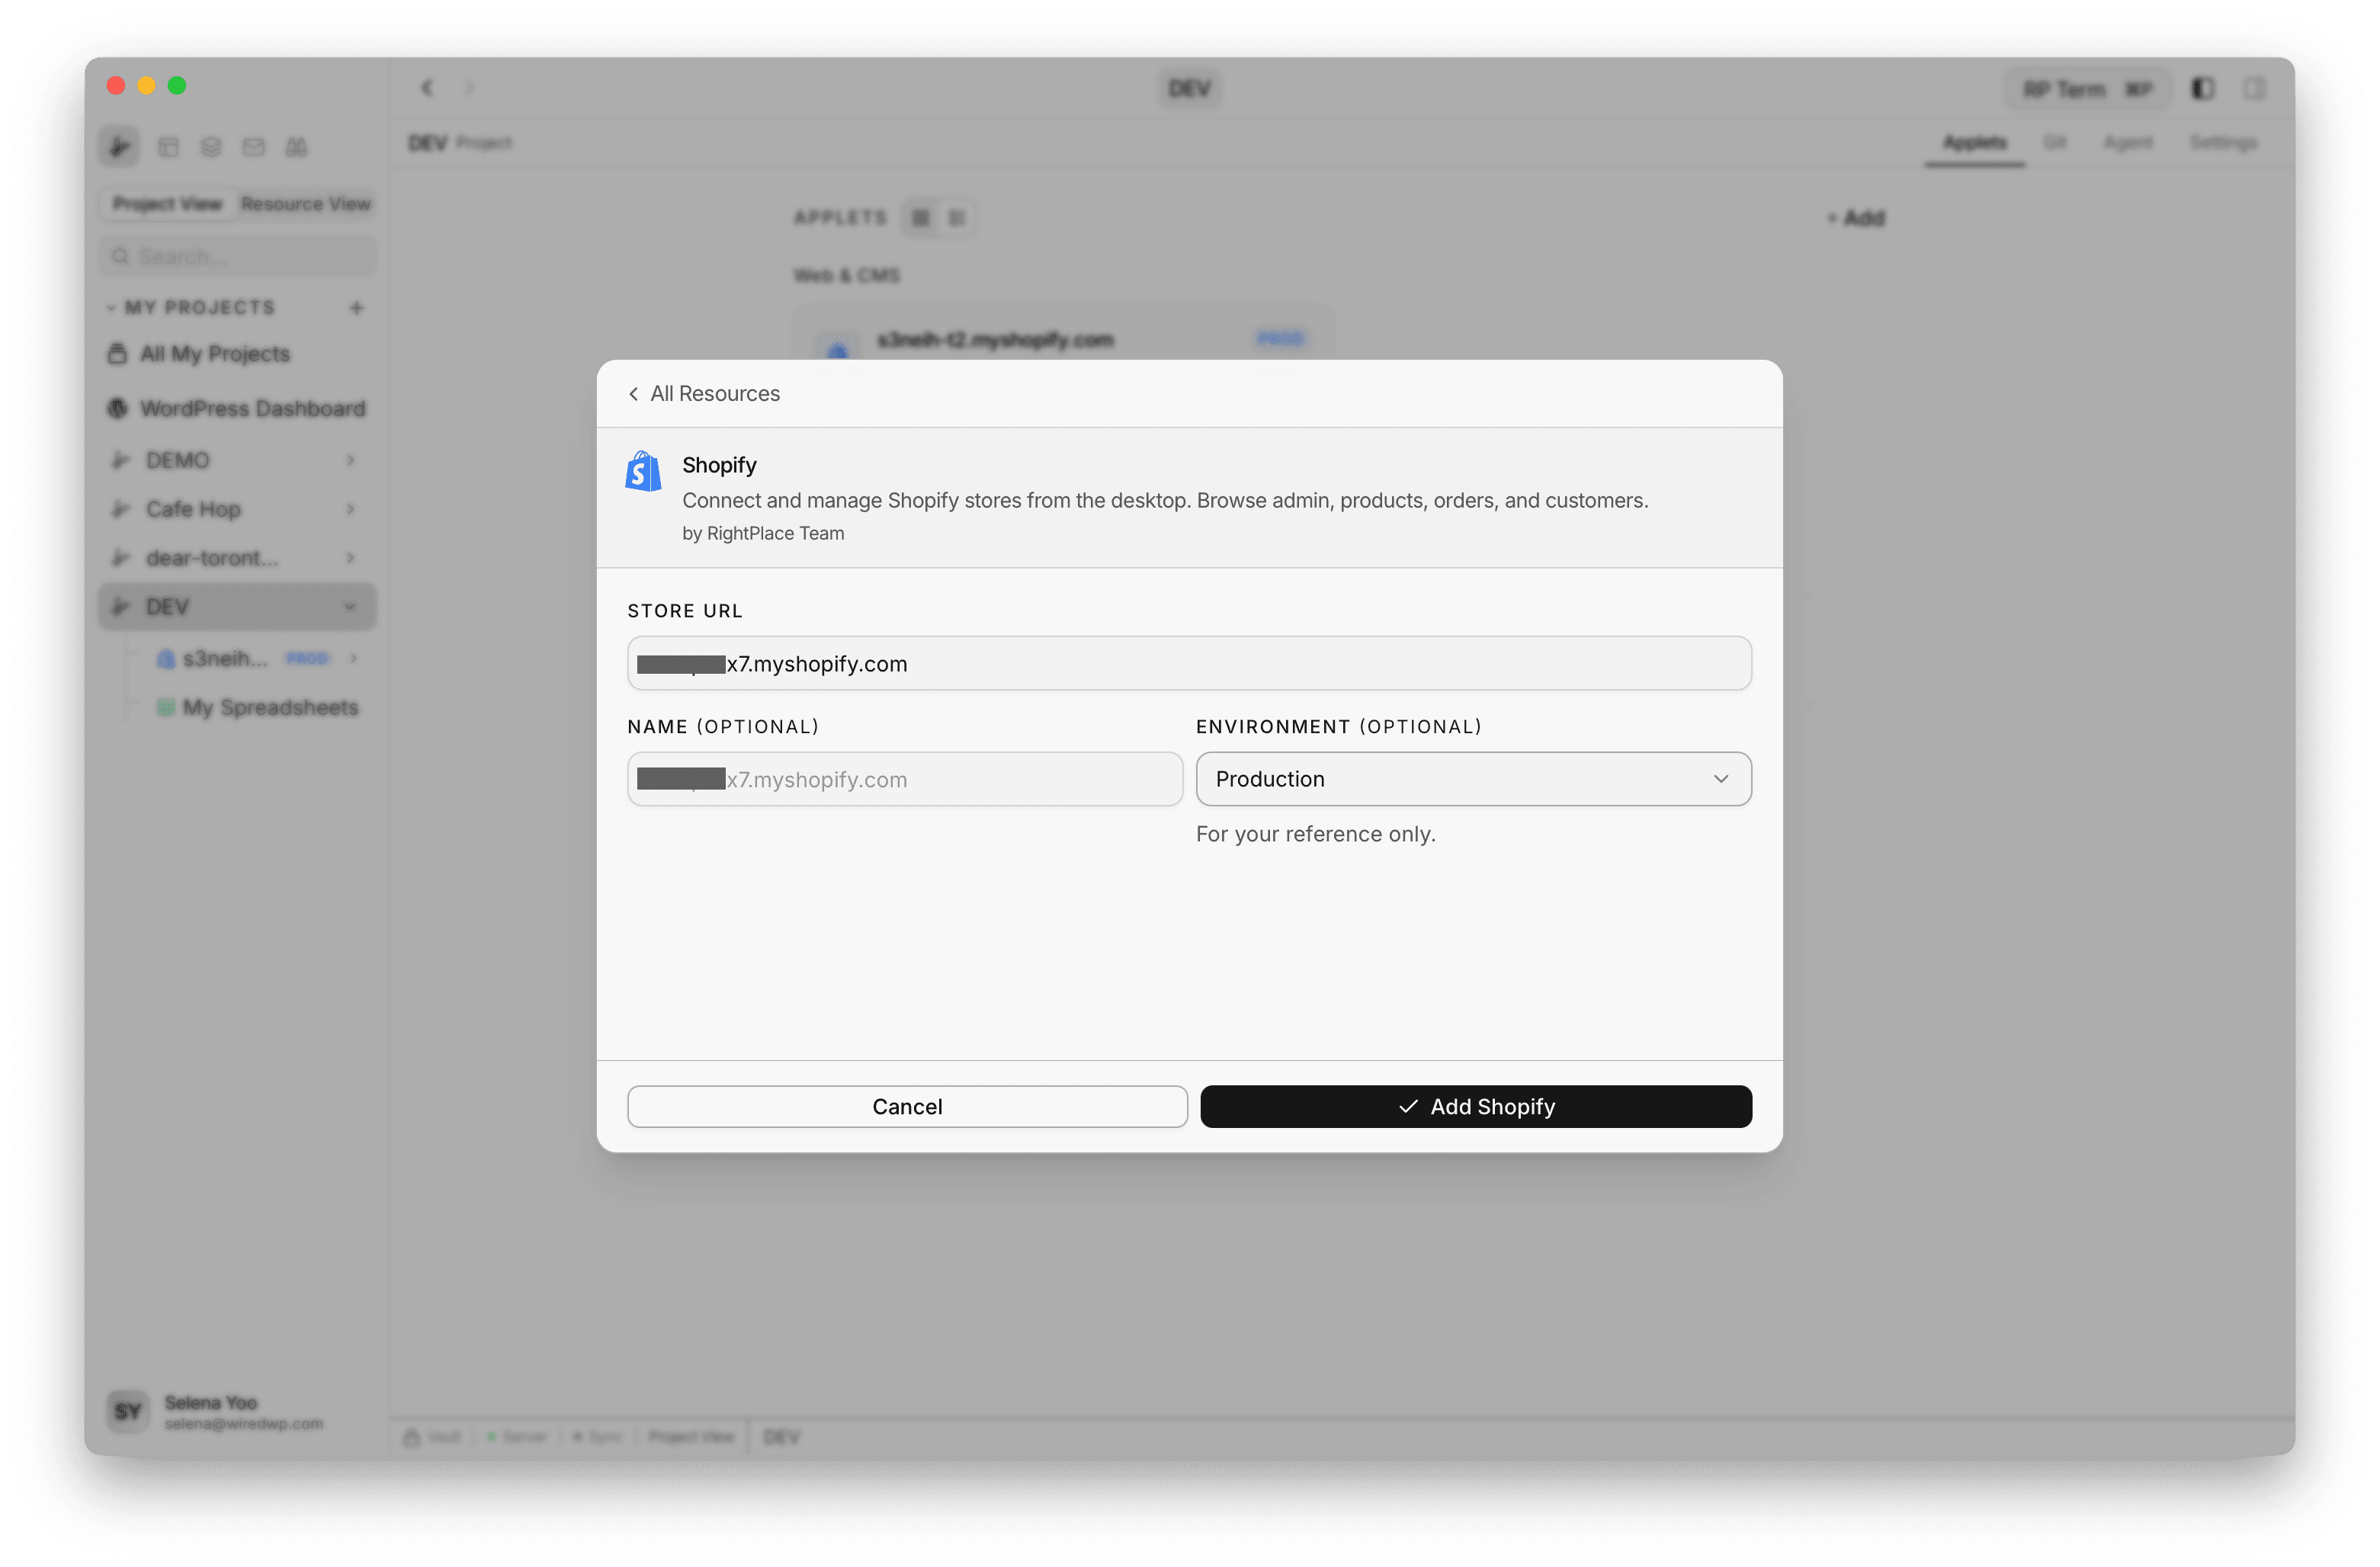
Step 2: Enter store details and create the applet
- Confirm you are on the Shopify add screen (header shows the Shopify logo and title).
- Store URL
- Enter
your-store.myshopify.comor only the slugyour-store. On submit, values without.myshopify.comare saved asyour-store.myshopify.com. - On paste, if the text includes
https://ormyshopify.com, the form drops the protocol and everything after the first/. That matches URLs likehttps://your-store.myshopify.com/admin/.... - Store links that use only
admin.shopify.comare not converted to amyshopify.comhost. For those, paste or type the*.myshopify.comhostname.
- Enter
- Name (optional): Display name in the sidebar. If you leave it blank, it defaults from the store URL.
- Environment (optional): Pick Production, Staging, or Development for your own organization. This is a label only and does not change Shopify APIs.
- Click Add Shopify to create the applet. You land on the resource with Browse and Settings. The store is not connected to Shopify admin until you complete OAuth below.
Connecting via OAuth
After the applet exists, connect it once so RightPlace can call the Shopify APIs. You can start OAuth from Settings (shown here) or from the Dashboard tab. Both use the same Connect with Shopify action.
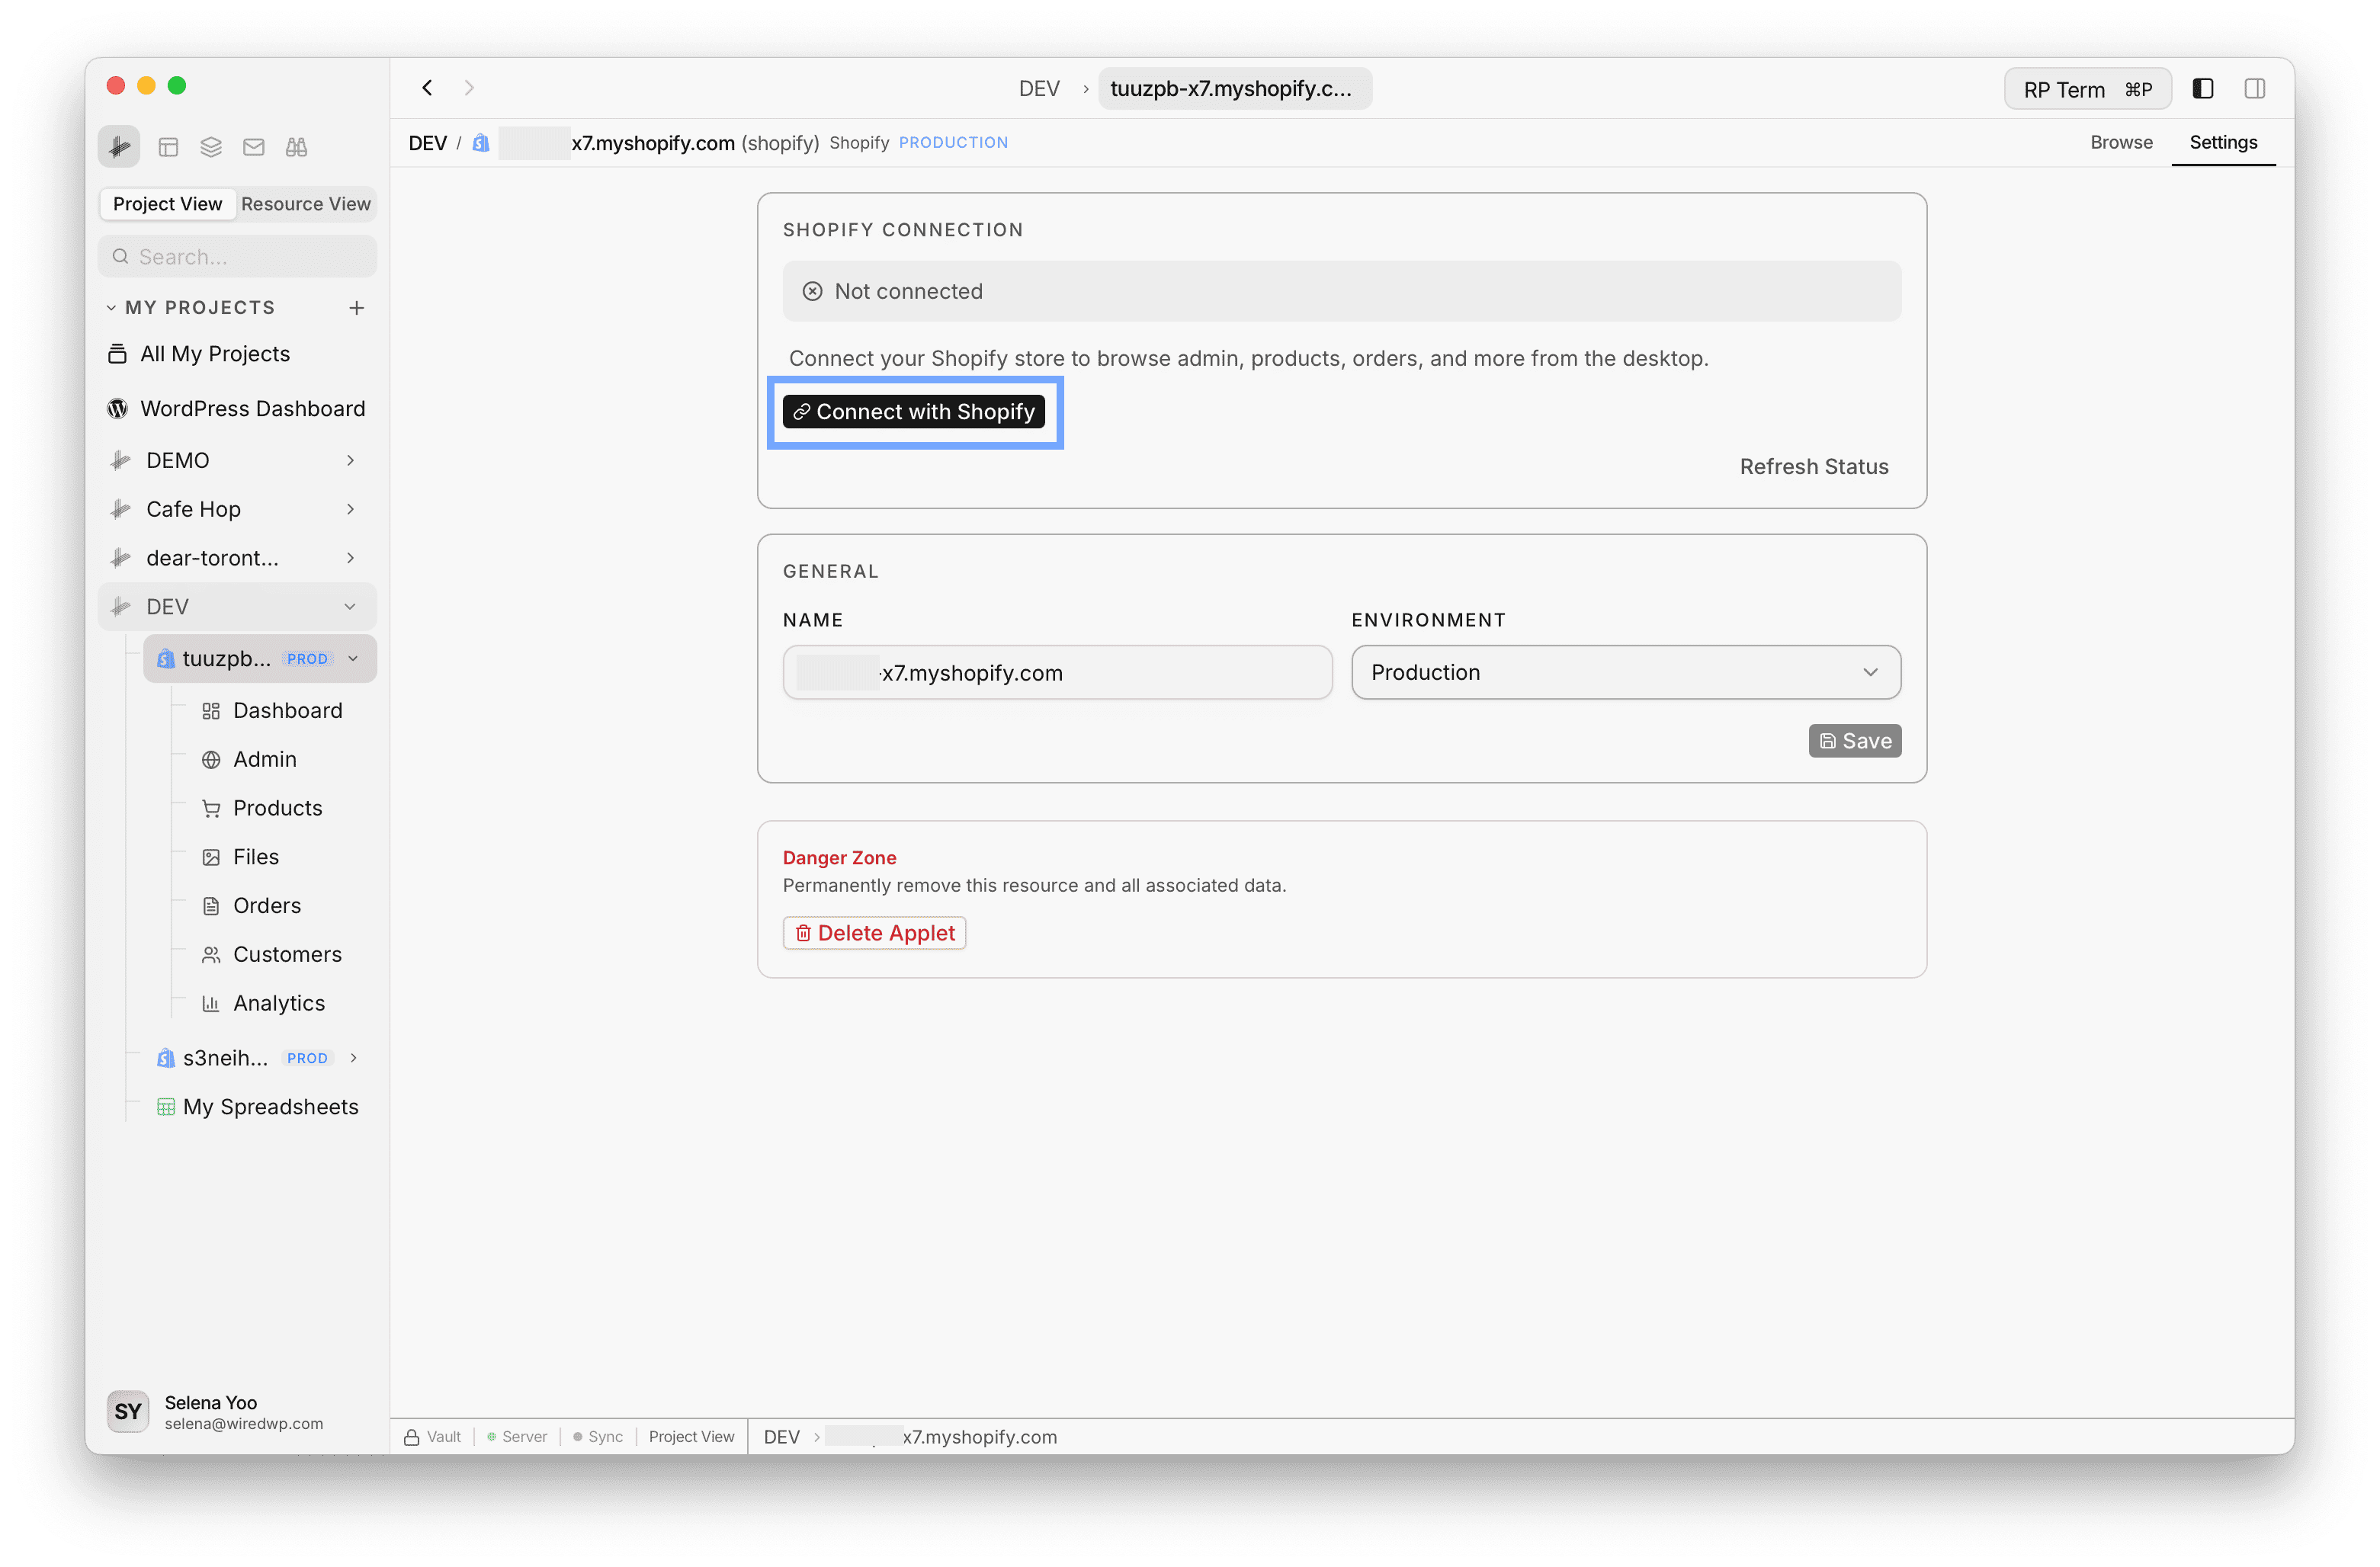
Step 3: Start Connect with Shopify
- Open your Shopify applet and switch to the Settings tab (or open Dashboard if you prefer that entry point).
- In Shopify Connection, you should see Not connected until OAuth succeeds.
- Click Connect with Shopify. Your system browser opens to Shopify’s sign-in and install flow. Keep RightPlace open. You will return to it after approving access.
- Use Refresh Status if you finished in the browser and the app still shows disconnected.
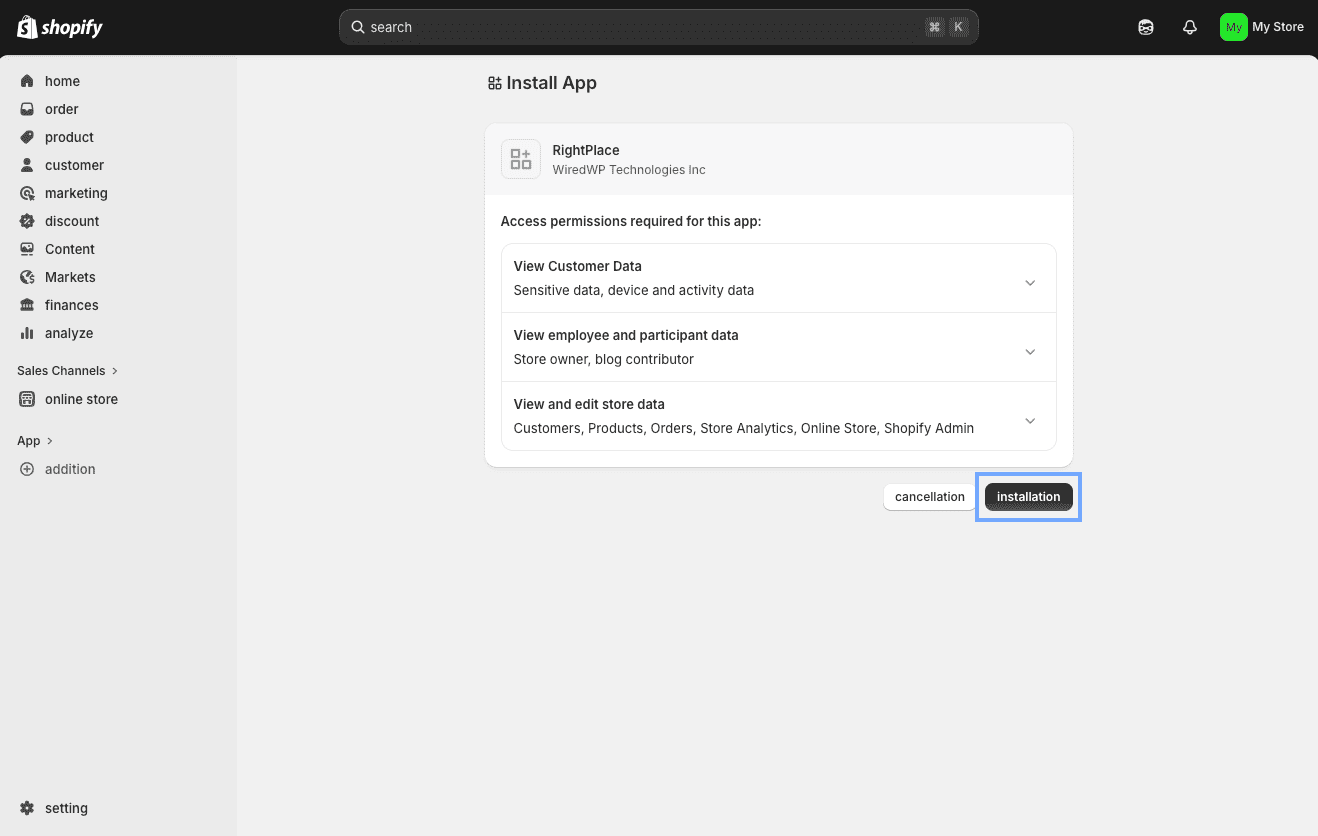
Step 4: Approve the app in Shopify Admin
- Sign in to the correct Shopify store if prompted.
- On the Install app page, review Access permissions required for this app (customers, products, orders, analytics, admin, and related scopes).
- Click Install (or the primary install button Shopify shows) to grant access. The exact label may vary slightly by Shopify locale and version.
- When Shopify finishes redirecting, close the browser tab if it does not auto-close and return to RightPlace.
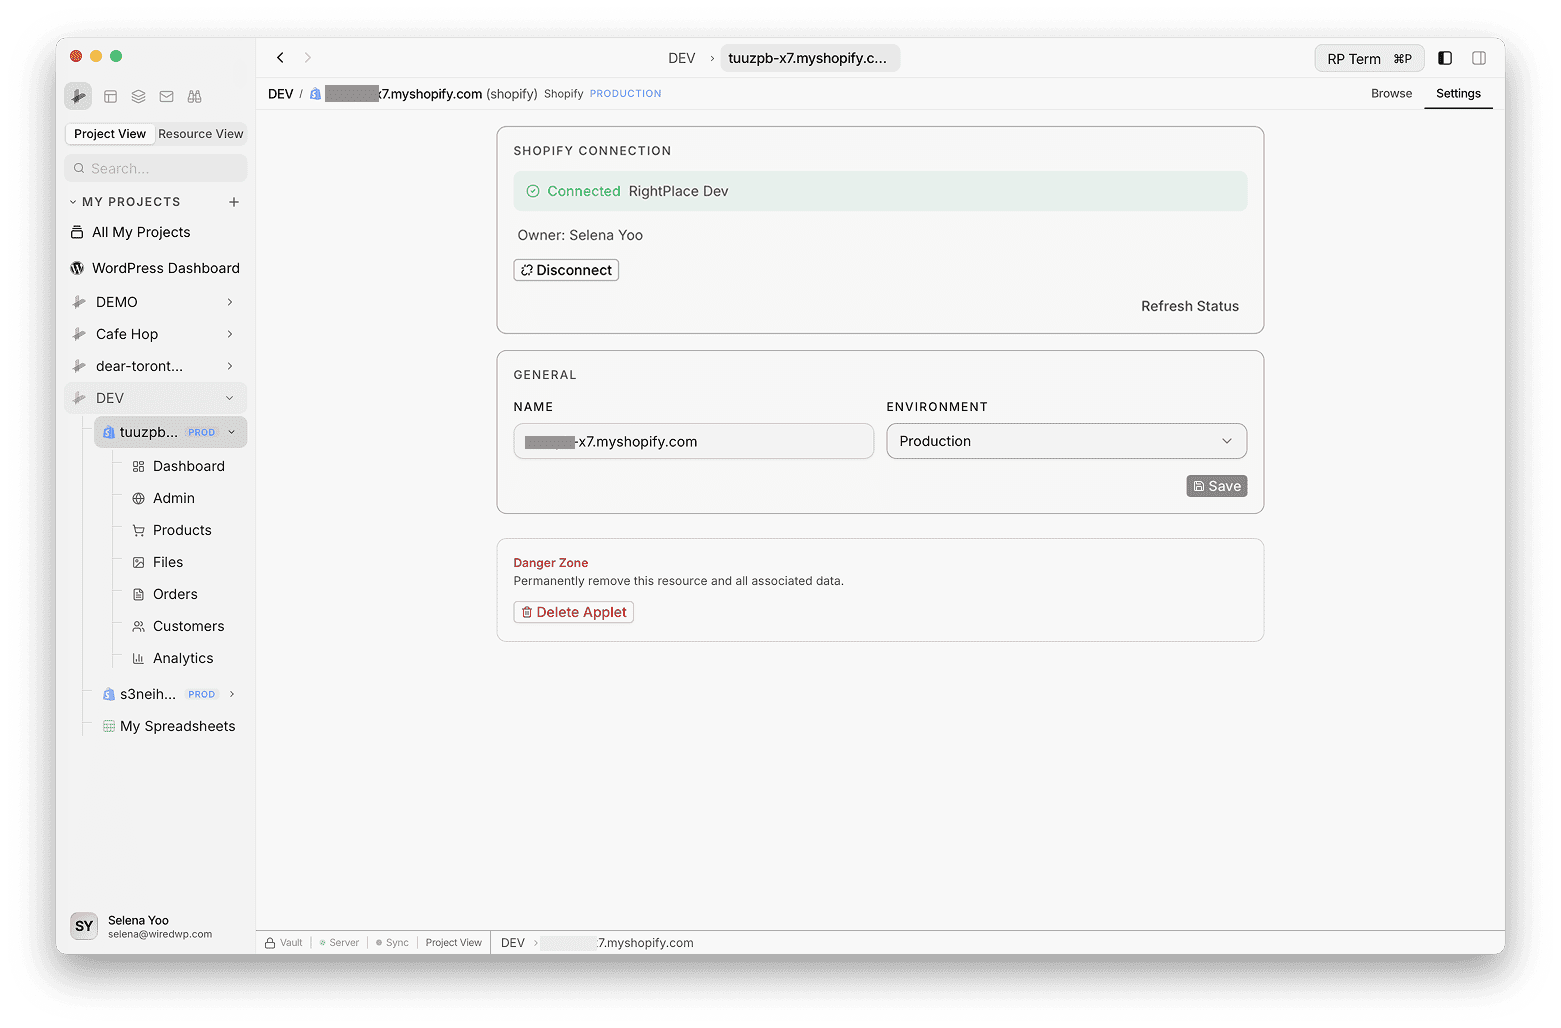
Step 5: Confirm connected
- Back in RightPlace, open Settings (or Dashboard) on the same applet.
- Shopify Connection should show Connected with the app name (for example RightPlace or RightPlace Dev) and store owner when available.
- To remove access later, click Disconnect here or on Dashboard. That revokes the token and clears cached Shopify data for this applet.