Stages
Plan and track work with hierarchical tasks, labels, and a visual canvas
Stages is a built-in task management workspace for planning and tracking work. Each stage contains a tree of tasks with statuses, labels, and resource links - all organized around a freeform canvas. Stages live inside your project and sync across devices automatically.
Creating a Stage
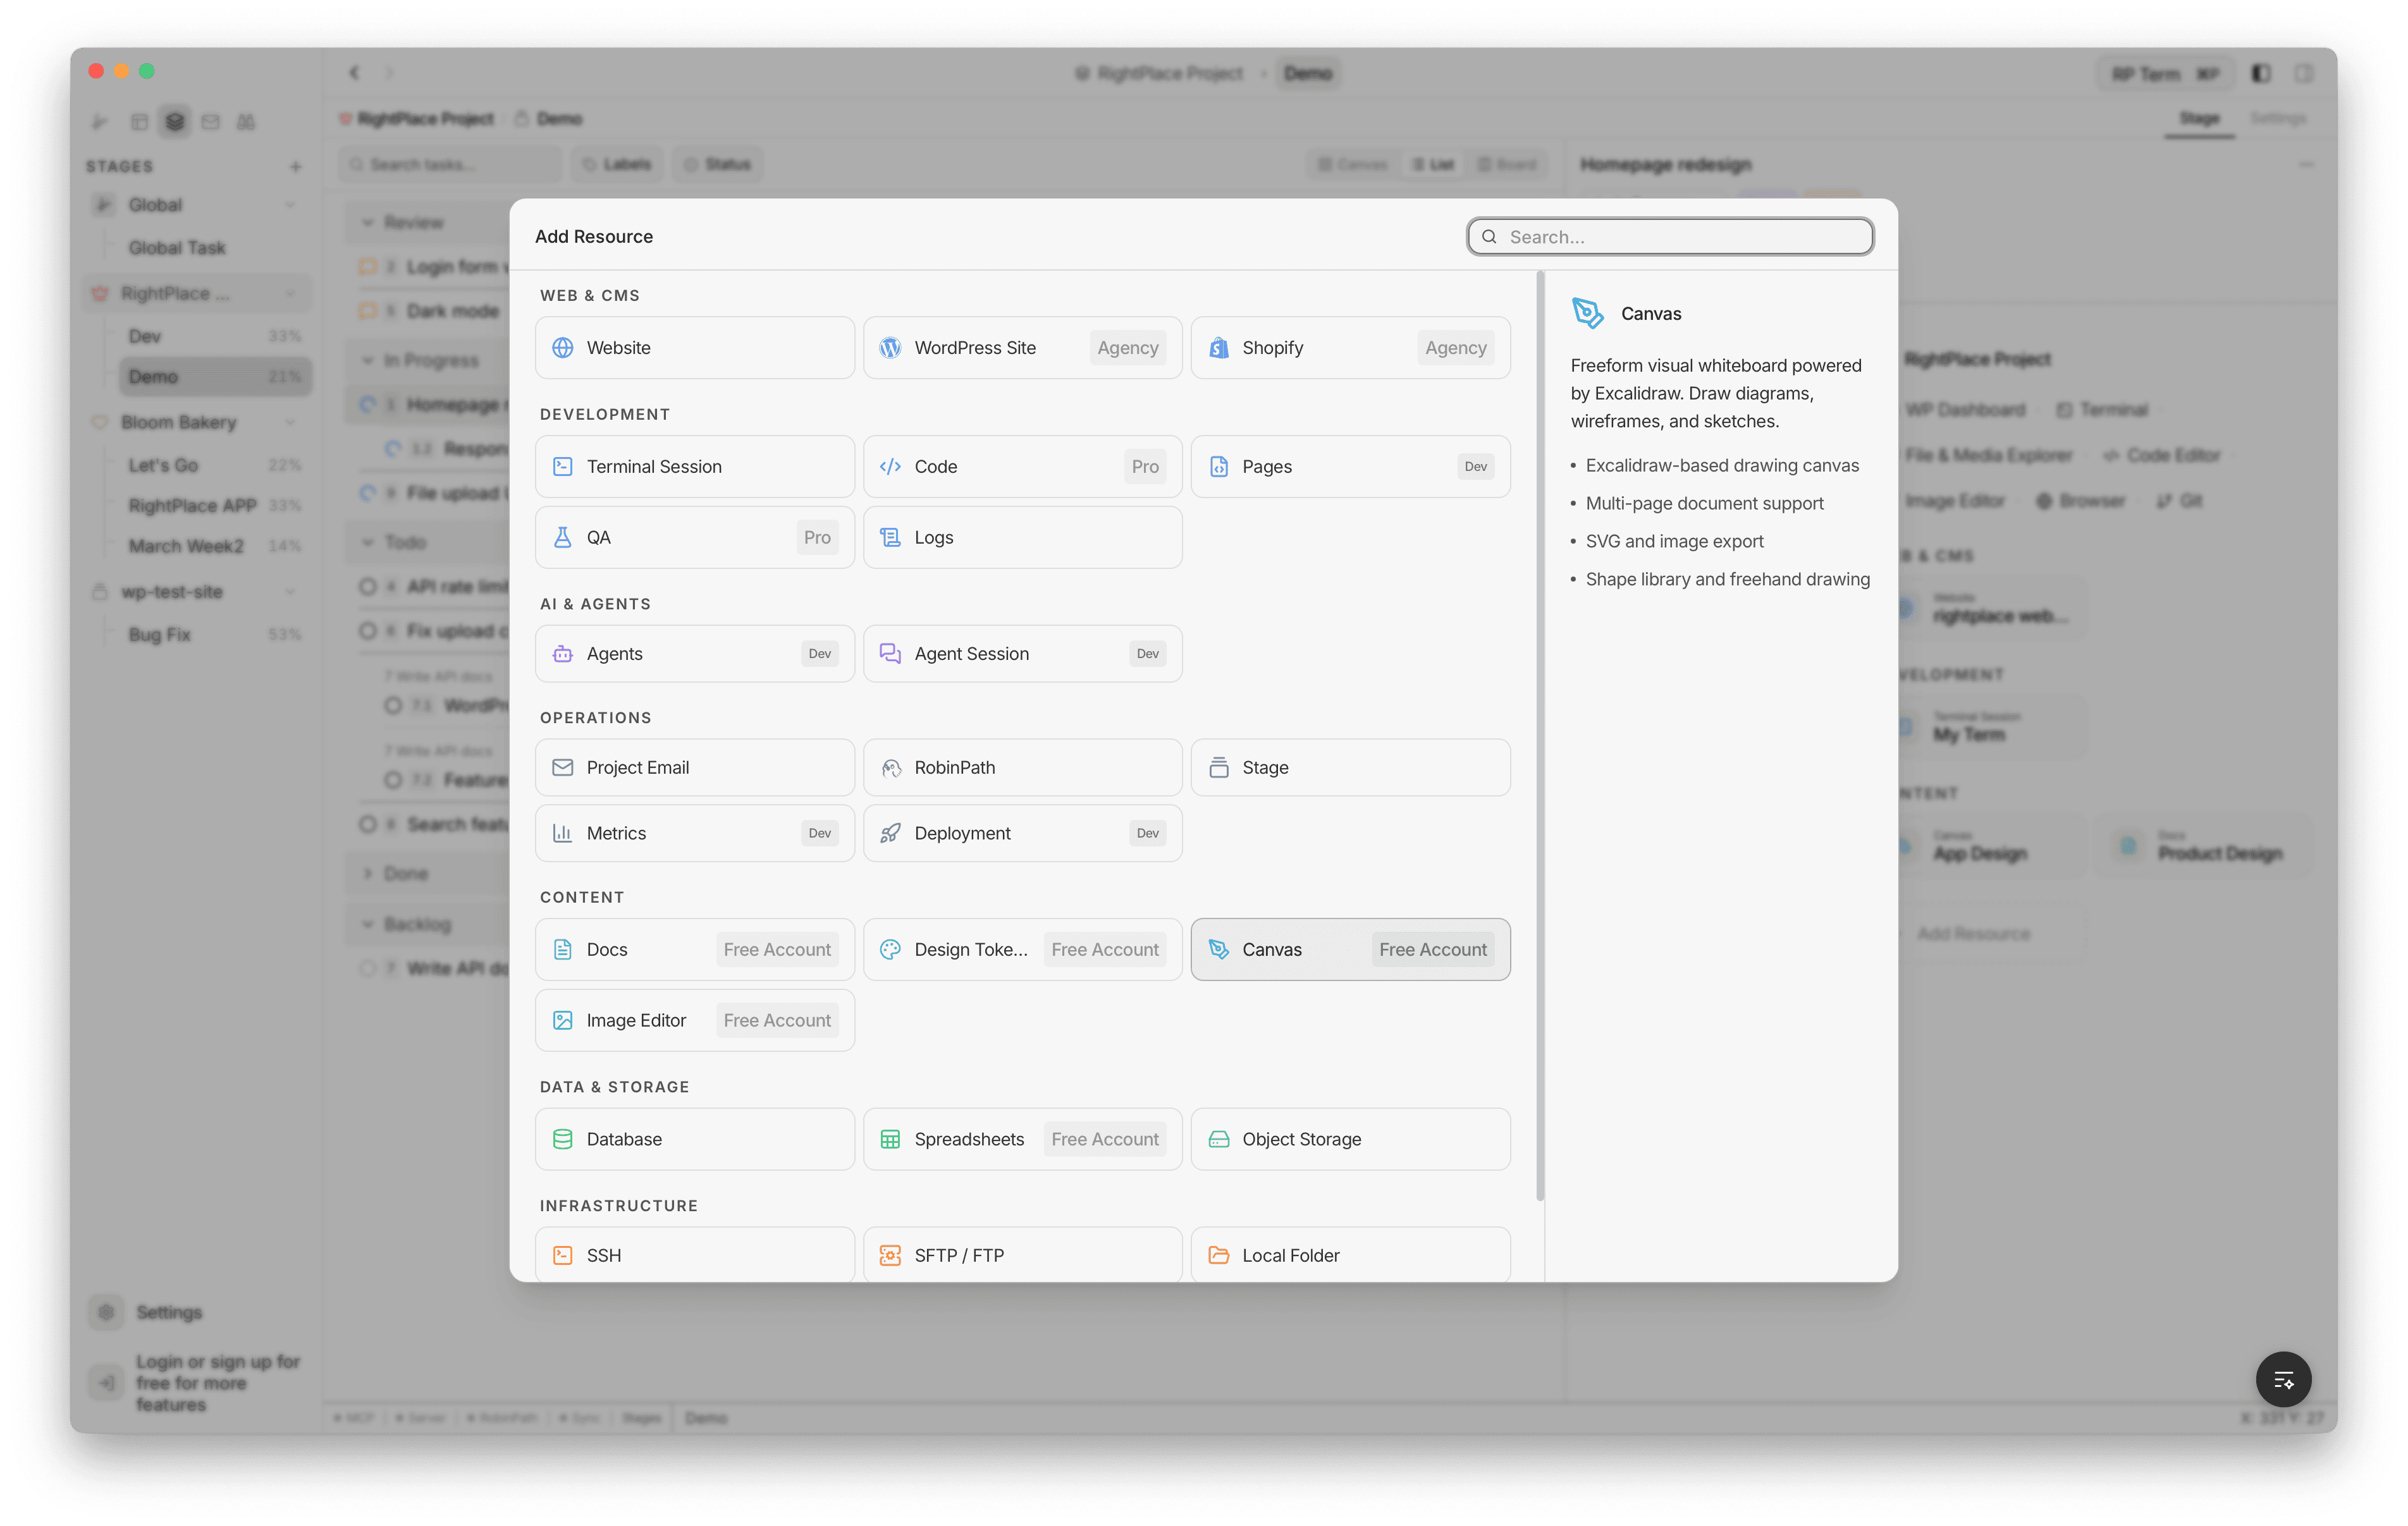
To add a stage, open the Add Resource dialog and select Stage under the Operations category.
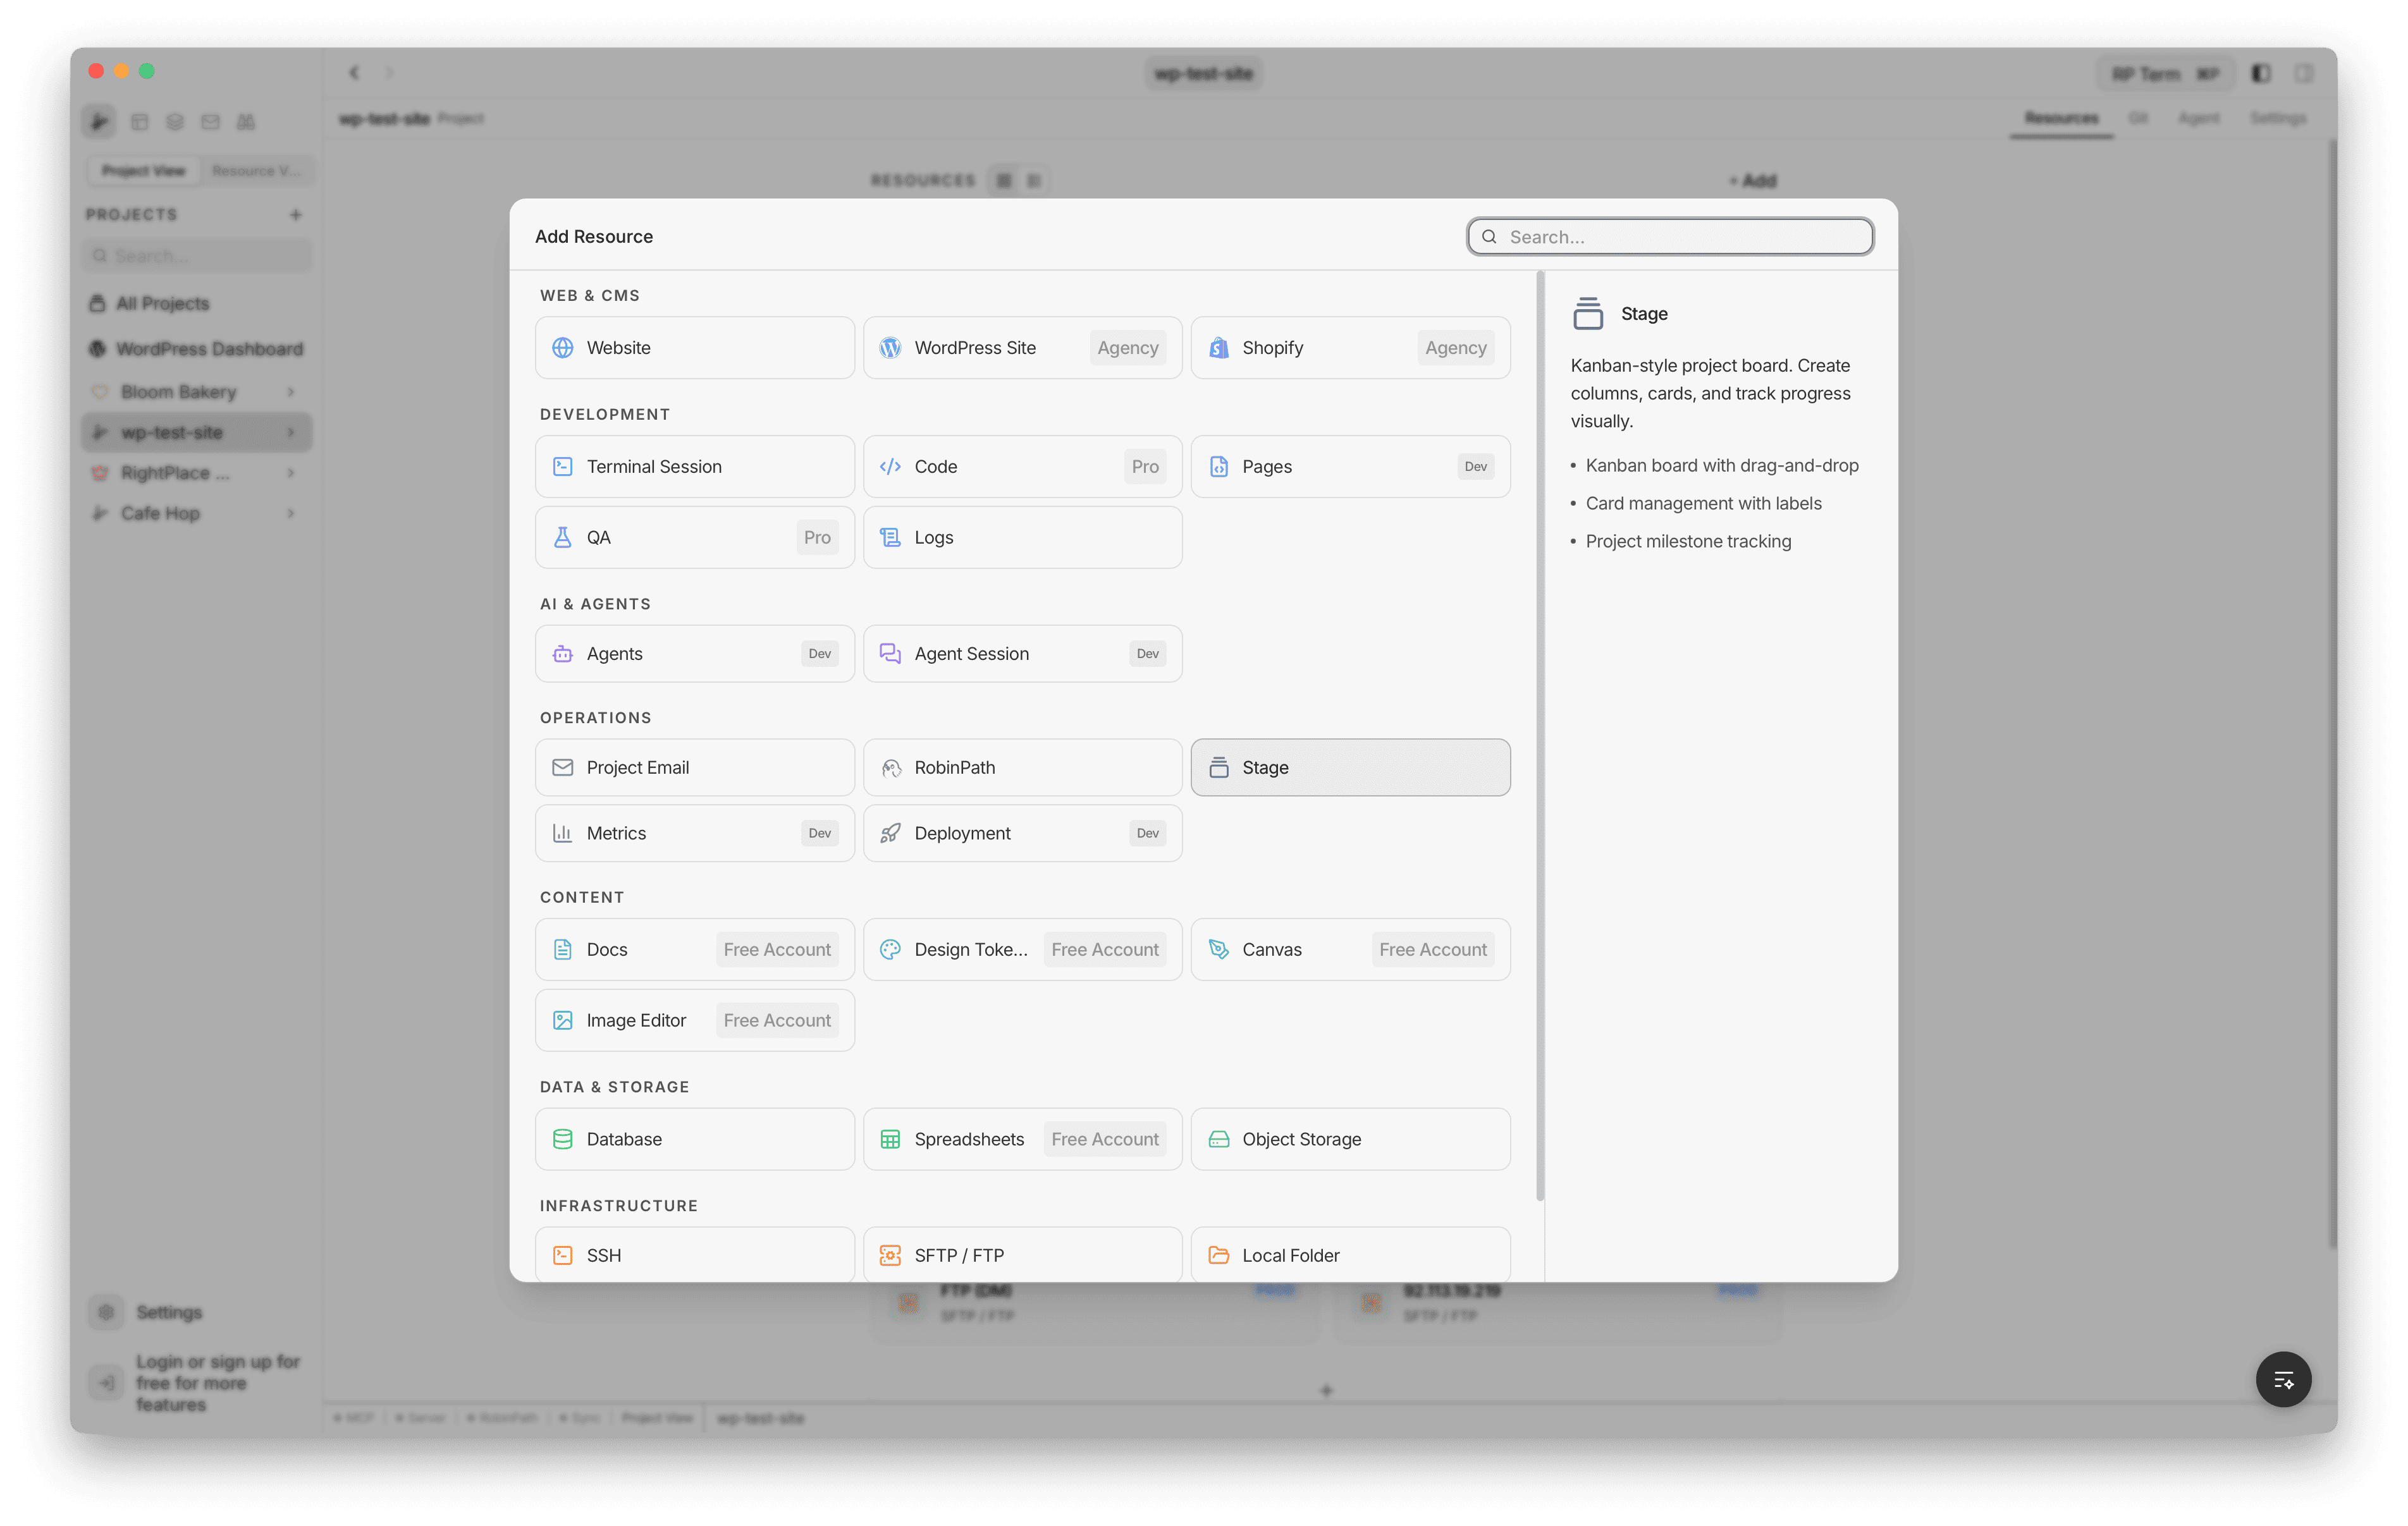
The creation form has:
- Project: which project the stage belongs to
- Stage Name: the name of your stage
- Environment (optional): tag for Development, Staging, or Production
- Description: a short summary of what this stage covers
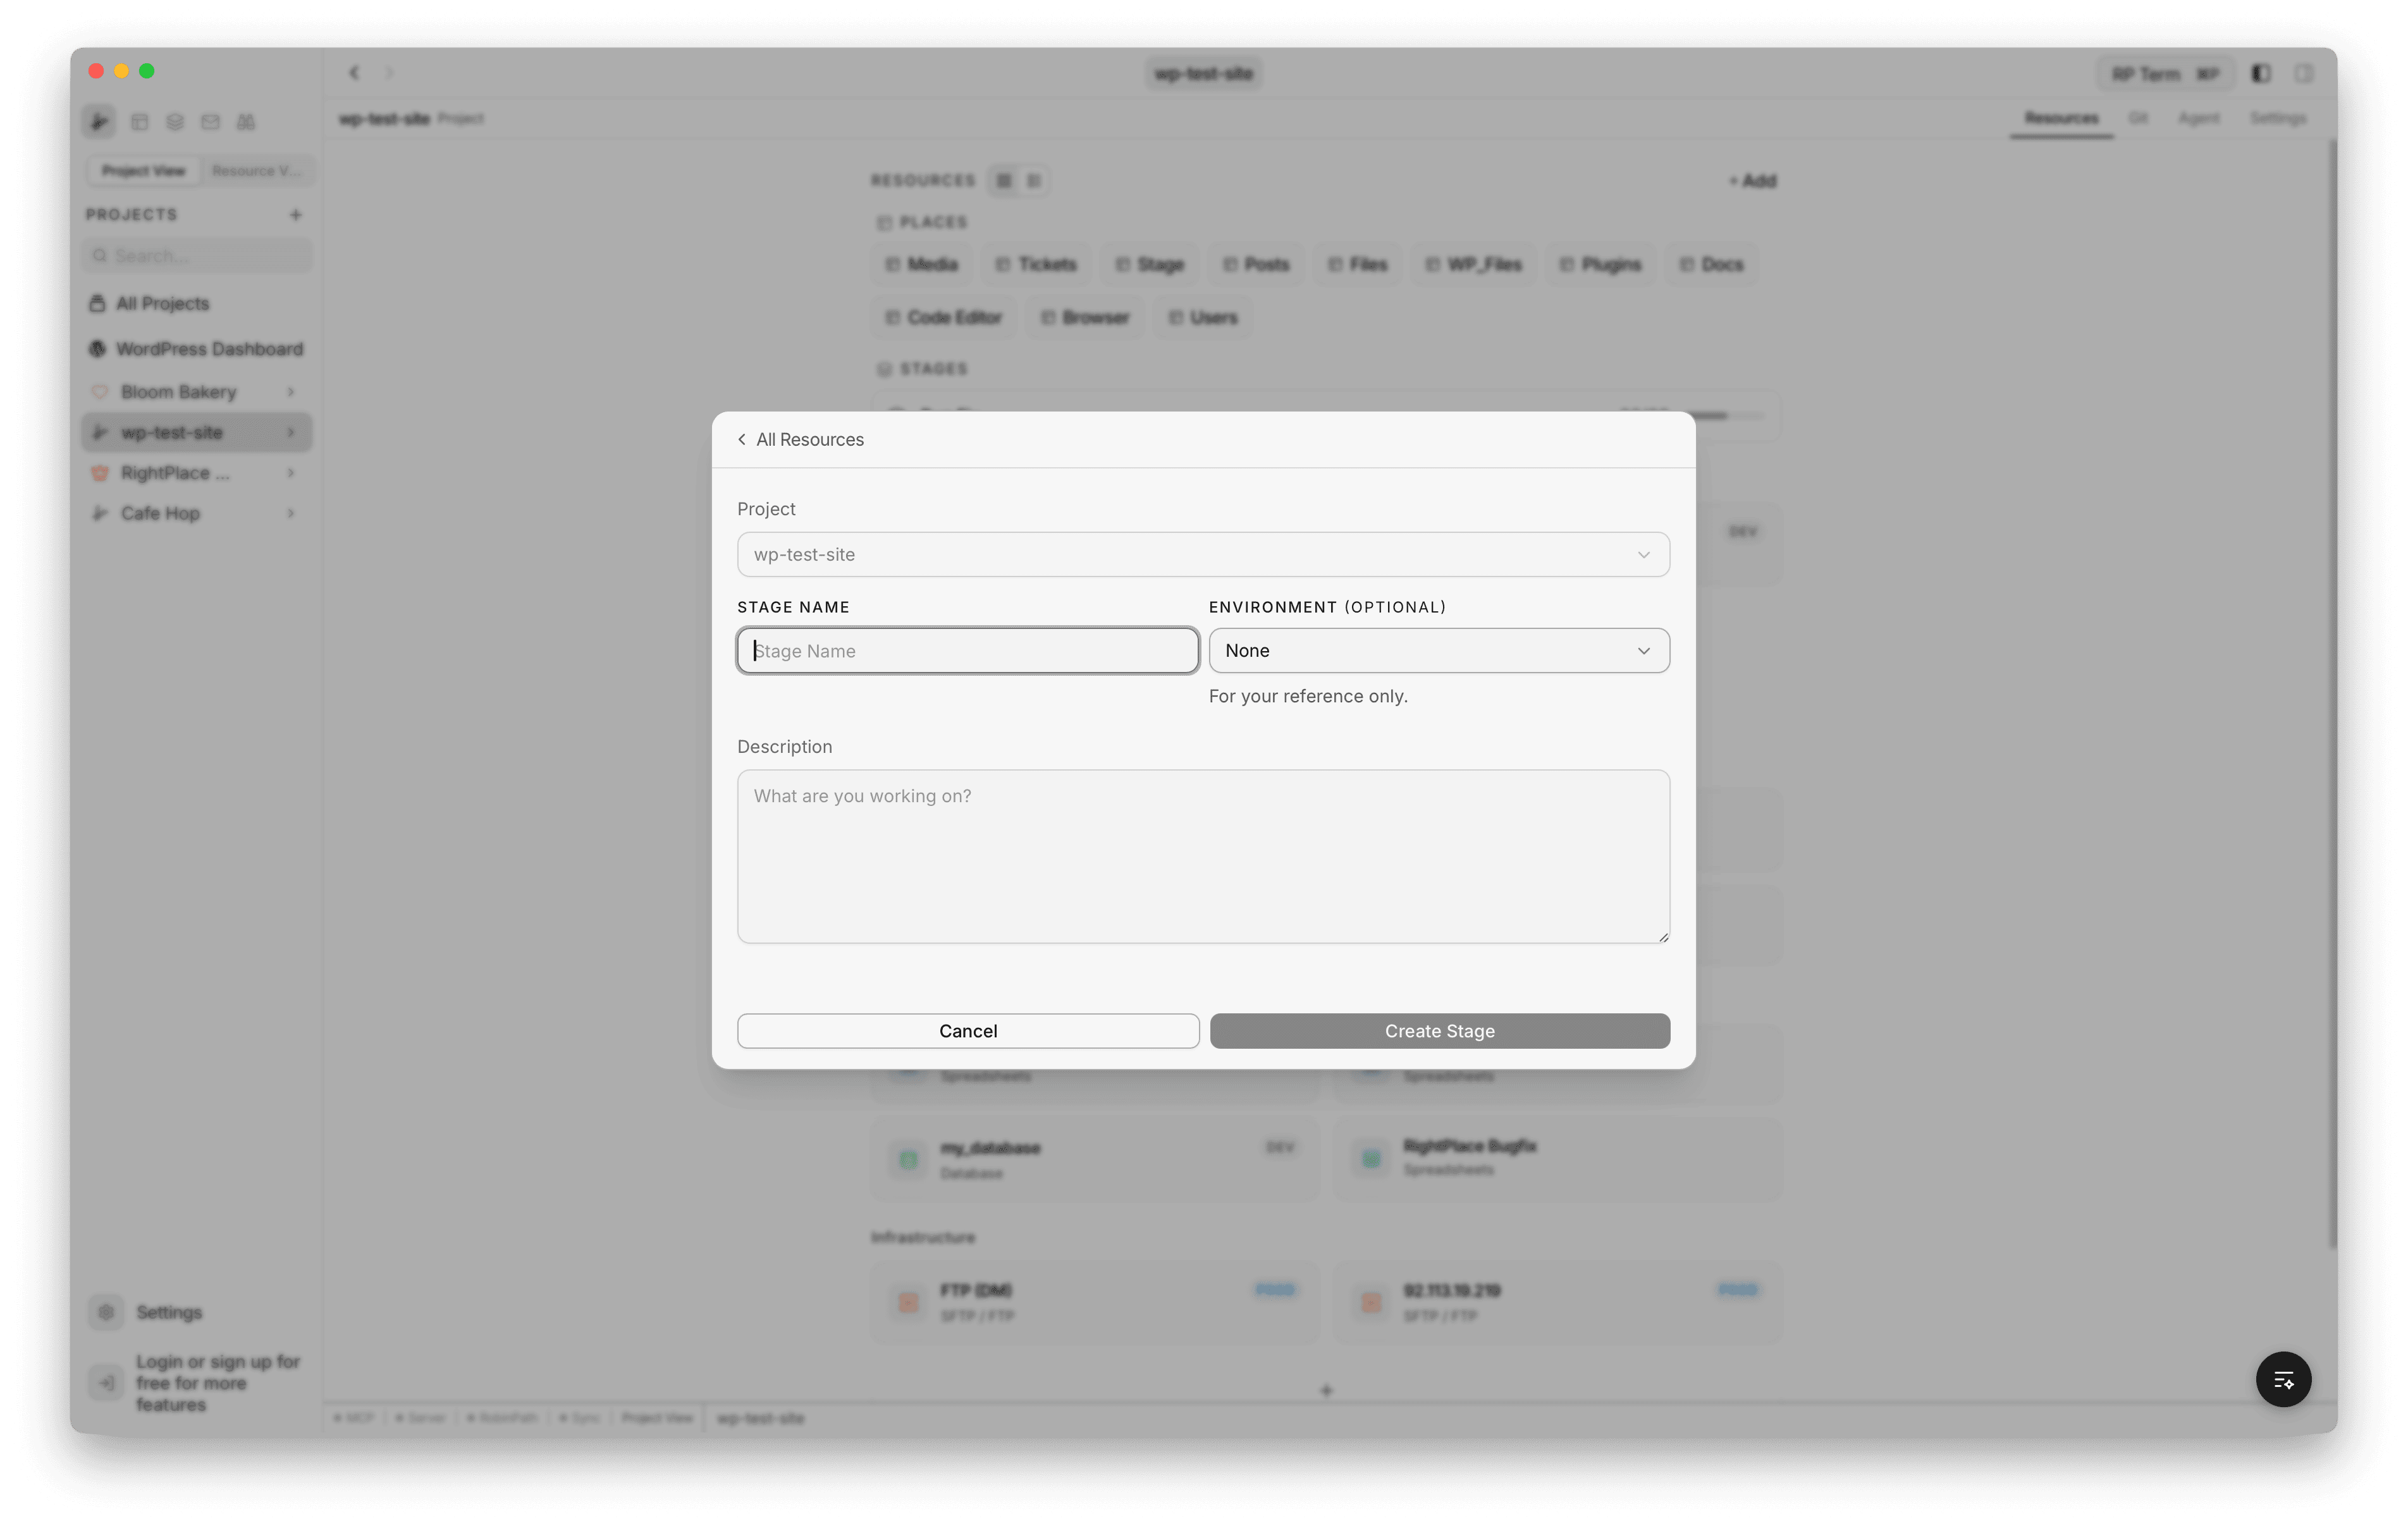
Stages can also be created from the sidebar by clicking the + button next to a project name.
Sidebar
Stages appear in the app sidebar grouped by project. Each entry shows the stage title and a completion percentage.
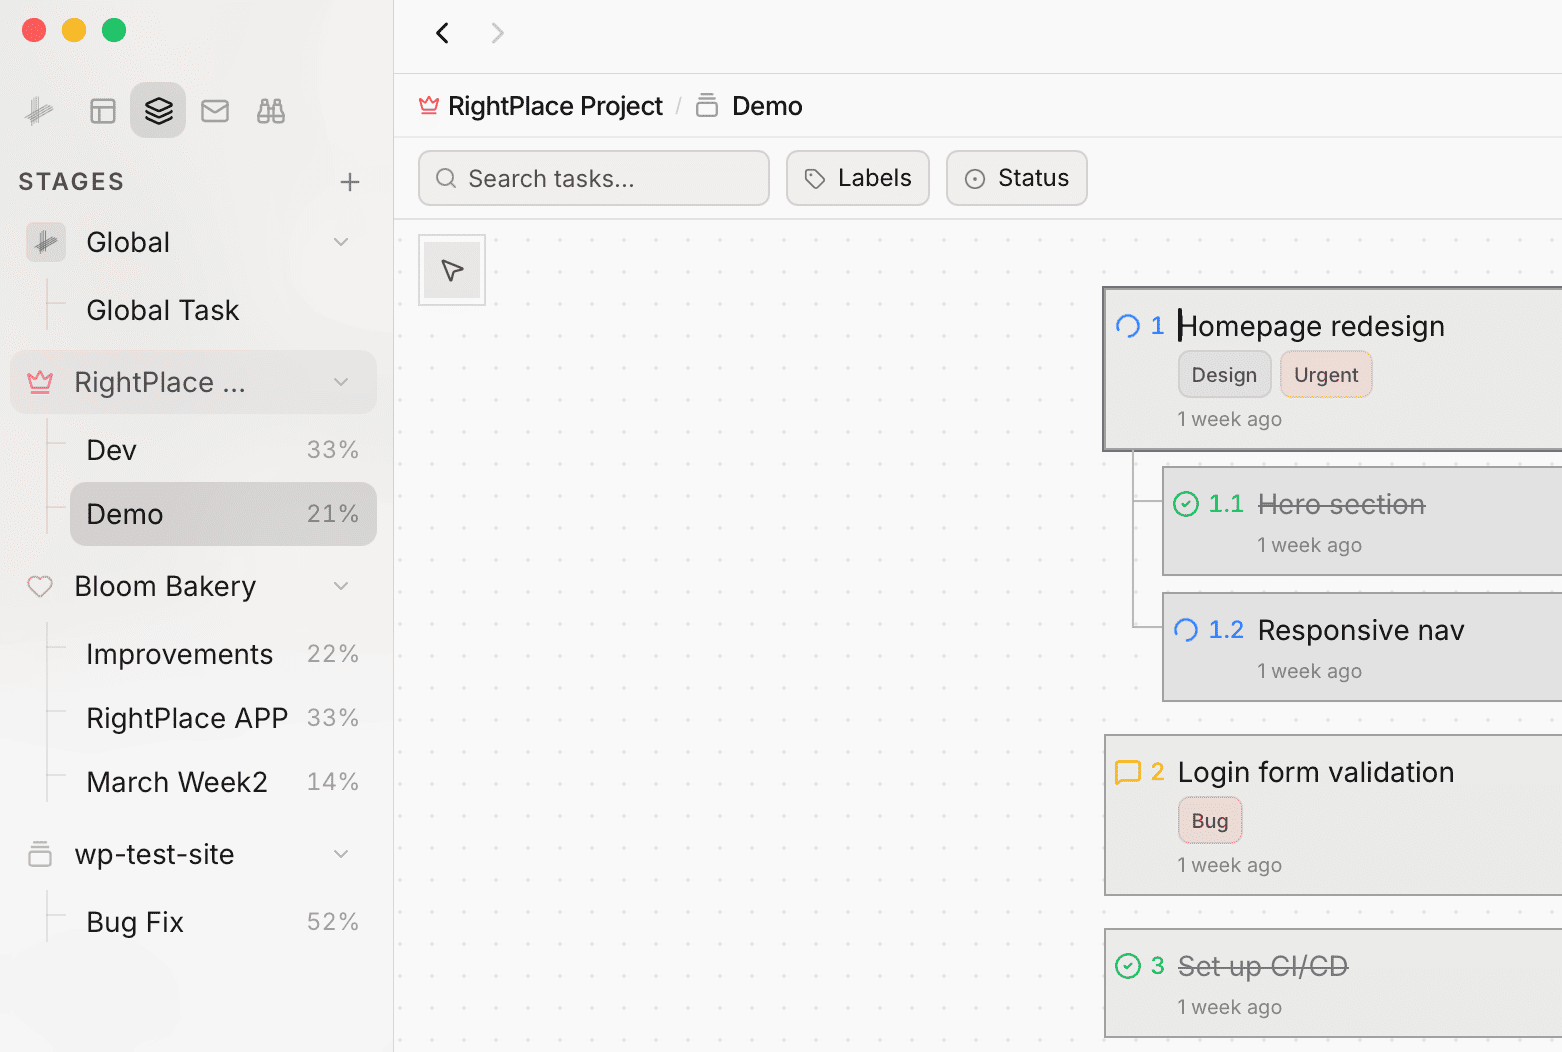
- Click a stage to open it
- Right-click for a context menu with Open and Delete options
- Hover over a project group to see the + button for adding a new stage
- Global stages (outside any project) appear at the top under “Global”
View Modes
Stages support three view modes, toggled from the toolbar at the top right: Canvas, List, and Board.
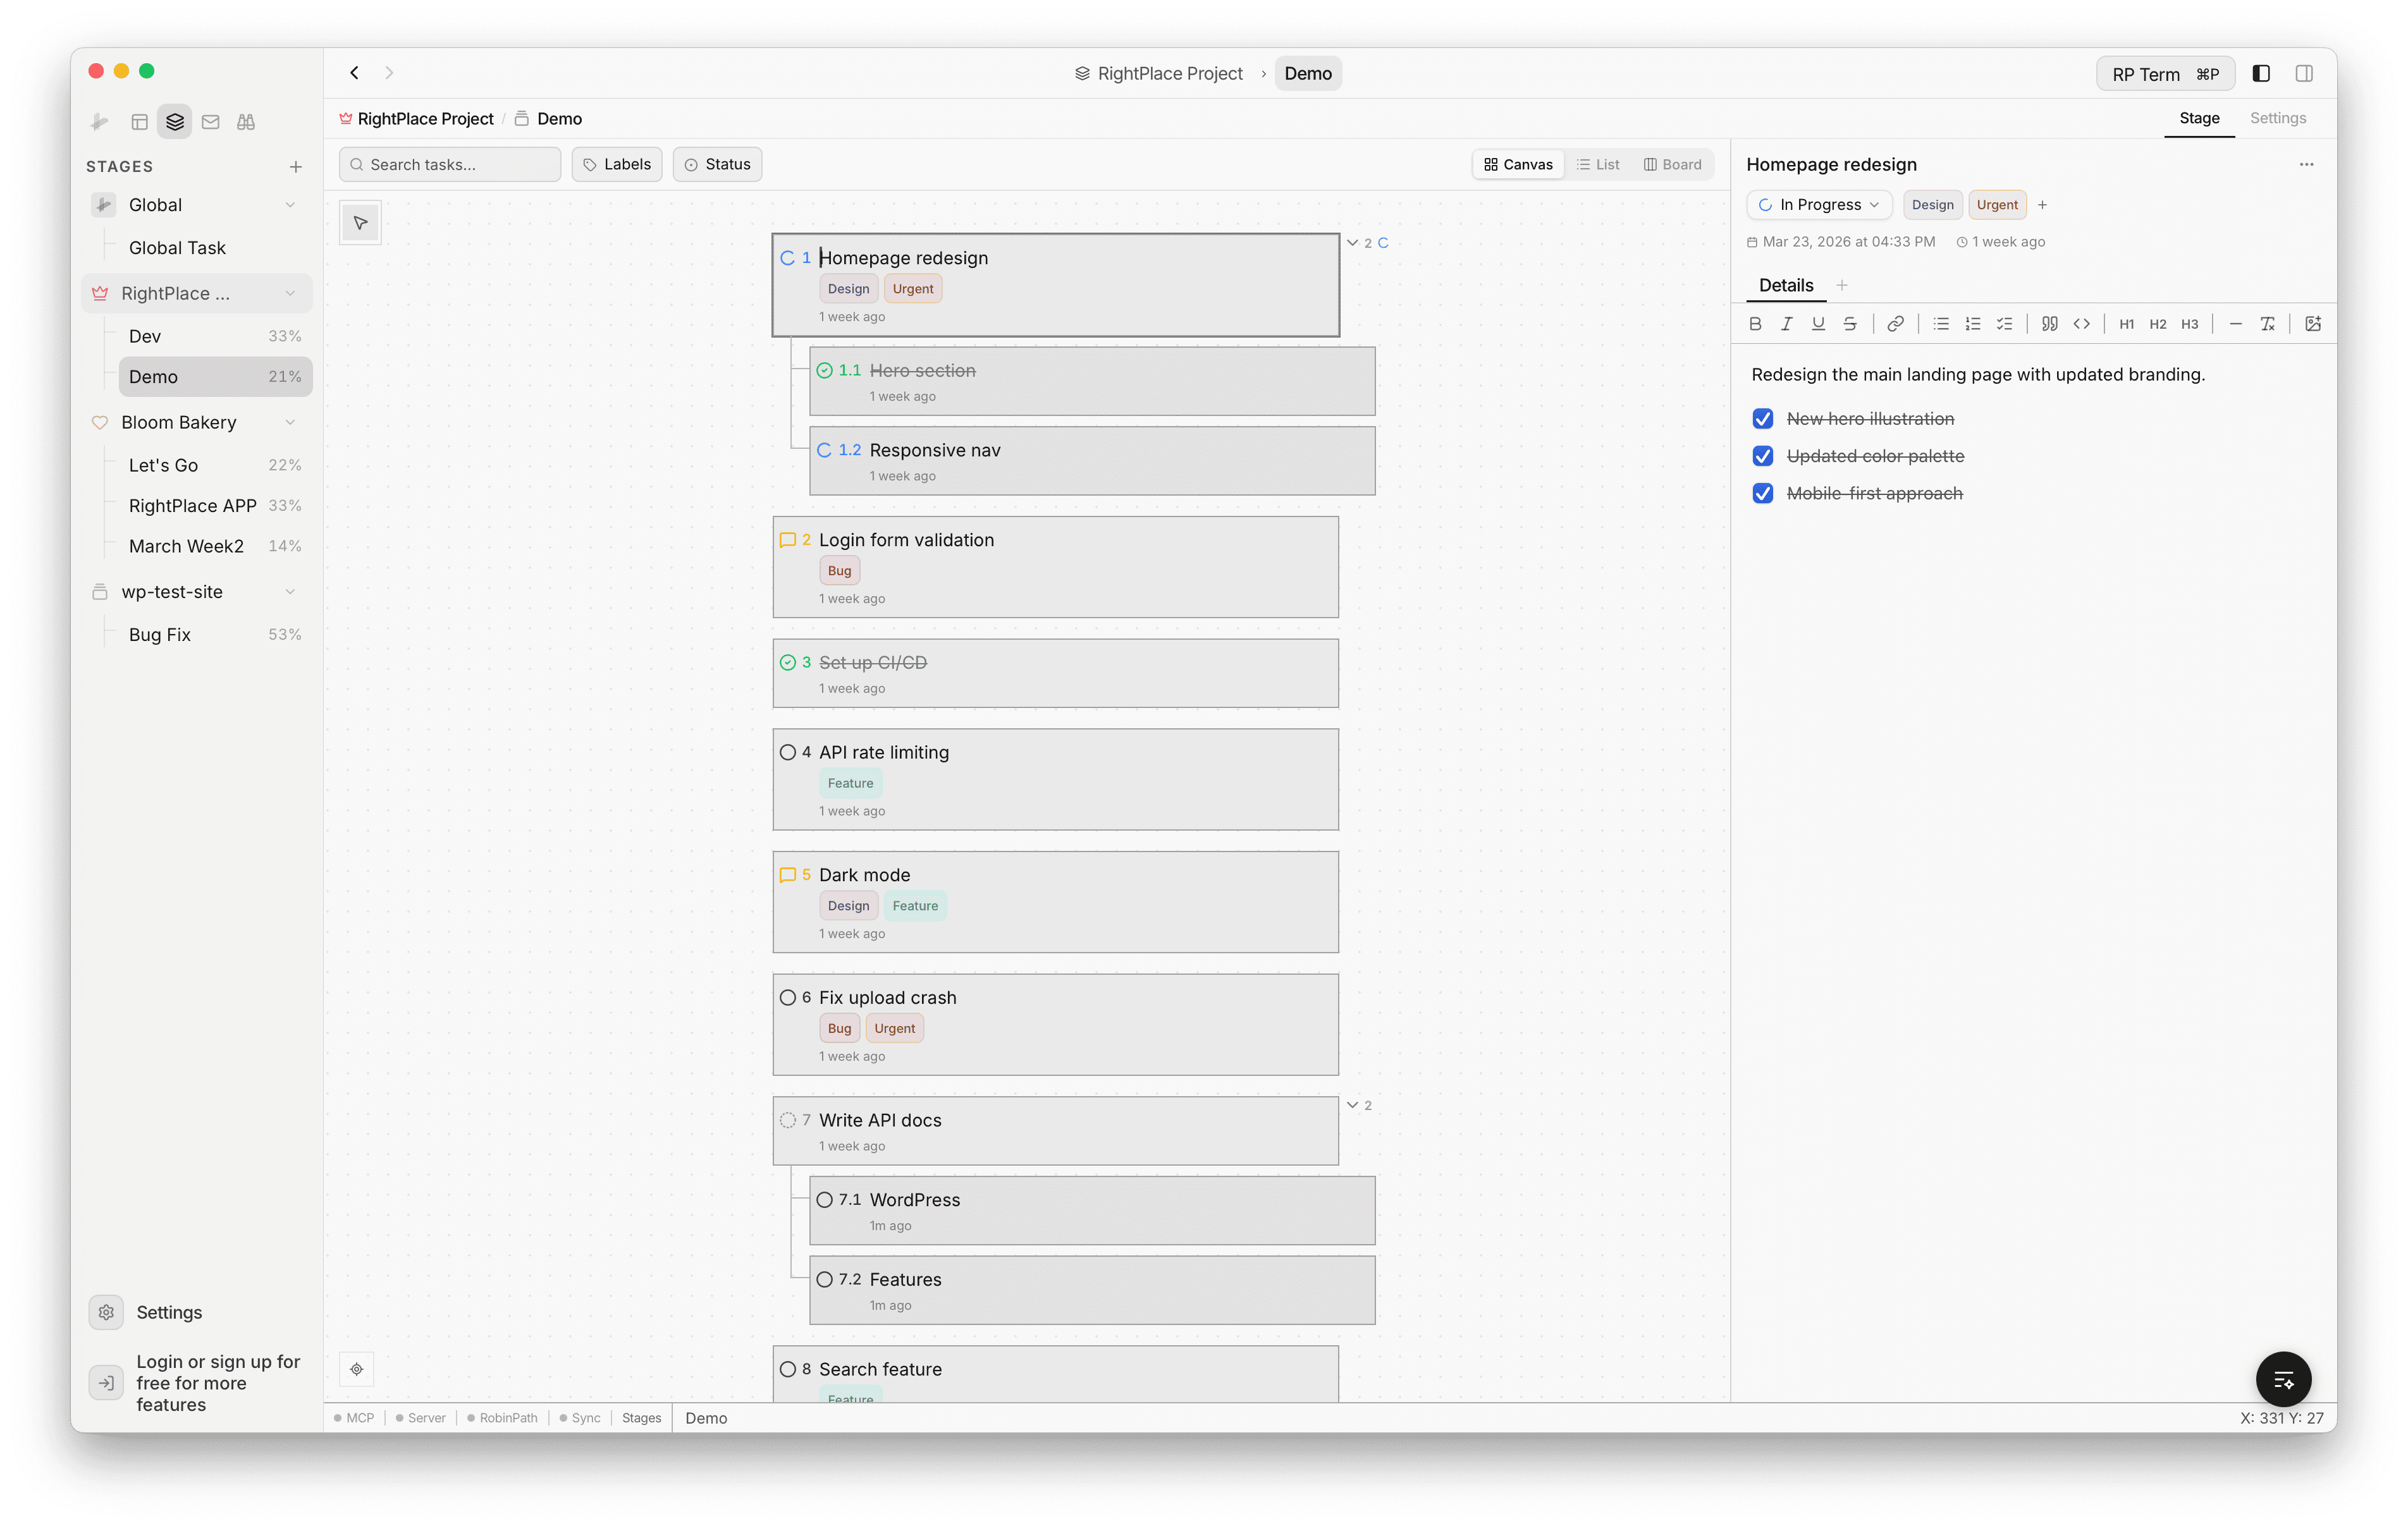
Canvas View
The canvas view combines a freeform drawing surface with your task tree. Tasks appear as cards on the canvas, and you can sketch diagrams, arrows, and annotations around them.
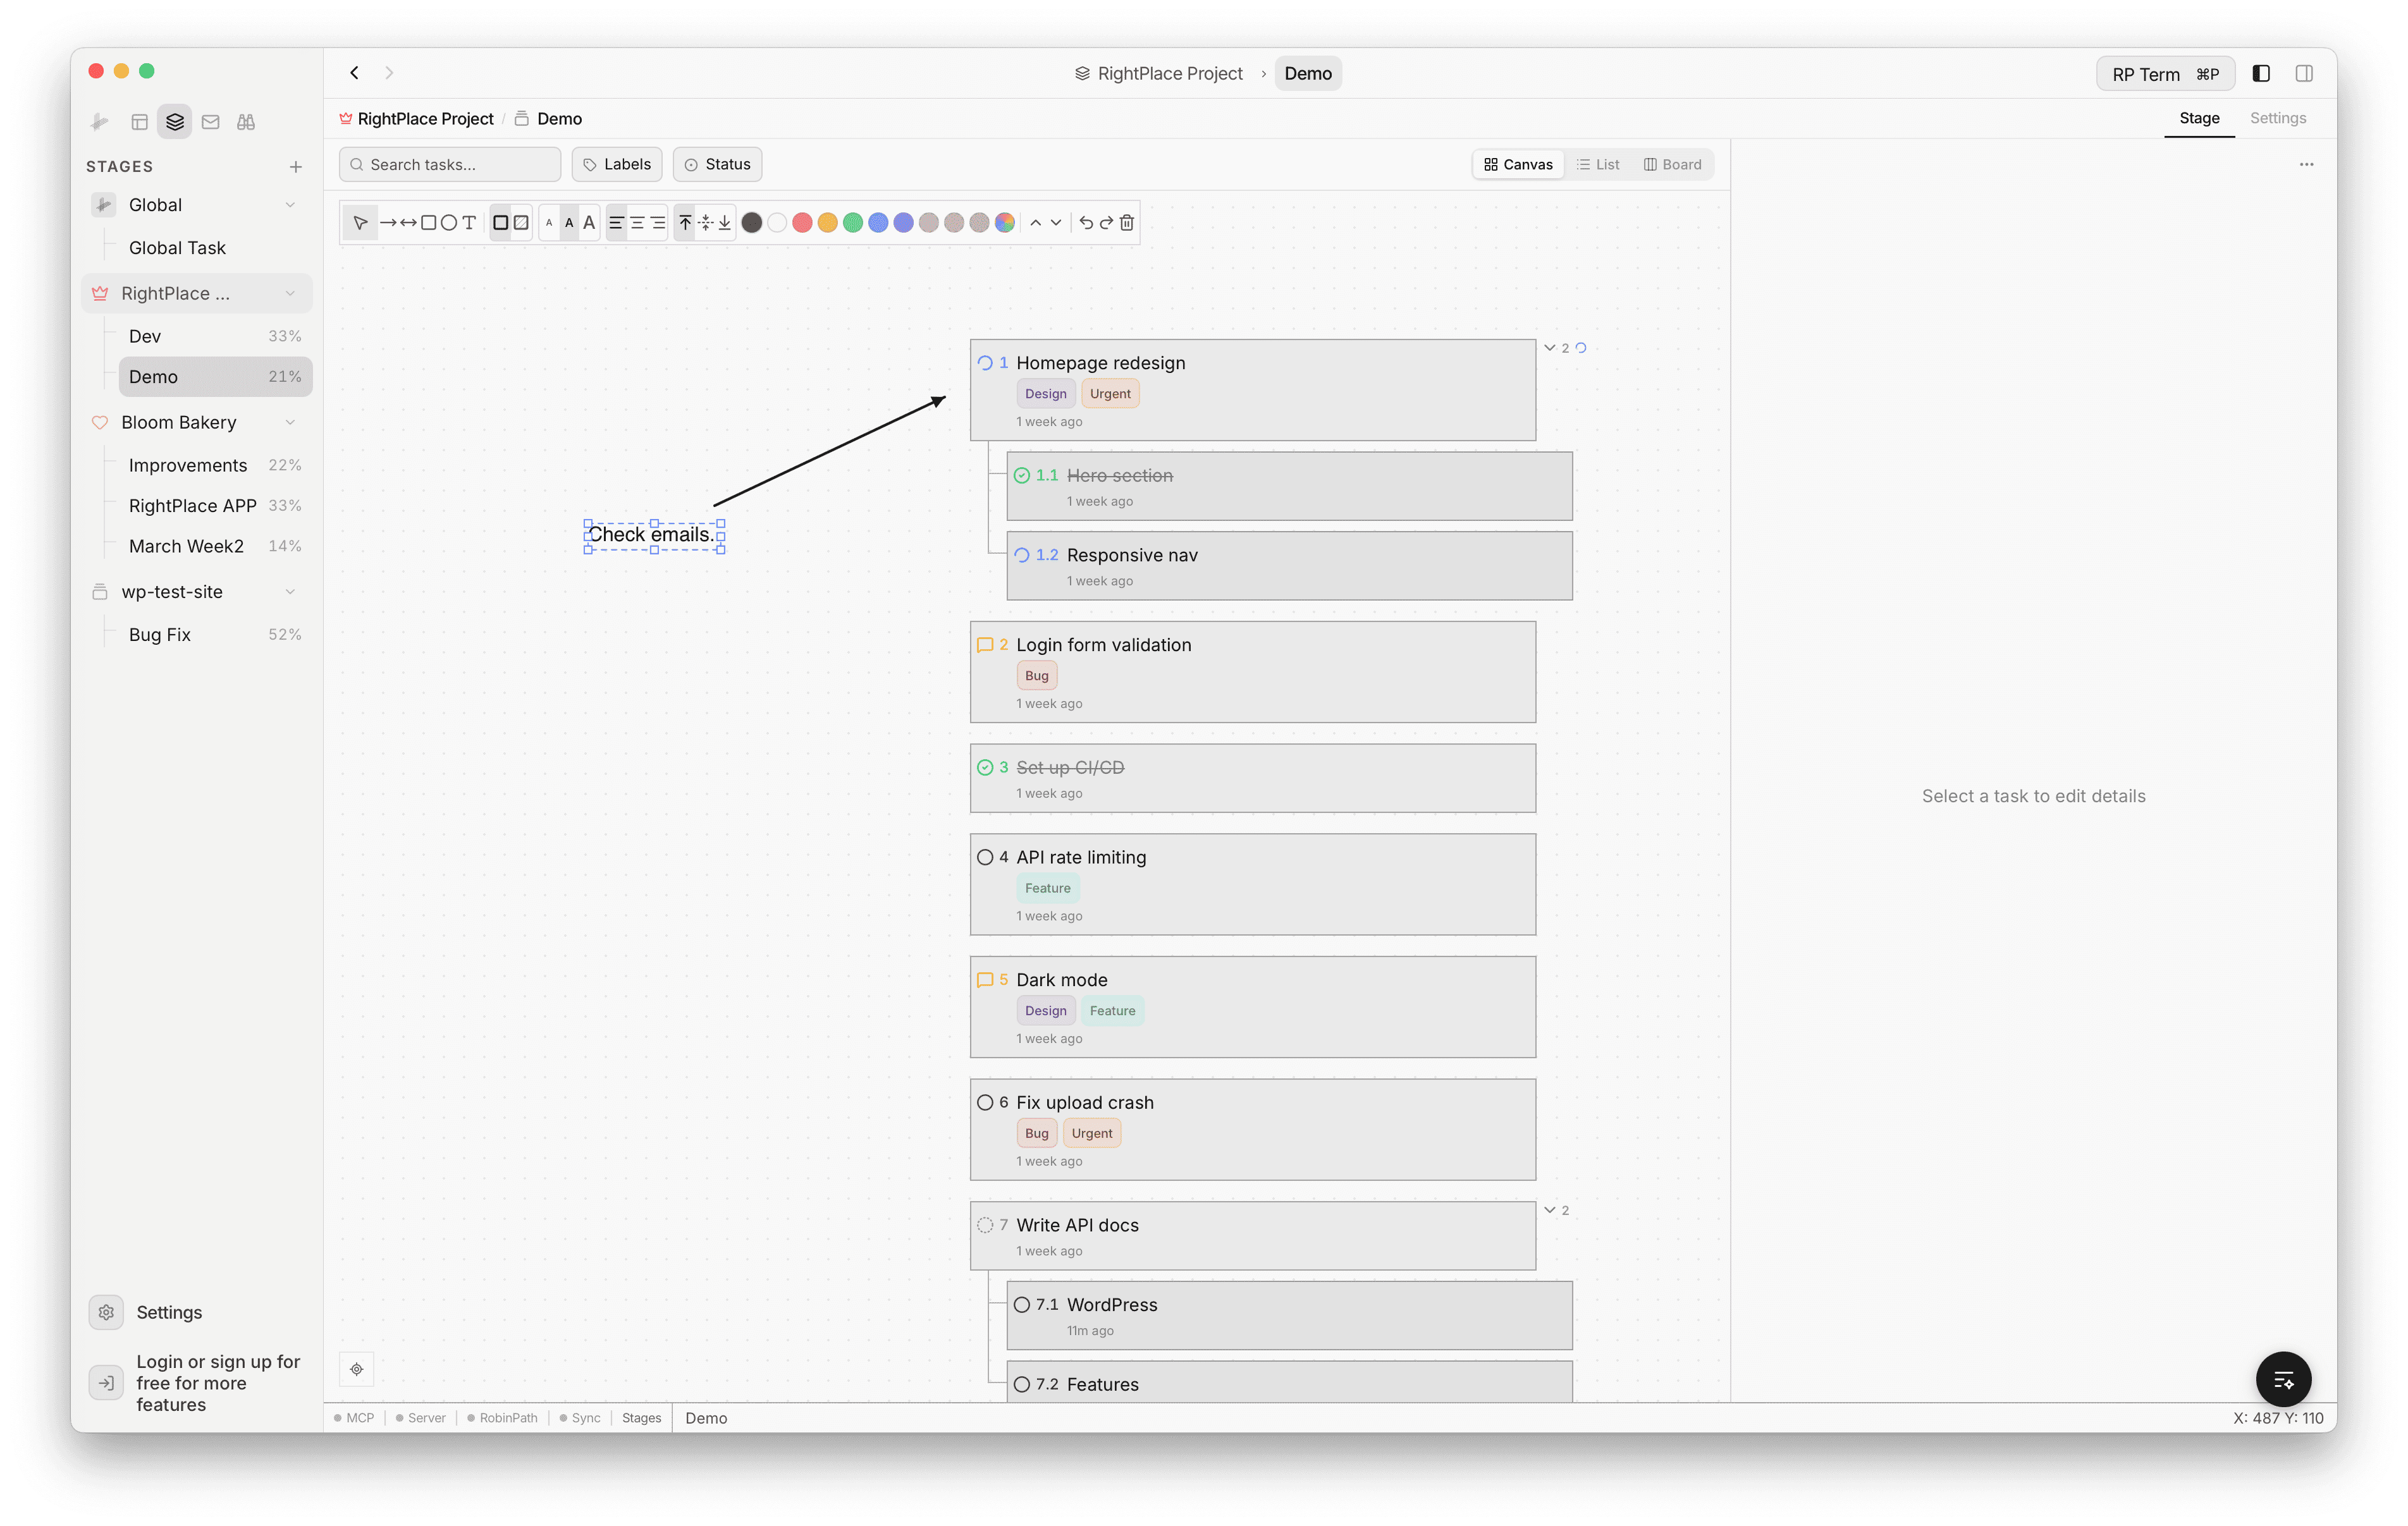
Drawing Tools
| Tool | Description |
|---|---|
| Select | Select, move, and resize objects |
| Arrow | Draw a single-headed arrow |
| Double Arrow | Draw a double-headed arrow |
| Rectangle | Draw a rectangle |
| Ellipse | Draw an ellipse |
| Text | Add a text label |
The toolbar also includes:
- Color picker: choose stroke and fill colors for shapes
- Text formatting: font size presets (S, M, L) and alignment options
- Image embedding: insert images from your stage files
- Object layering: bring to front or send to back
- Undo/Redo: up to 50 levels of history
The canvas auto-saves after 2 seconds of inactivity.
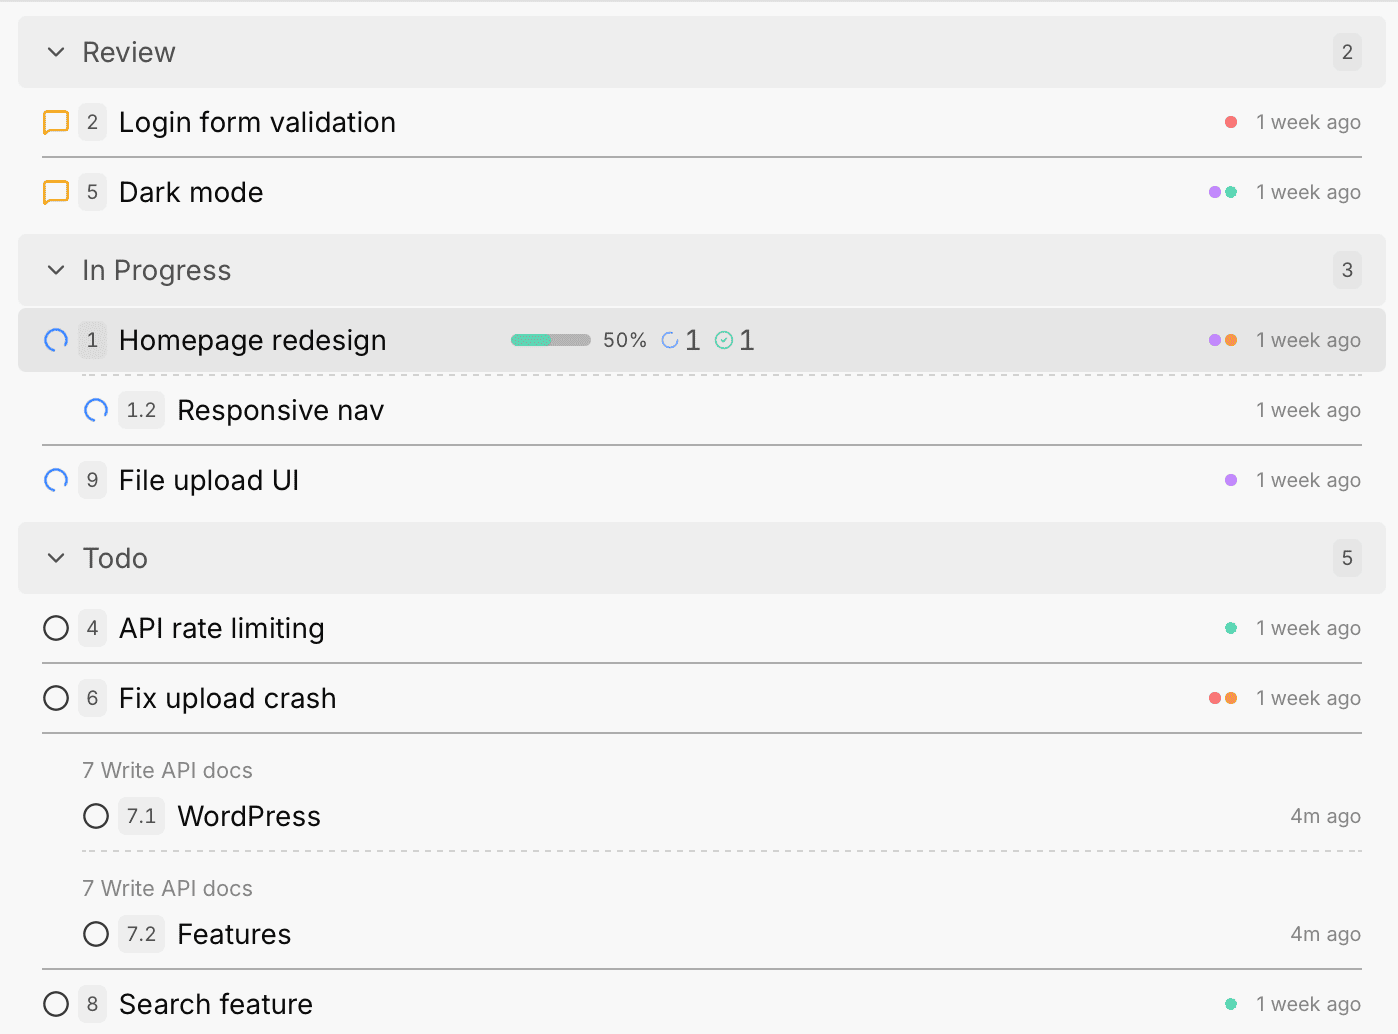
List View
The list view groups tasks by status (Review, In Progress, Todo, Done, Backlog). Each section shows the task count and can be expanded or collapsed.
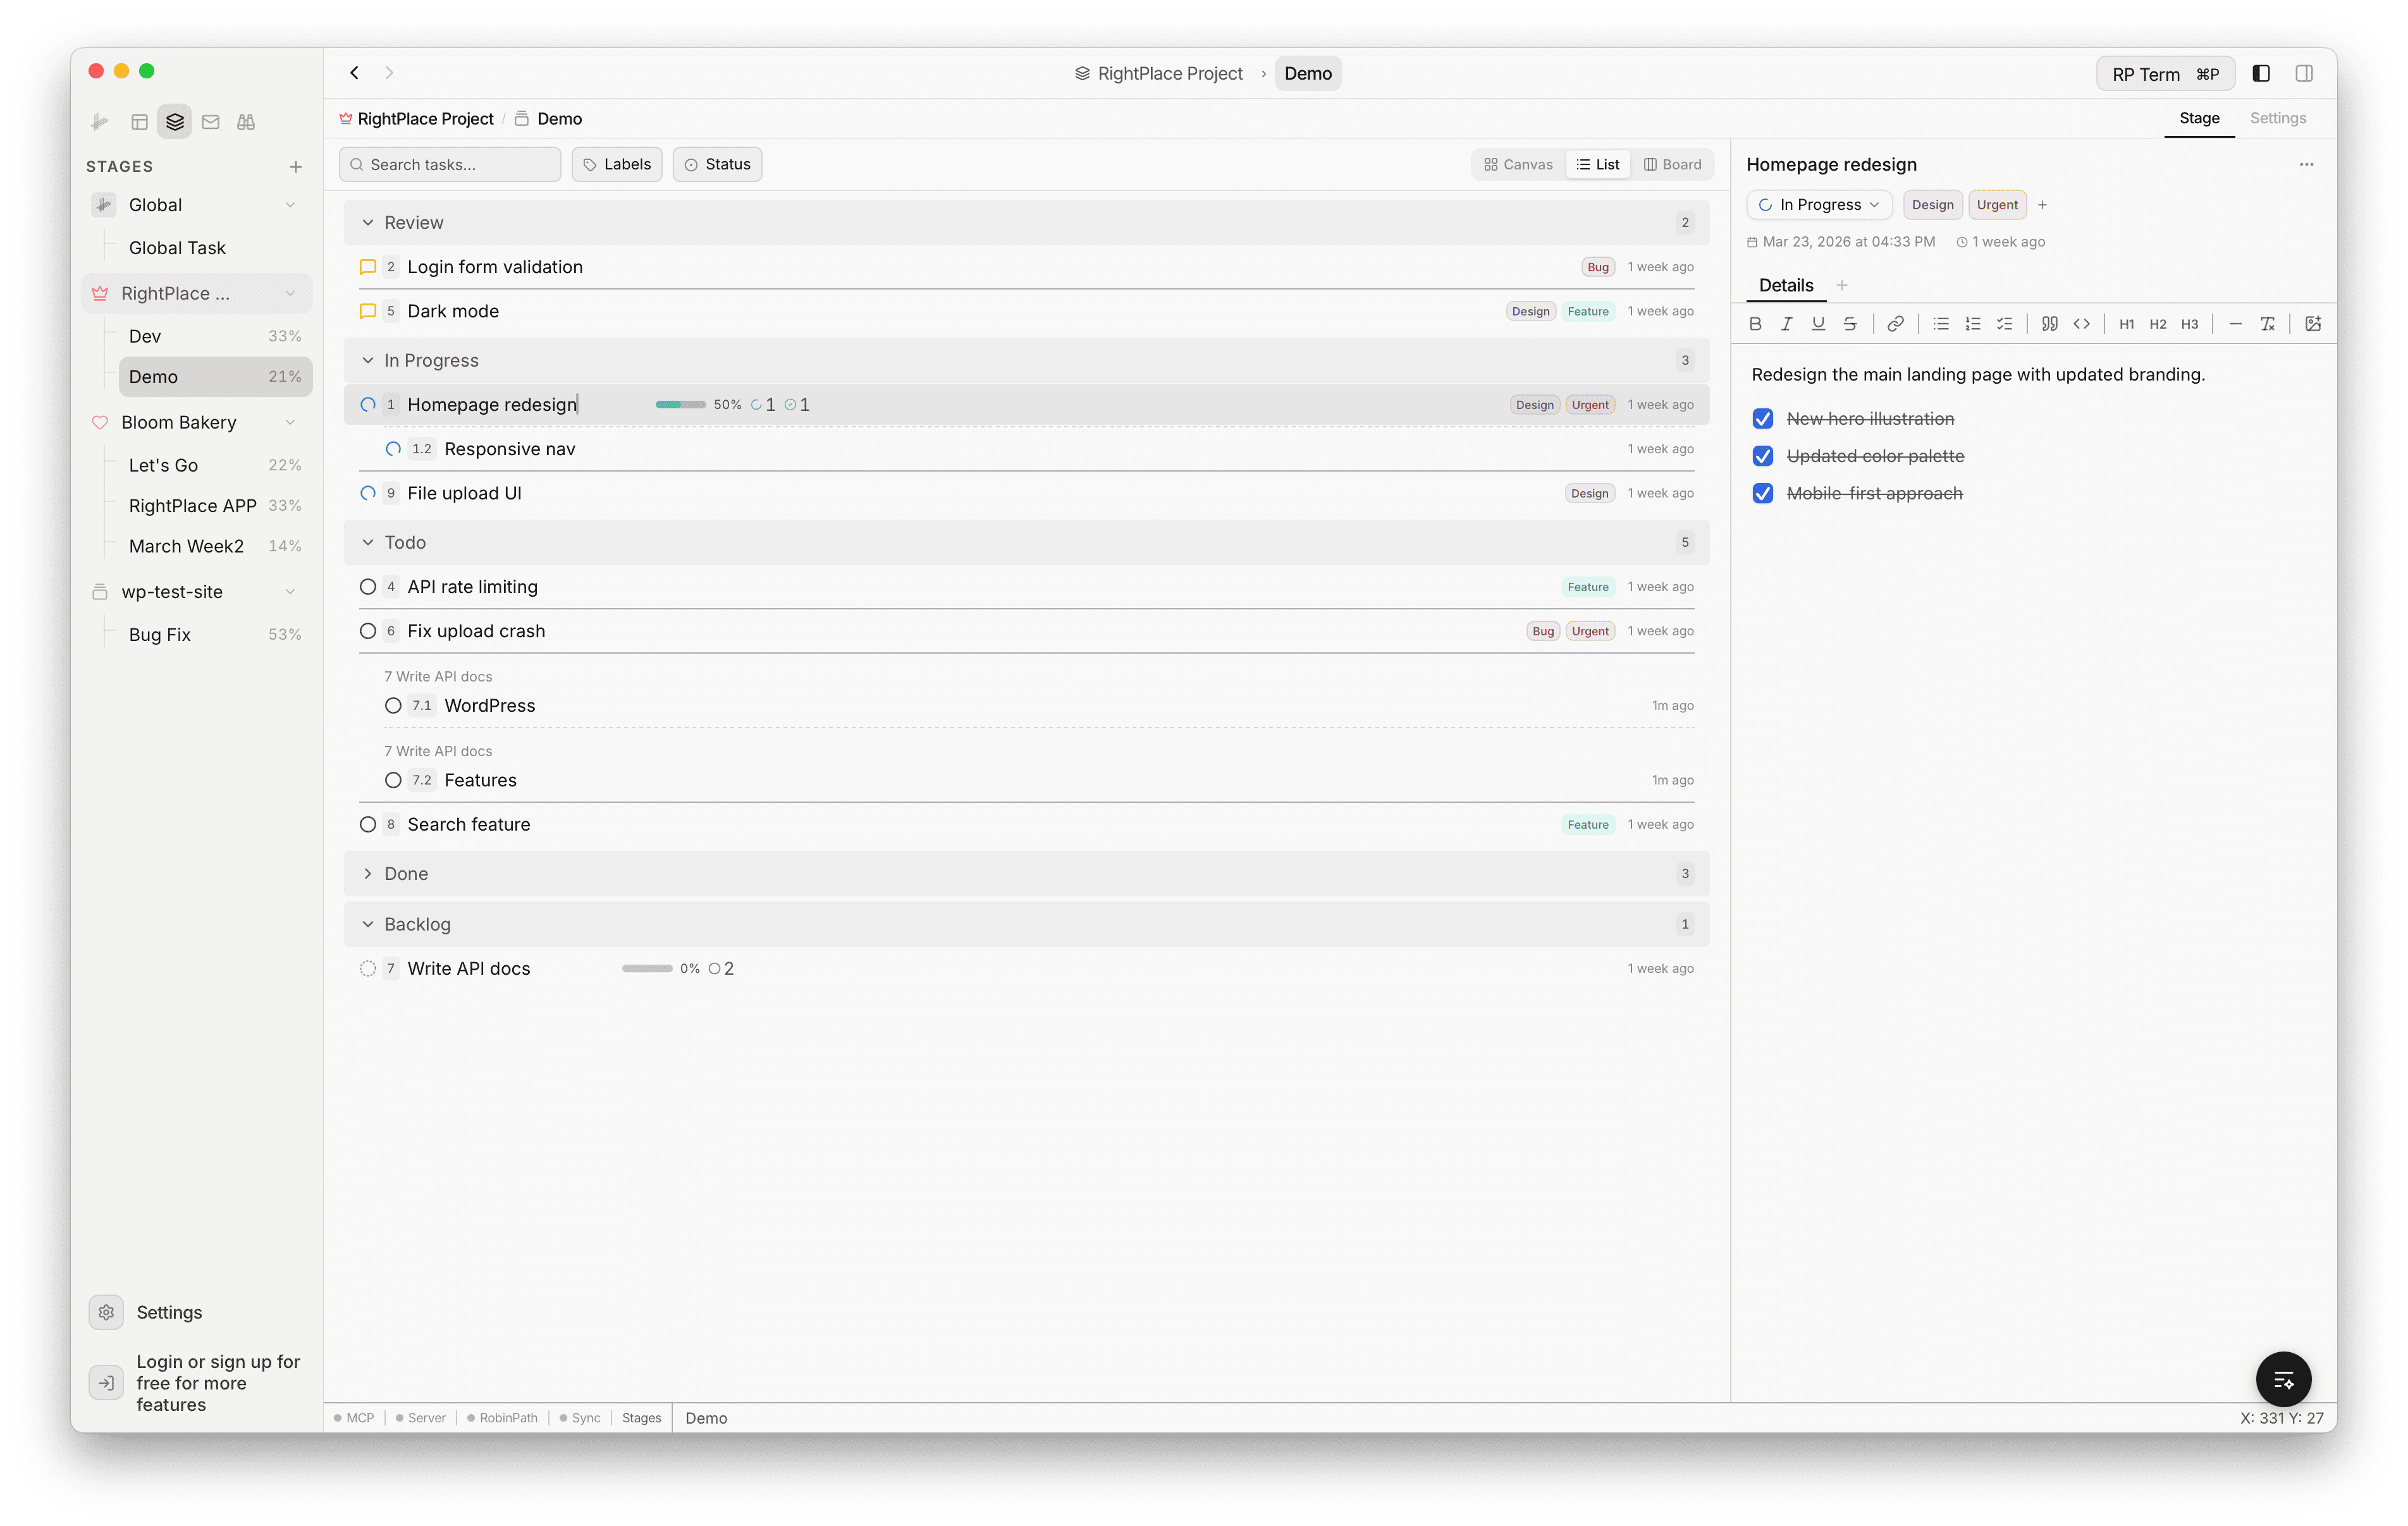
Tasks display their number, title, labels (as badges or color dots), subtask progress, and timestamp. Parent tasks show their children indented beneath them.
Label Display Styles
Labels can be shown as badges (colored text tags) or color dots (compact circles). You can switch between styles in the stage Settings tab.
Board View
The board view arranges tasks in a Kanban-style layout with columns for each status: Backlog, Todo, In Progress, Review, and Done.
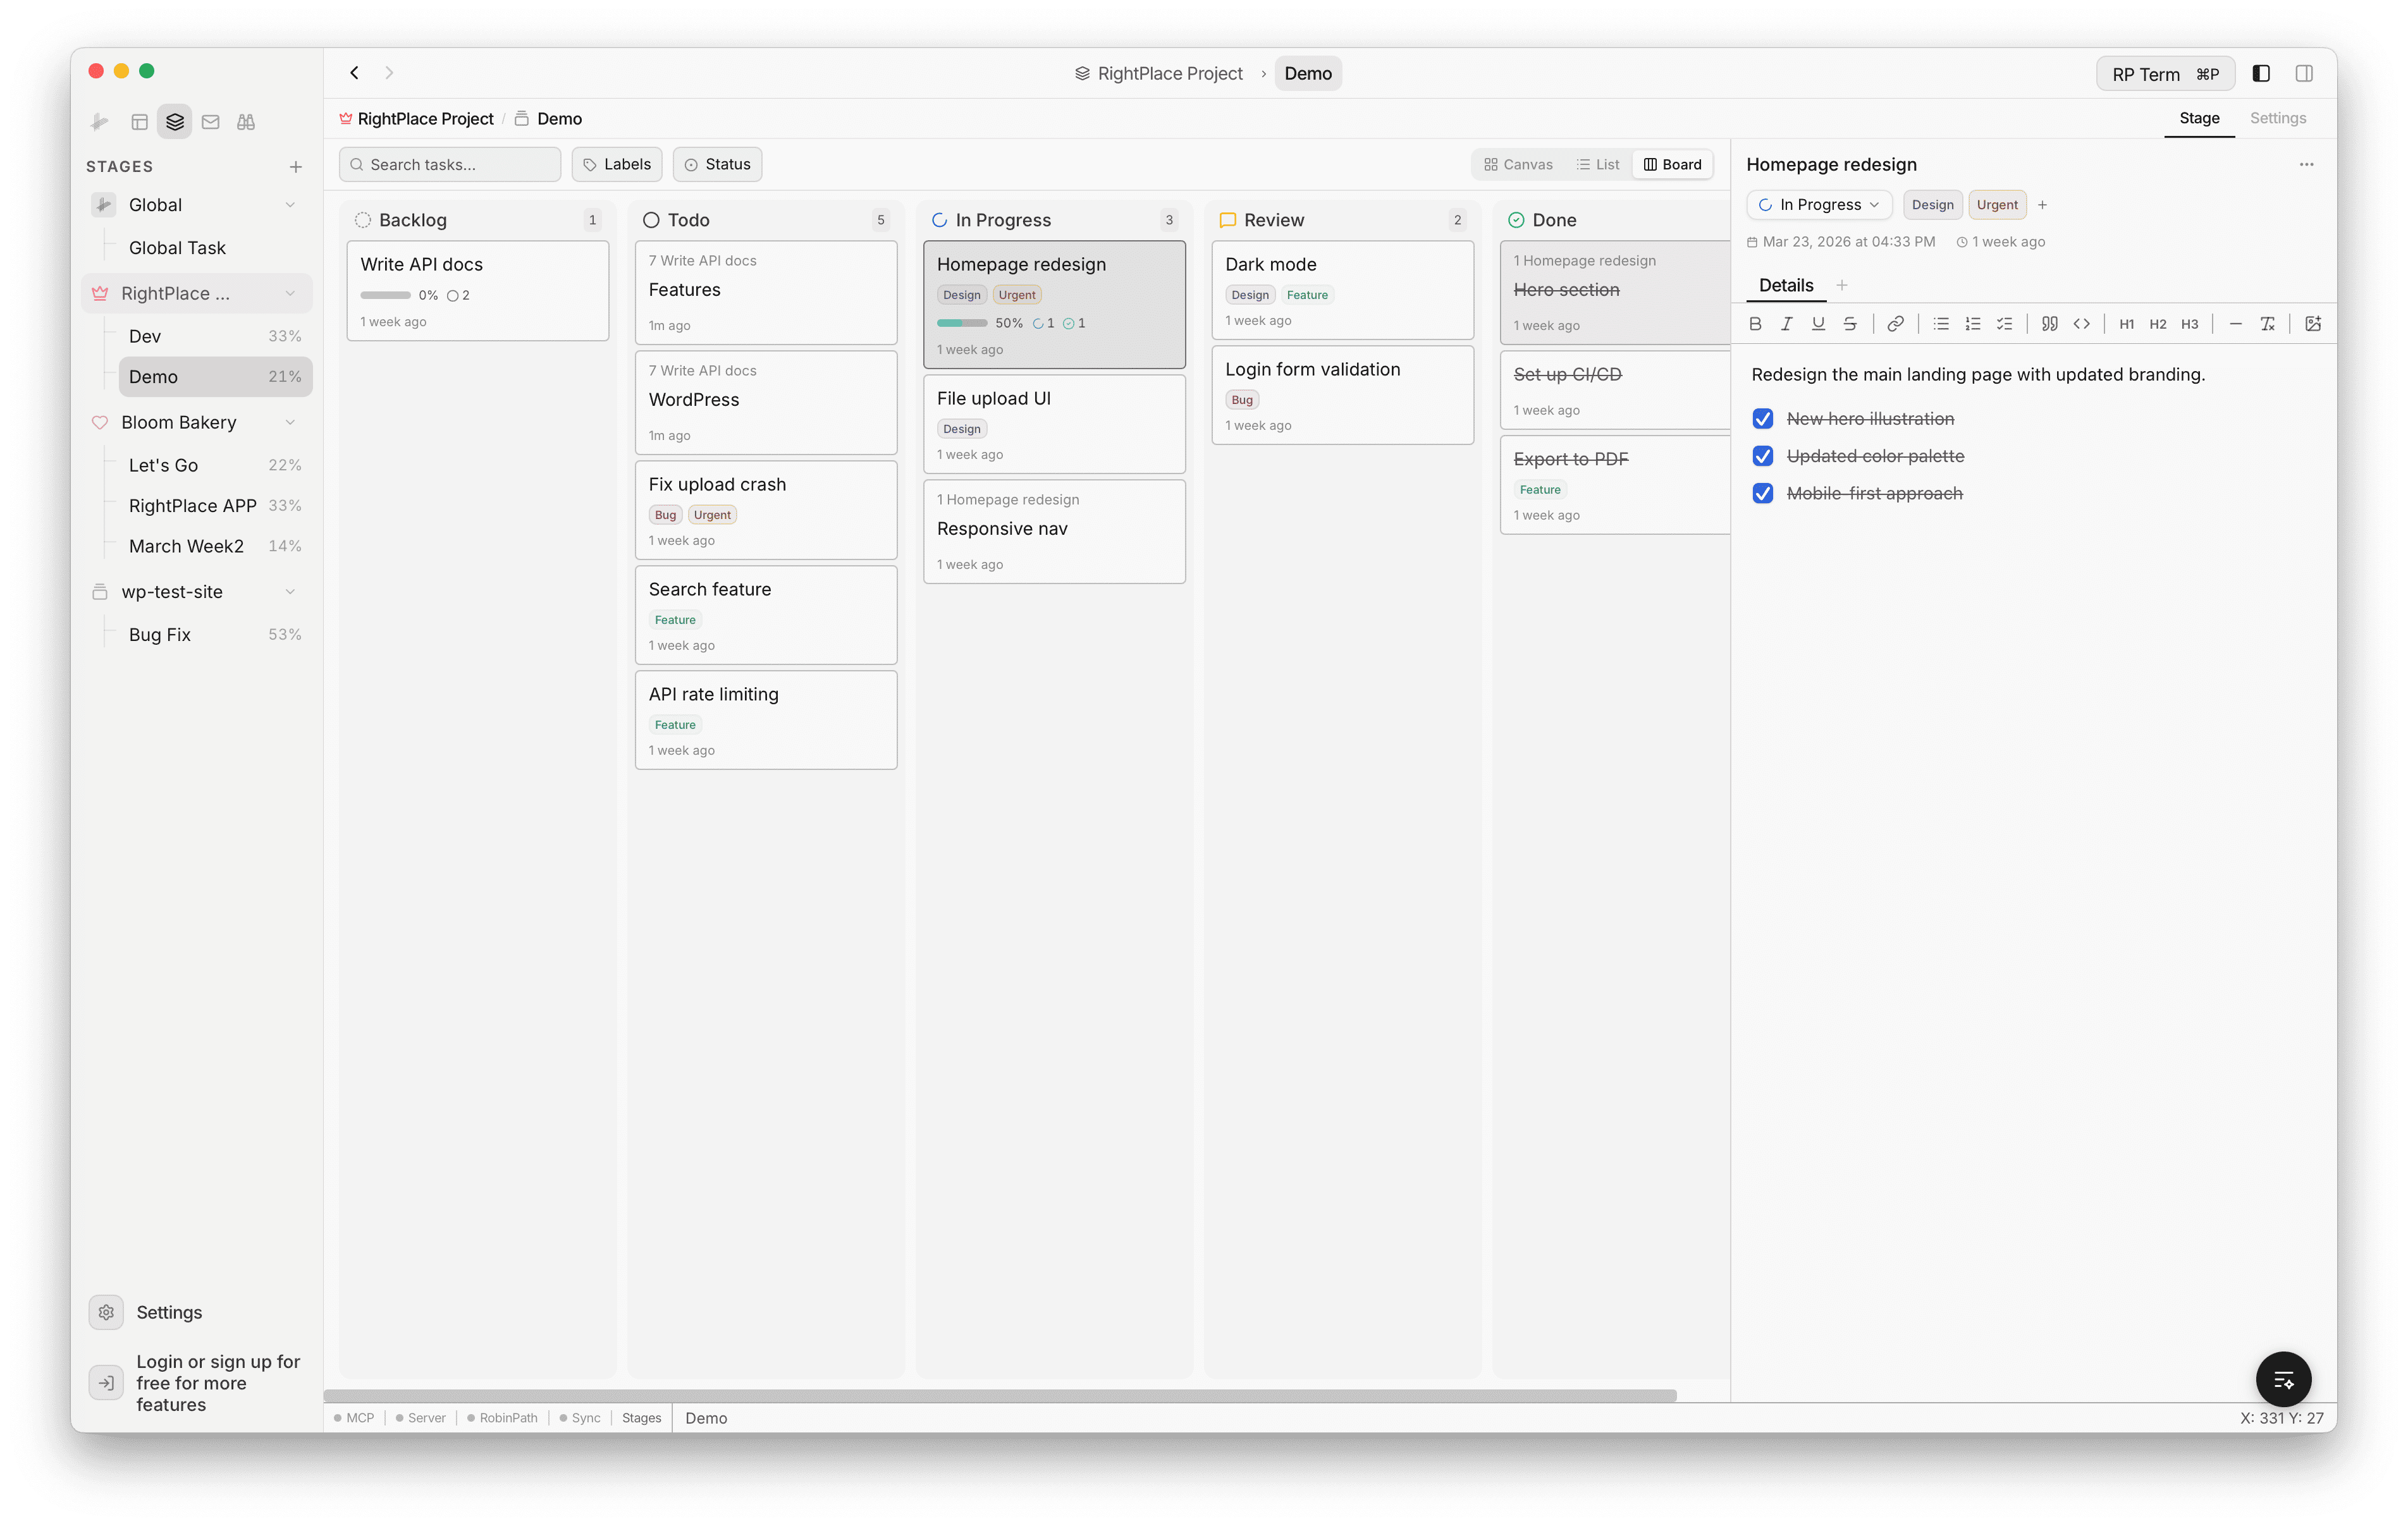
Each column shows the task count. Cards display the task title, labels, subtask progress, and timestamp. Subtasks appear under their parent task name.
Task Tree
Tasks are organized in a hierarchical tree. Tasks can be nested to any depth, creating parent-child relationships for breaking down work.
Creating Tasks
- Click the Add Task area or press Enter on a focused task to create a new sibling
- Press Tab to indent a task (nest it under the previous sibling)
- Press Shift+Tab to outdent a task (move it up one level)
Reordering Tasks
Drag and drop tasks to reorder them:
- Drag to the top of a task to insert before it
- Drag to the bottom to insert after it
- Drag horizontally to nest it as a child
Keyboard Shortcuts
| Shortcut | Action |
|---|---|
| Enter | Create a new sibling task below |
| Tab | Indent (nest under previous sibling) |
| Shift+Tab | Outdent (move to parent level) |
| Arrow Up/Down | Move focus between tasks |
| Escape | Blur the current task |
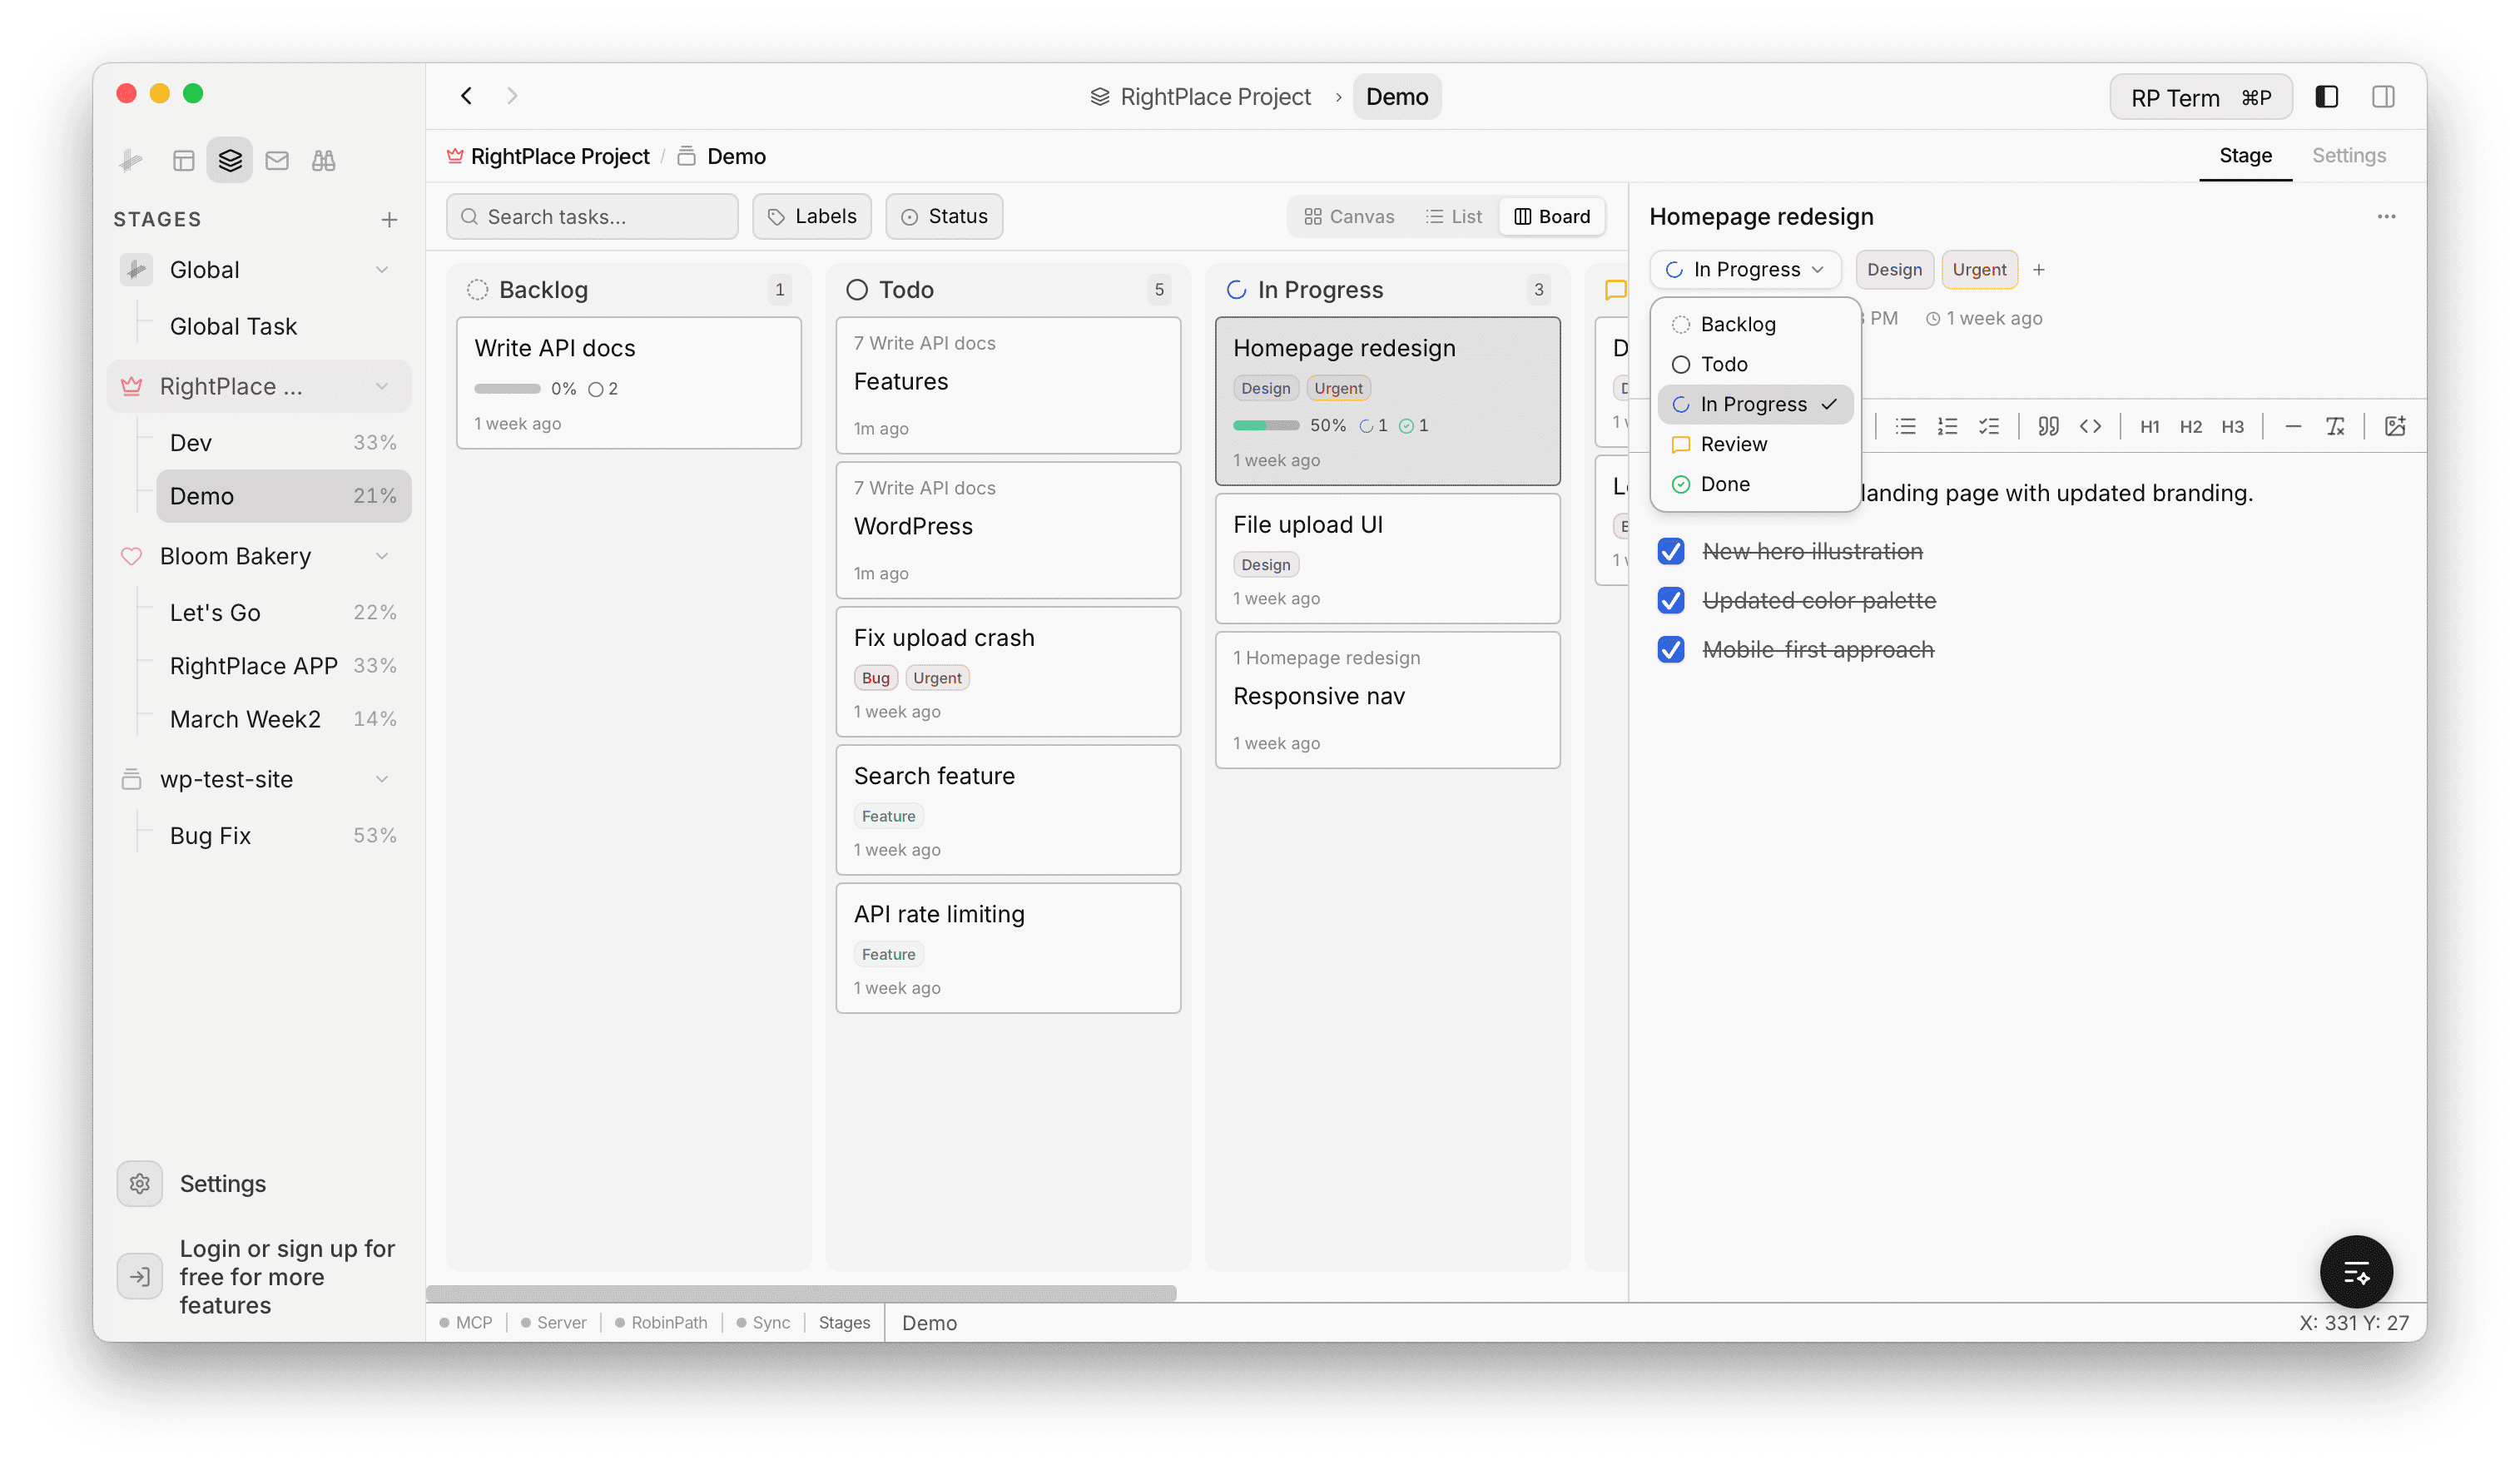
Task Status
Each task has one of five statuses:
| Status | Description |
|---|---|
| Backlog | Not yet planned |
| Todo | Planned but not started |
| In Progress | Currently being worked on |
| Review | Waiting for review |
| Done | Completed |
Click the checkbox on a task to toggle between Todo and Done. To set any other status, click the status dropdown in the task editor panel.
Filtering by Status
Click the Status button in the toolbar to filter tasks by one or more statuses. Only tasks matching the selected statuses will be shown.

Task Editor
Click a task to open the editor panel on the right side. The panel shows the task title, status, labels, timestamps, and a tabbed content area.
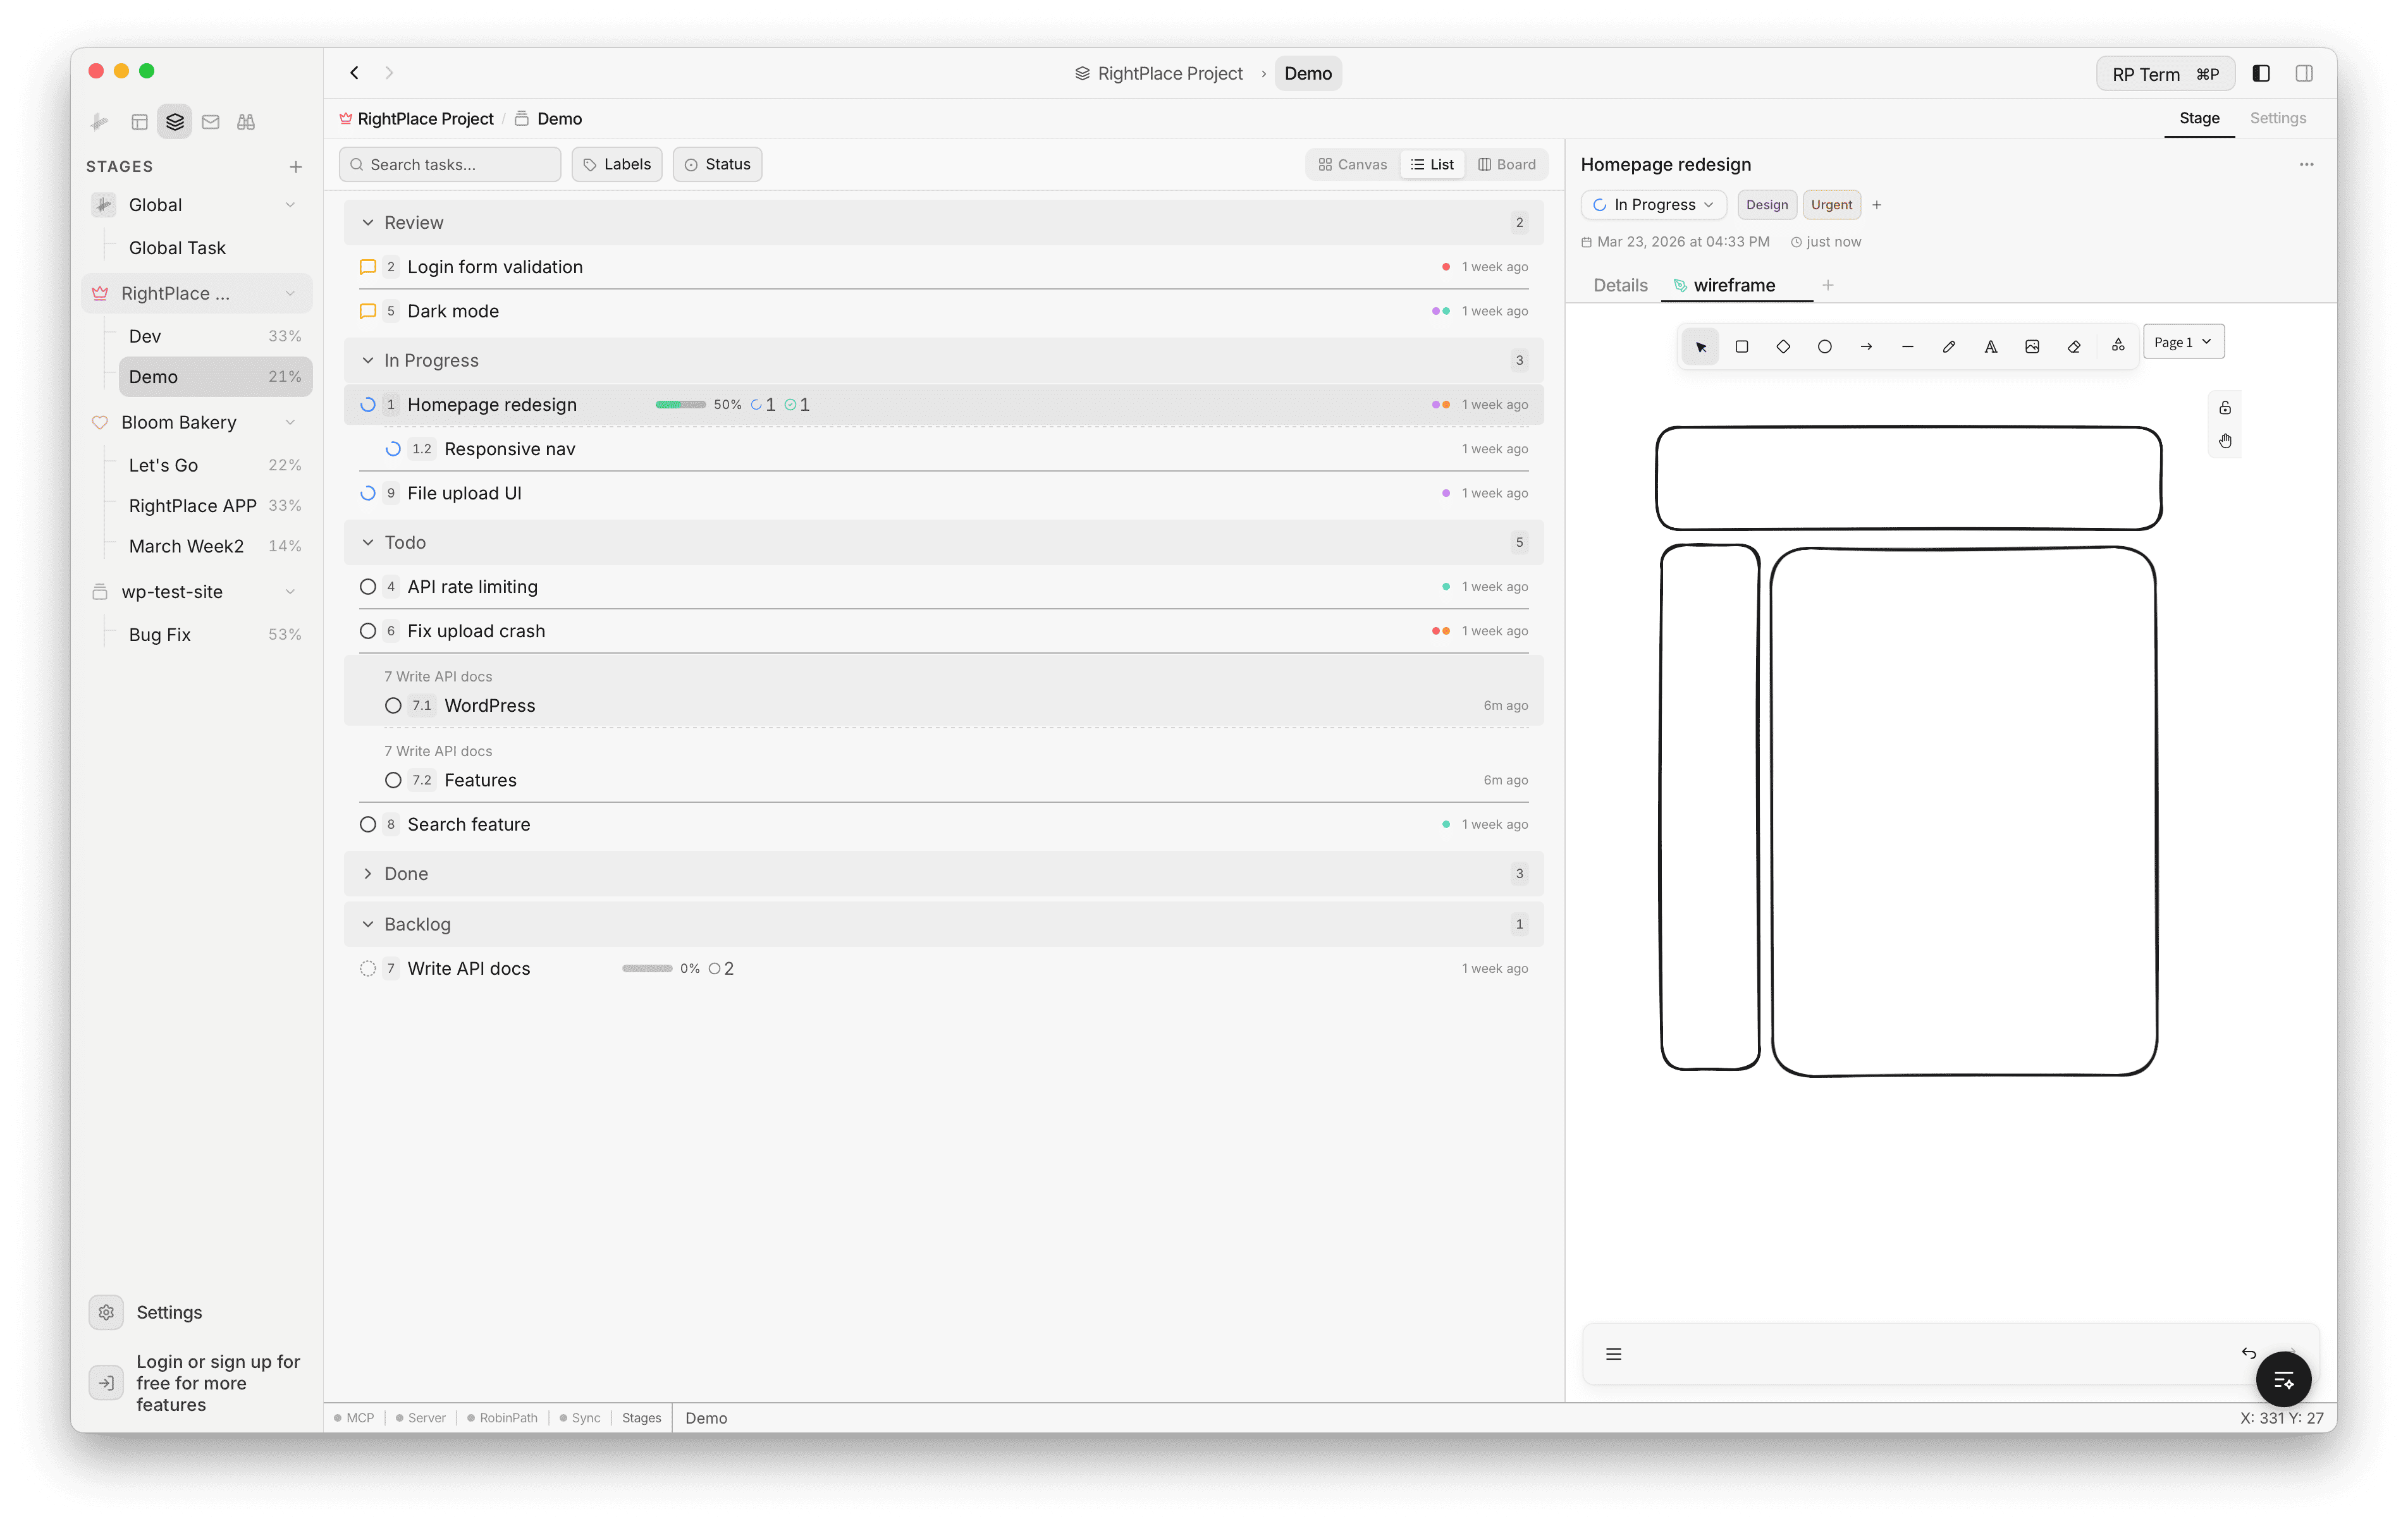
The Details tab includes:
- Rich text editor: format content with bold, italic, underline, strikethrough, links, lists, headings, code blocks, horizontal rules, and task checkboxes
- Status selector: change the task status from the dropdown
- Labels: assign one or more labels using the + button
Additional tabs can hold per-task canvases or linked resources. Click + to add a new tab.
Labels
Labels help you categorize and filter tasks. Each label has a name and a color.
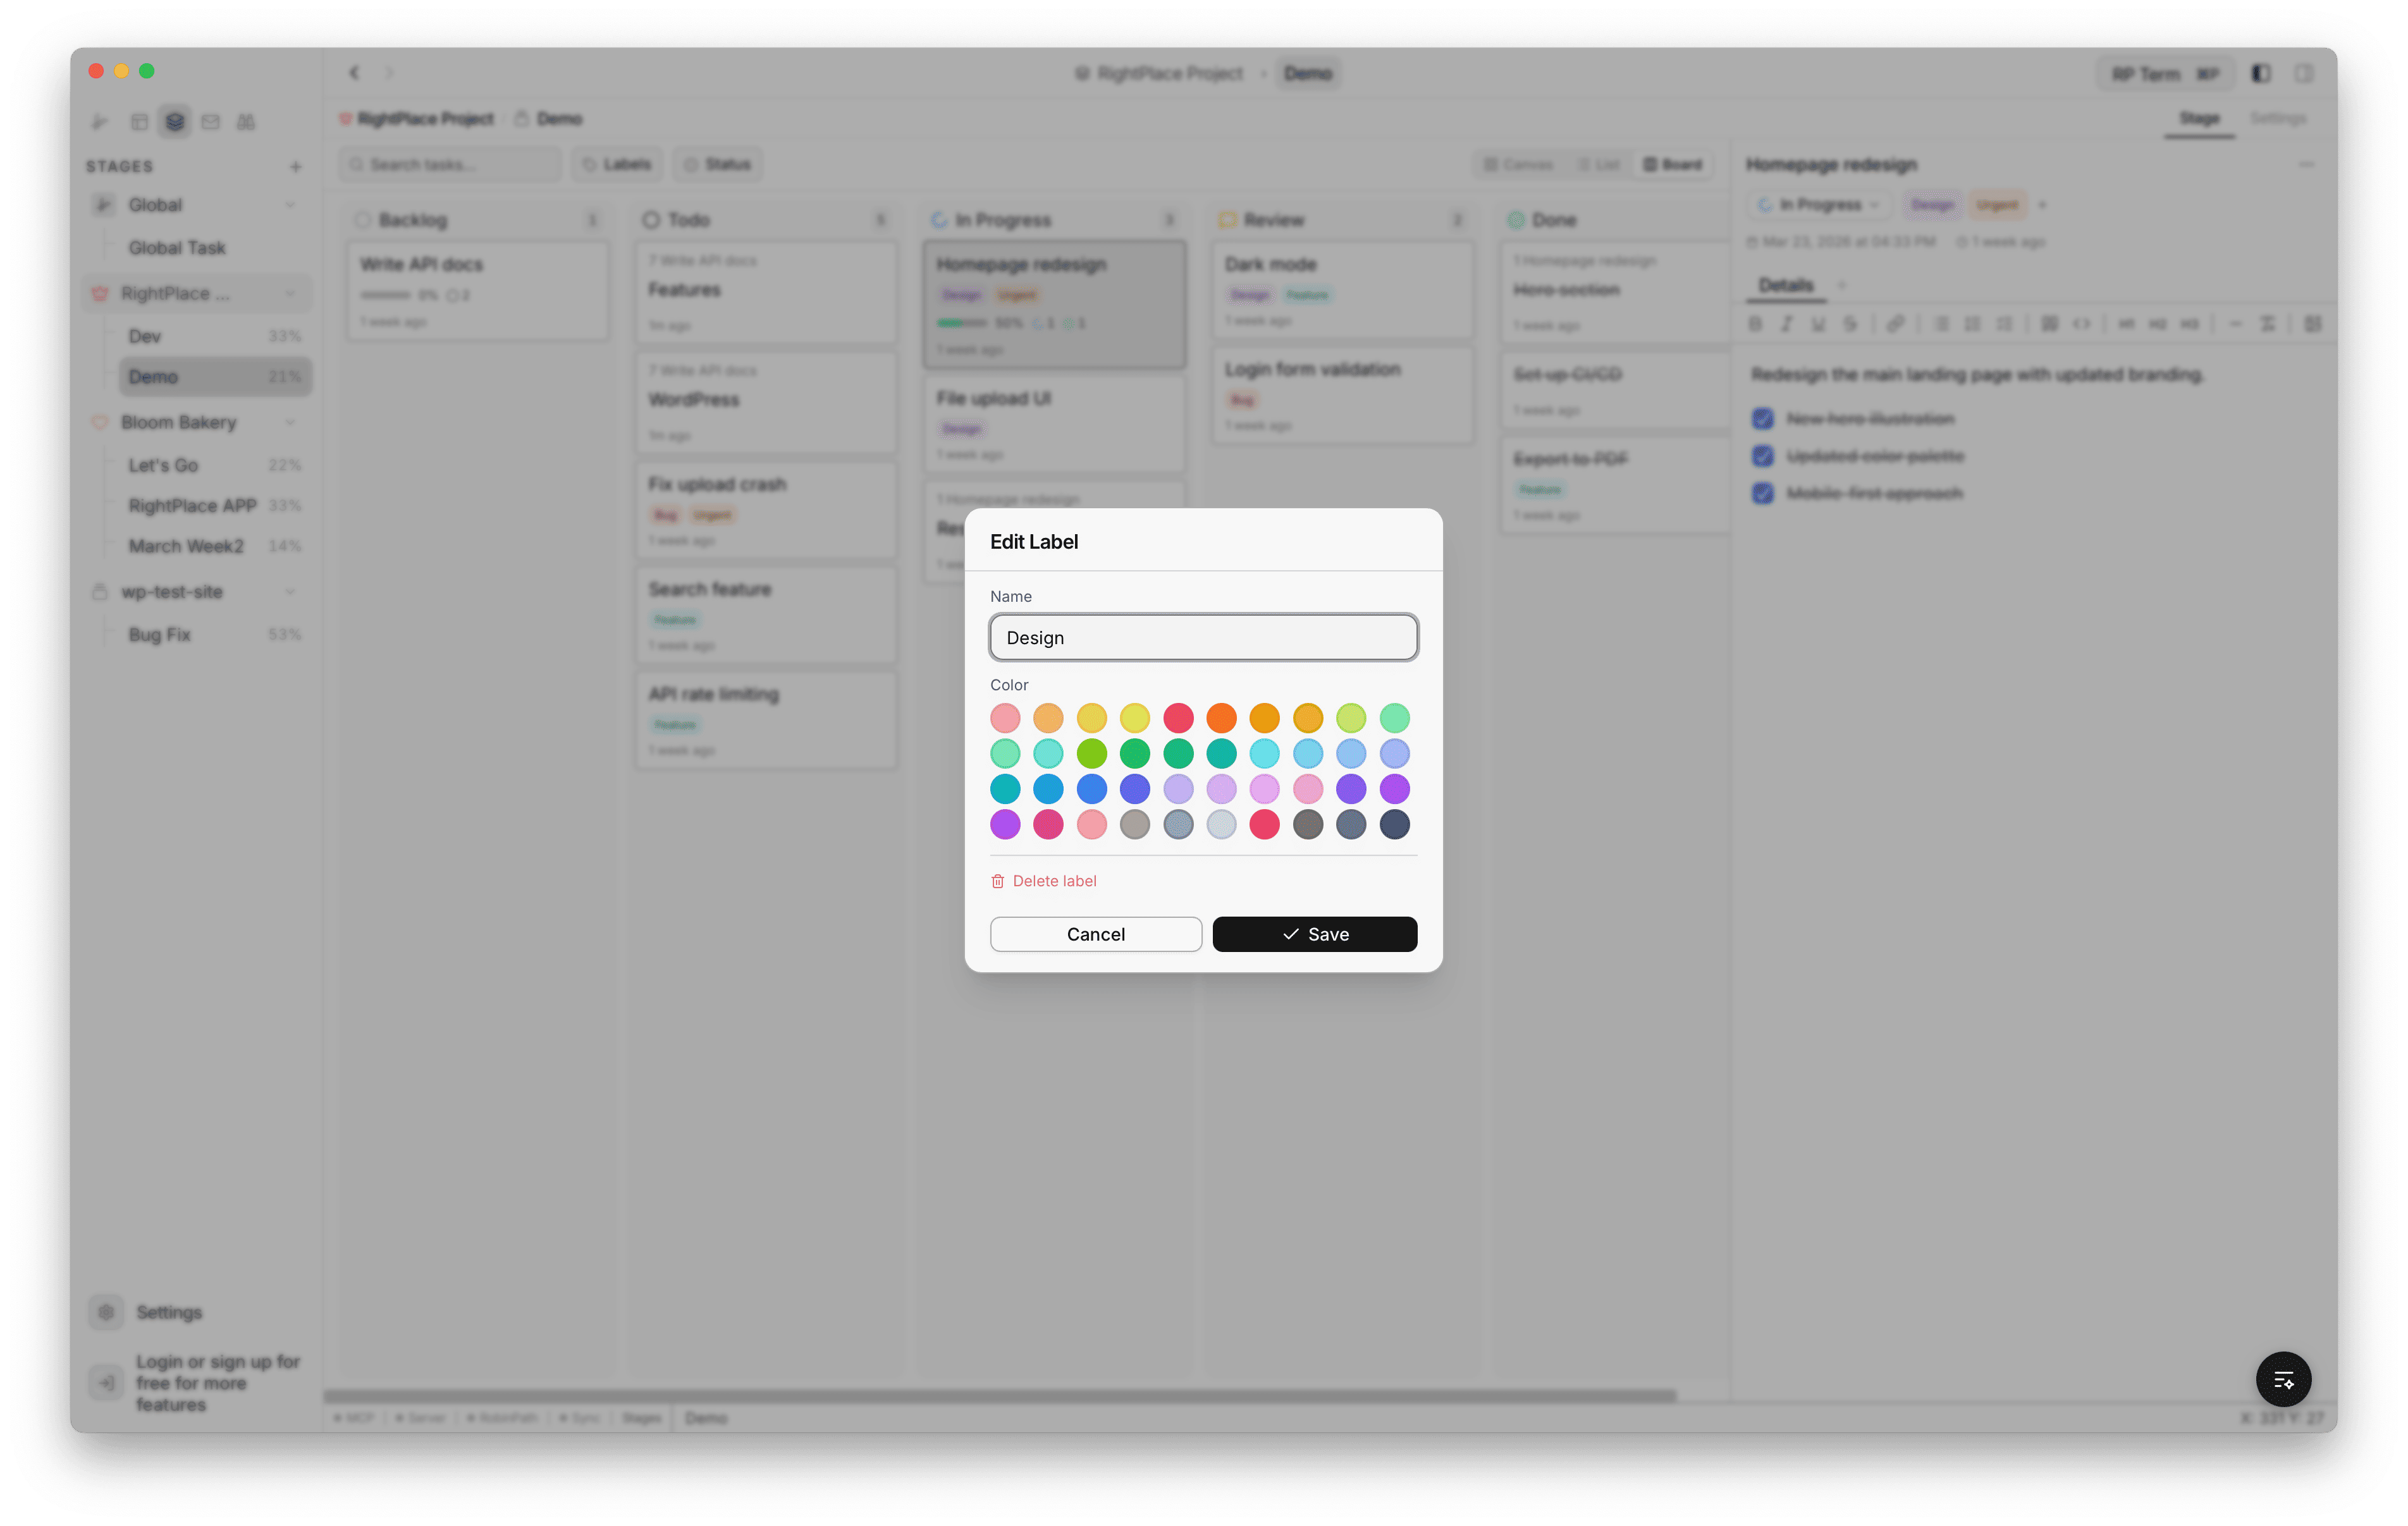
- Open the Labels button in the toolbar to manage labels
- Create labels with a name and color from the palette
- Assign labels to tasks from the task editor or context menu
- Filter the view by label to focus on specific categories
- Deleting a label removes it from all tasks that reference it
Linking Resources
You can link resources and app pages to tasks. Click the New Tab option in the task editor to browse and attach project resources.
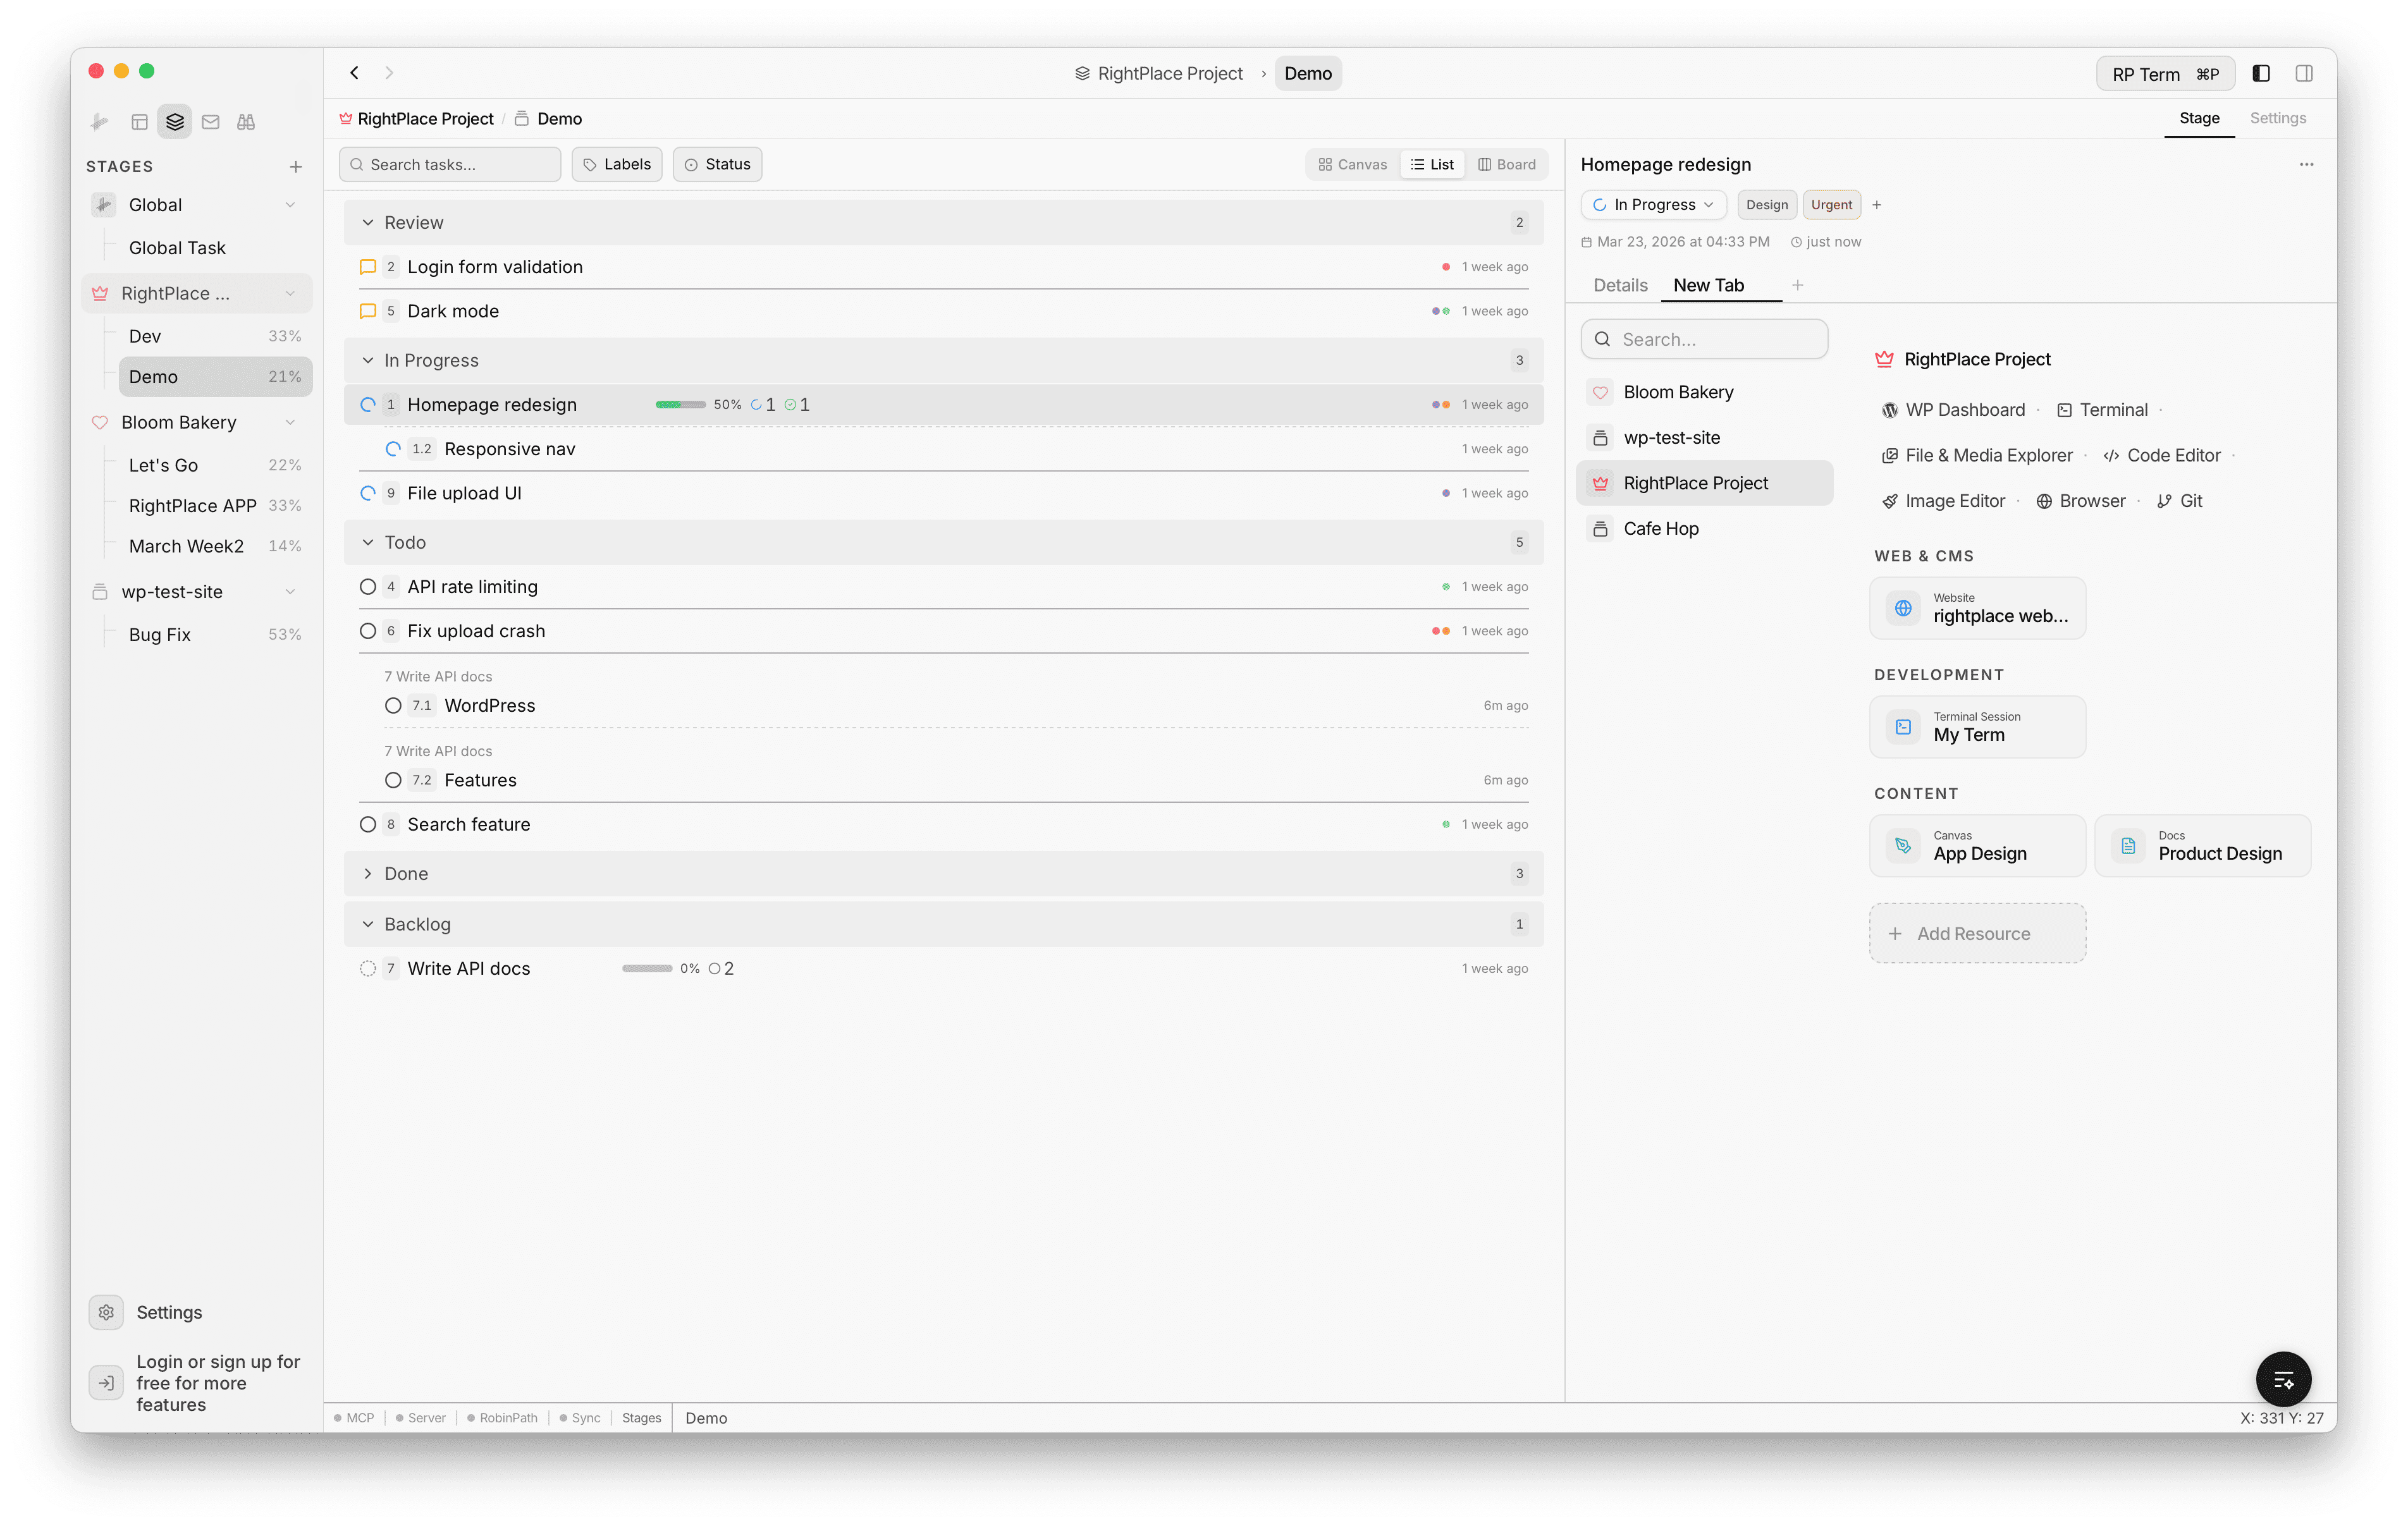
Resources from anywhere in the app can also be attached via the Save to Stage button available in email viewers, WordPress pages, and other resource browsers.
Supported attachment types:
- Reference: a live link that opens the resource when clicked
- Saved copy: a snapshot of the content saved to the stage folder (e.g., email as HTML or plain text)
You can also add new resources directly from the task editor by clicking Add Resource.
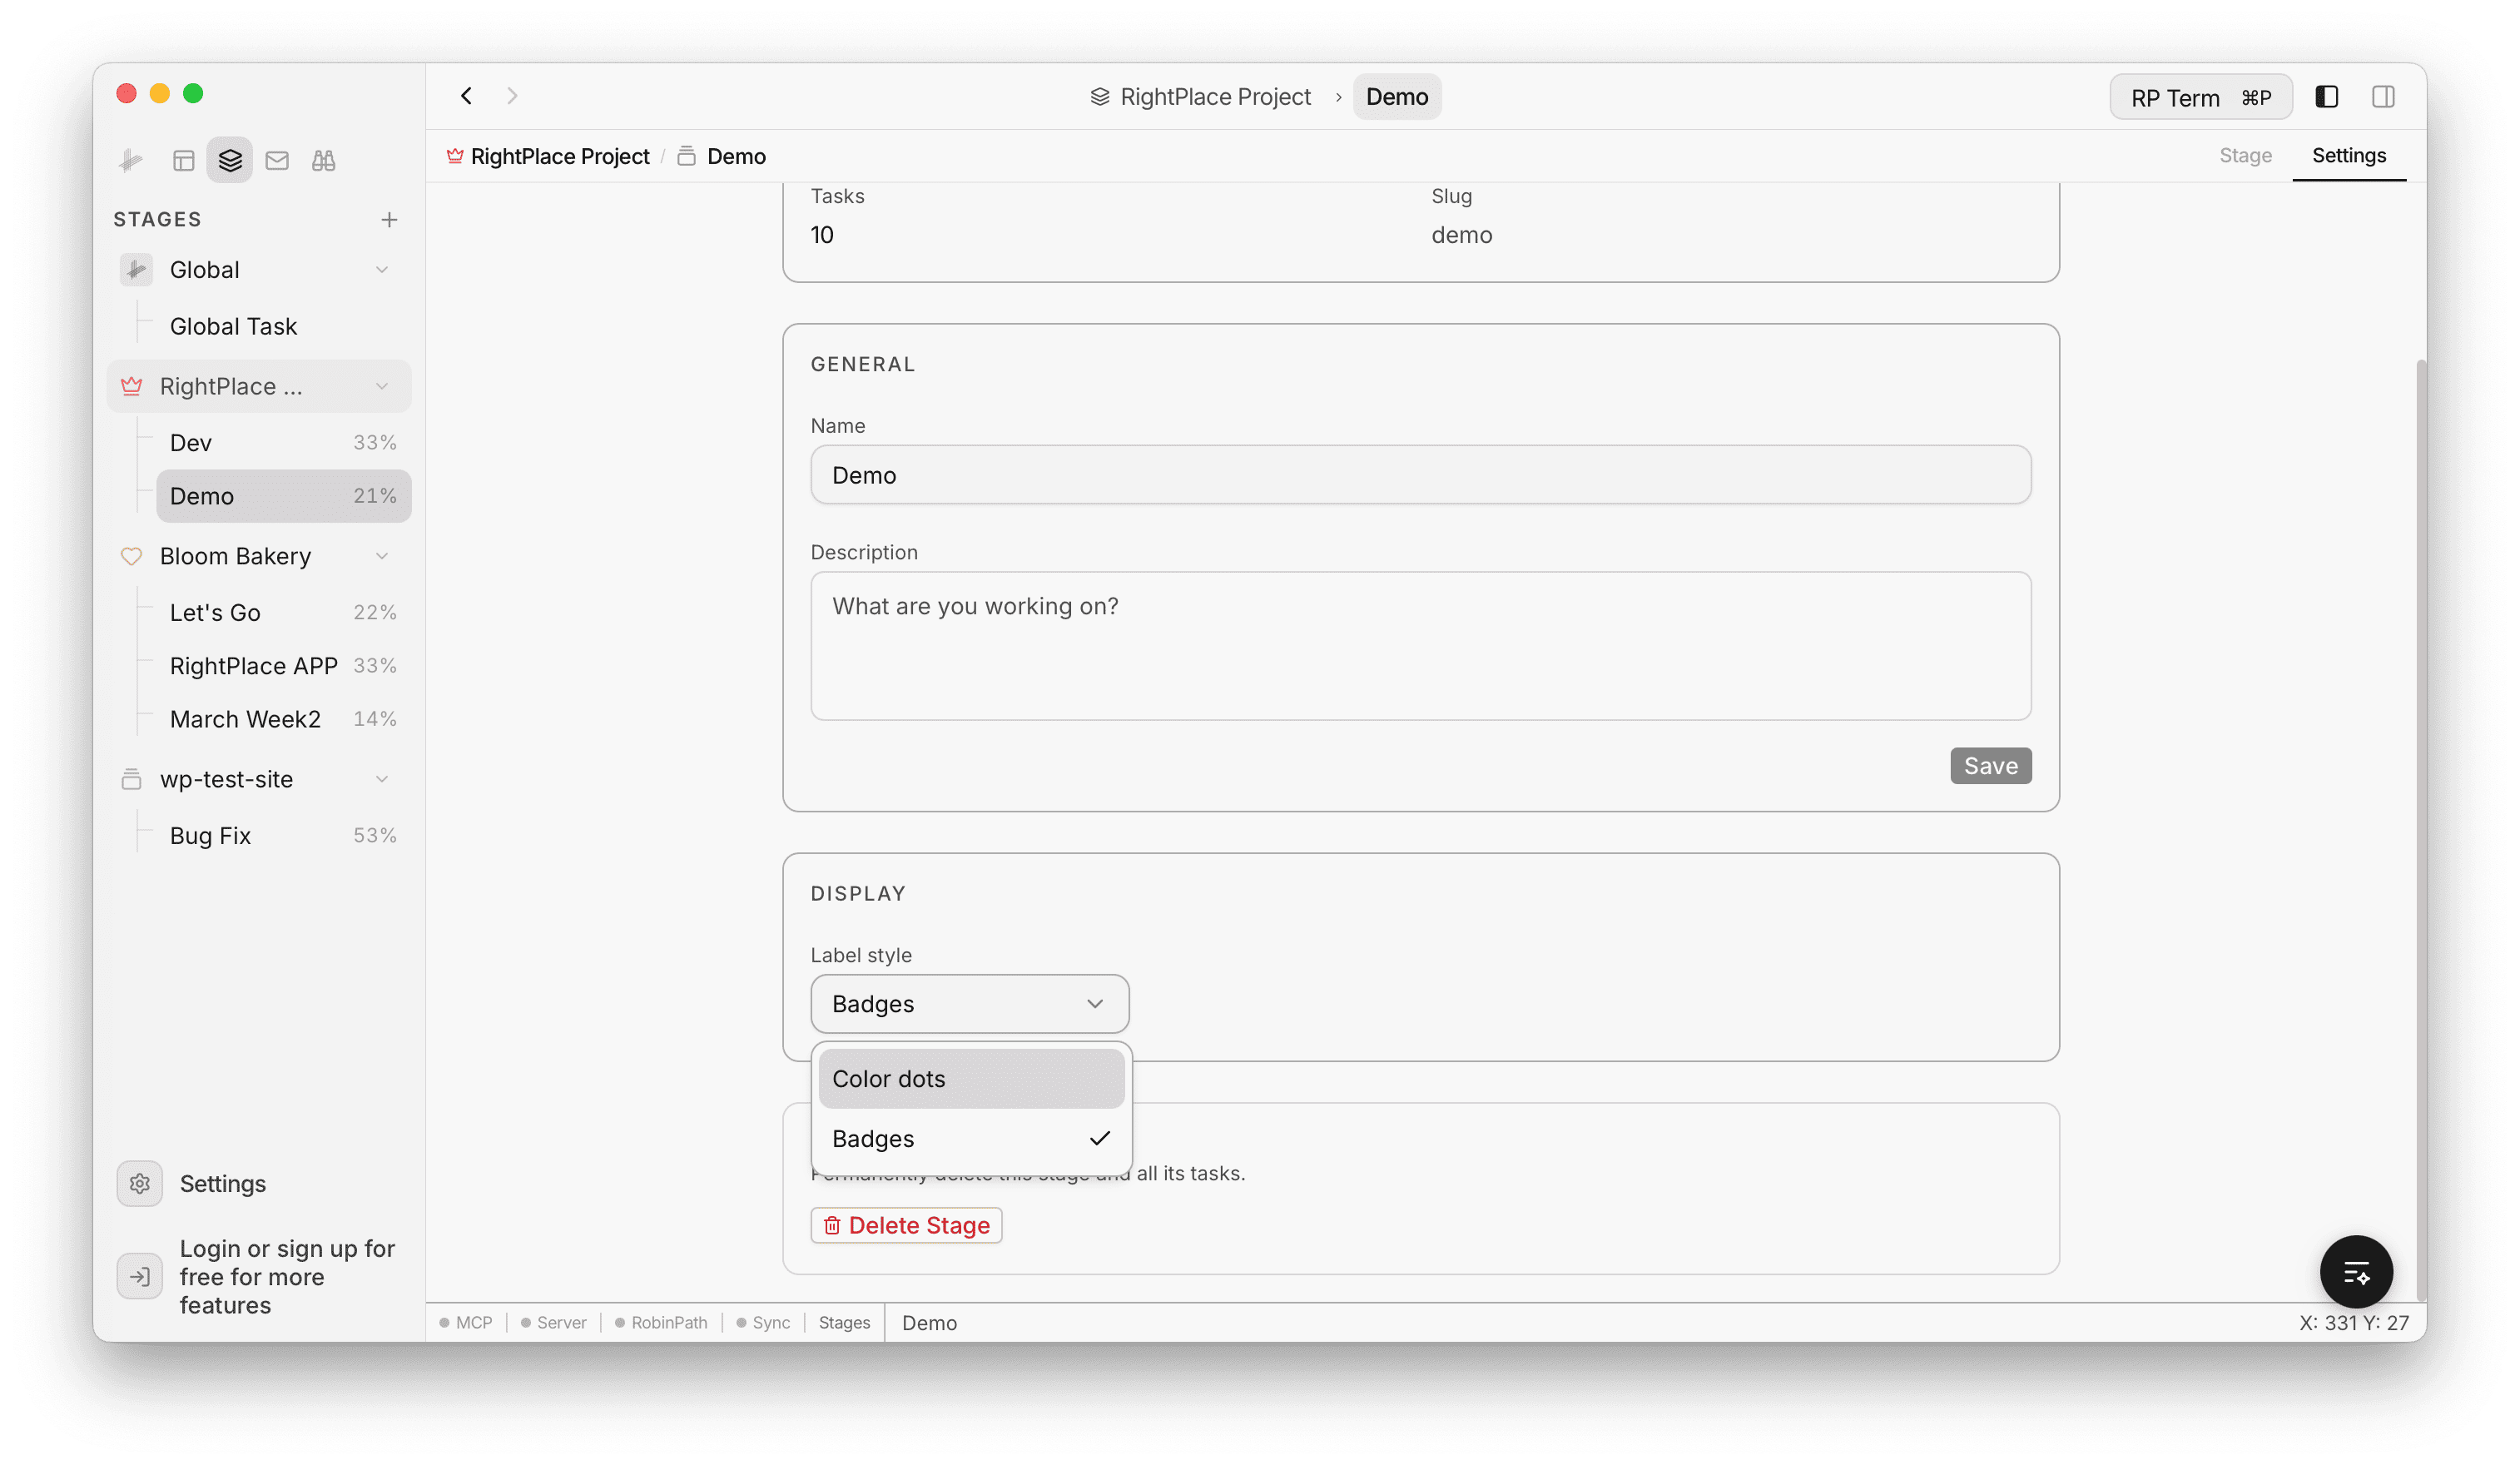
Settings
Each stage has a Settings tab (accessible from the top-right corner) where you can configure:
- Name: update the stage title
- Description: update the stage summary
- Label style: choose between Badges (colored text tags) or Color dots (compact circles)
- Delete Stage: permanently remove the stage and all its tasks
Progress Tracking
Each stage tracks task completion automatically:
- The sidebar shows a compact completion percentage next to each stage
- The list view shows status group counts and subtask progress bars on parent tasks
- The board view shows task counts per column
- The task editor displays subtask progress on parent tasks
File Storage
Stages store their data as JSON files in your project folder:
your-project/
  .rightplace/
    stages/
      my-stage-abc123/
        stage.json
        files/
          email-export.html
screenshot.pngstage.jsoncontains the full stage data (tasks, canvas, metadata)files/holds saved resource snapshots and embedded images- Stages sync across devices through the project’s sync mechanism
AI Agent Integration
Stages are accessible to AI agents through MCP (Model Context Protocol) tools. When MCP is enabled, agents can:
- Read: list stages, get stage details with full task tree, list labels
- Write: create/update/delete stages, create/update/move/delete tasks
This allows AI assistants to help plan work, create task breakdowns, and update progress programmatically. MCP permissions for Stages can be configured independently (read-only or read-write) from the MCP settings page.
Next steps
- Global Search: Search across all resources and stages
- Widgets: Add dashboard widgets for quick access