WordPress Site
Full WordPress management from the desktop. Manage content, media, files, plugins, themes, and users.
WooCommerce
Products, categories, orders, and customers when WooCommerce is installed on the site
On this page
- Products
- List table view
- Card (grid) view
- Saved views
- Inline editing
- Bulk actions
- New product
- Post Meta and Taxonomies
- Import products
- Step 1: Upload
- Step 2: Preview
- Step 3: Mapping
- Step 4: Options
- Step 5: Import
- Step 6: Results
- Export products
- Step 1: Scope
- Step 2: Export type (Download CSV)
- Step 2: Export type (Send to Store)
- Step 3: Configure (Download CSV)
- Step 3: Configure (Send to Store)
- Categories
- Tree and product table
- Create a category
- Drag and drop to reparent categories
- Orders
- Orders table
- Customers
- Customers table
- Detail widget
- Product mode
- Order mode
- Customer mode
- Related
When the WooCommerce plugin is active on your paired WordPress Site, the WooCommerce item appears in the resource sidebar (between Files and Plugins). Open it to work in four areas: Products, Categories, Orders, and Customers. Counts on each item reflect cached rows for that site.
This page uses Products for the main catalog UI, then separate Import products and Export products sections so import and export steps nest correctly in the outline.
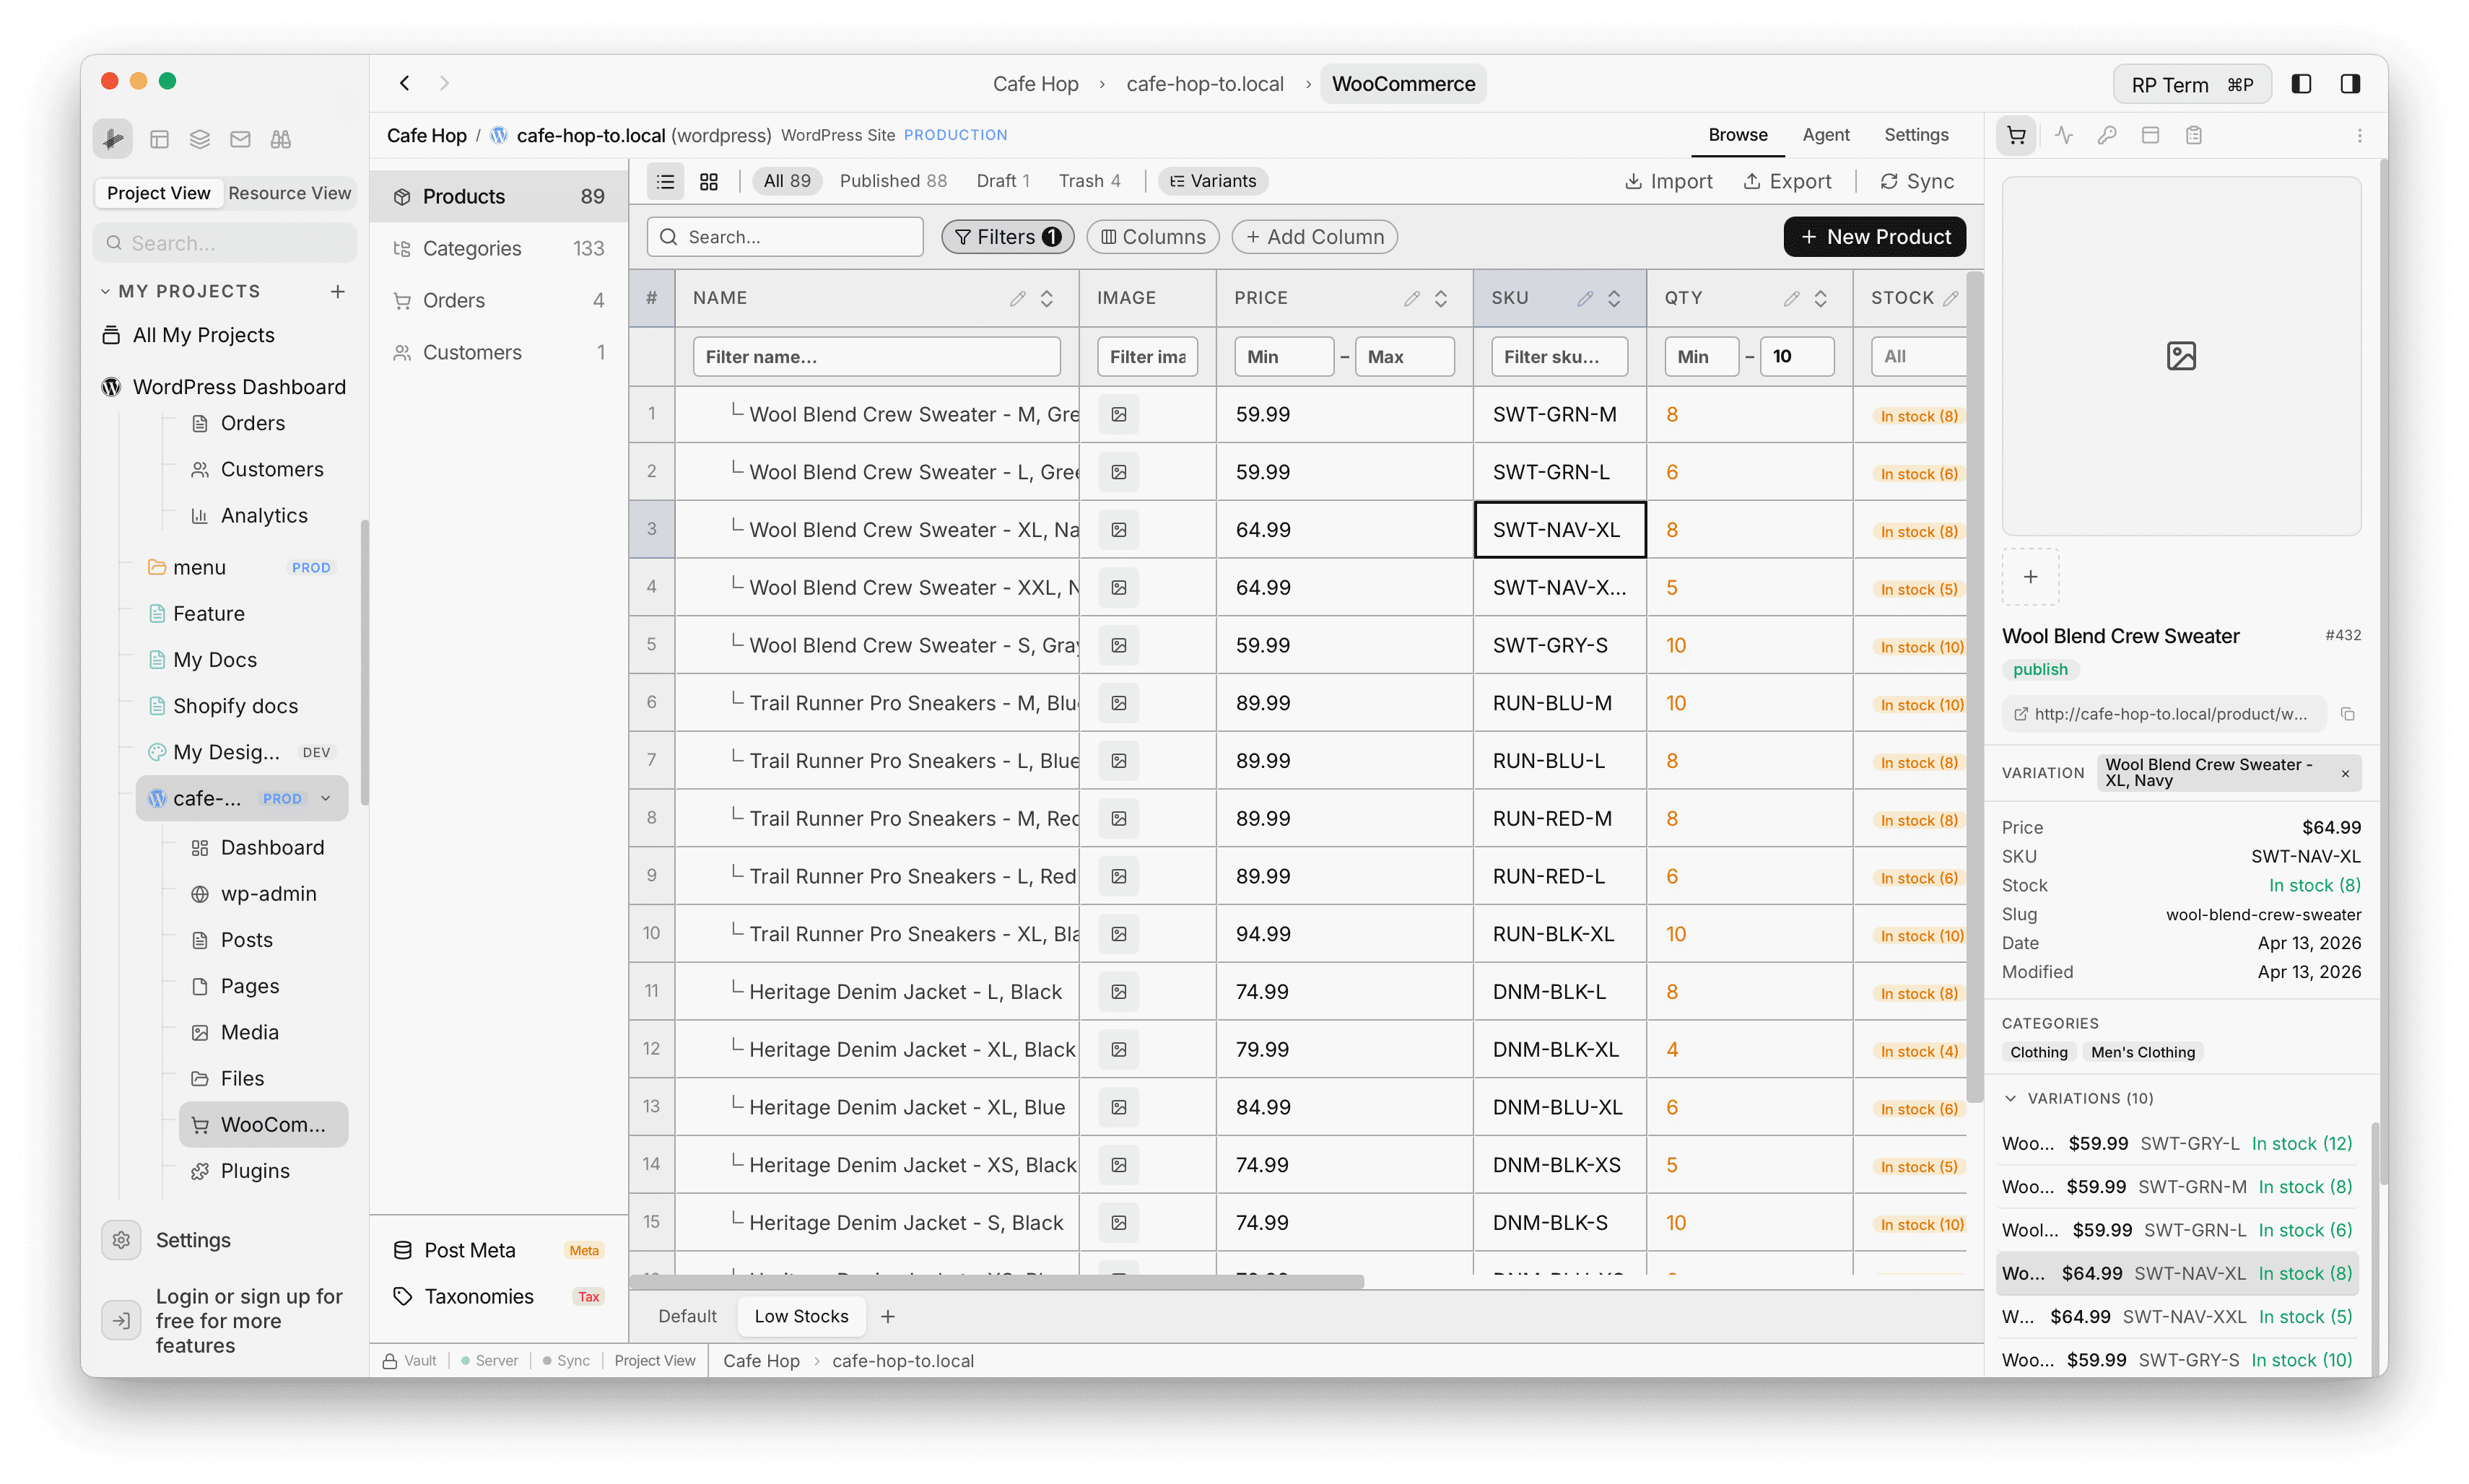
Products
The Products area combines a SmartTable with optional card (grid) view, status filters, and Sync to refresh cached product data from the site. Import and Export in the Products toolbar open the dialogs described under Import products and Export products below.
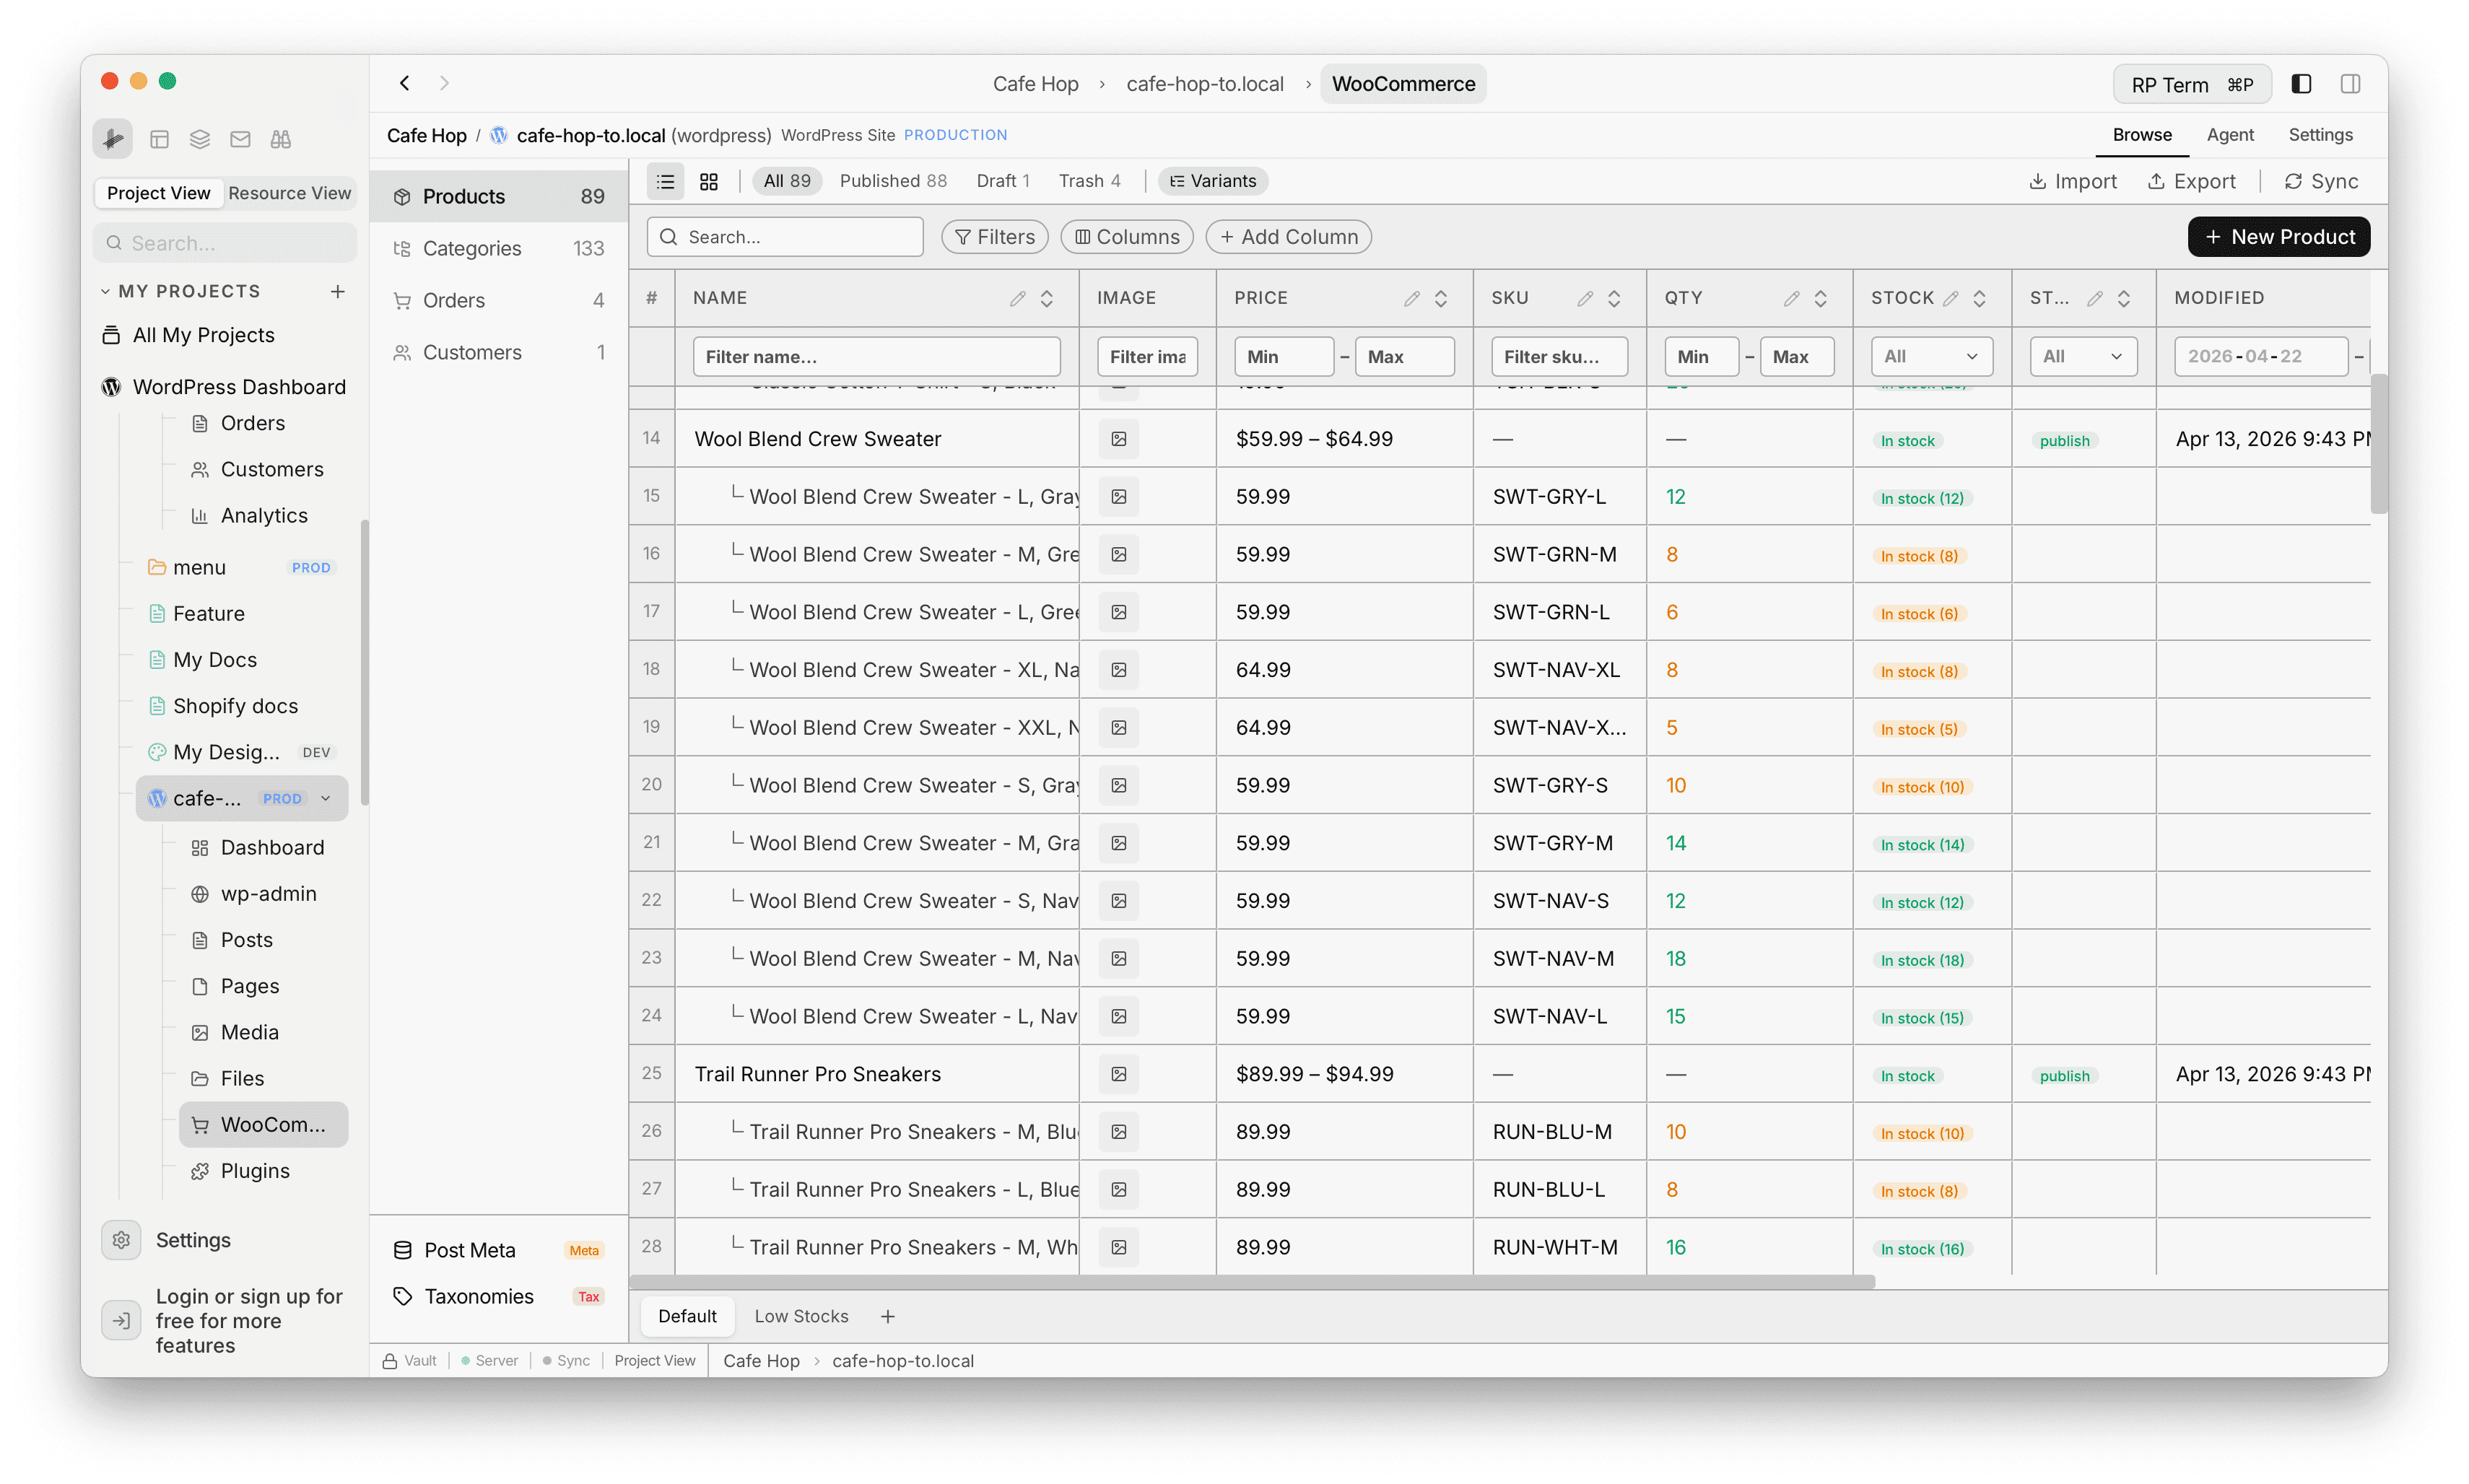
List table view
- Switch to list view when you want a SmartTable with sortable columns
- Status pills such as All, Published, Draft, Trash, and Variants (exact labels follow your catalog)
- Search, Filters, Columns, and Add column on the toolbar
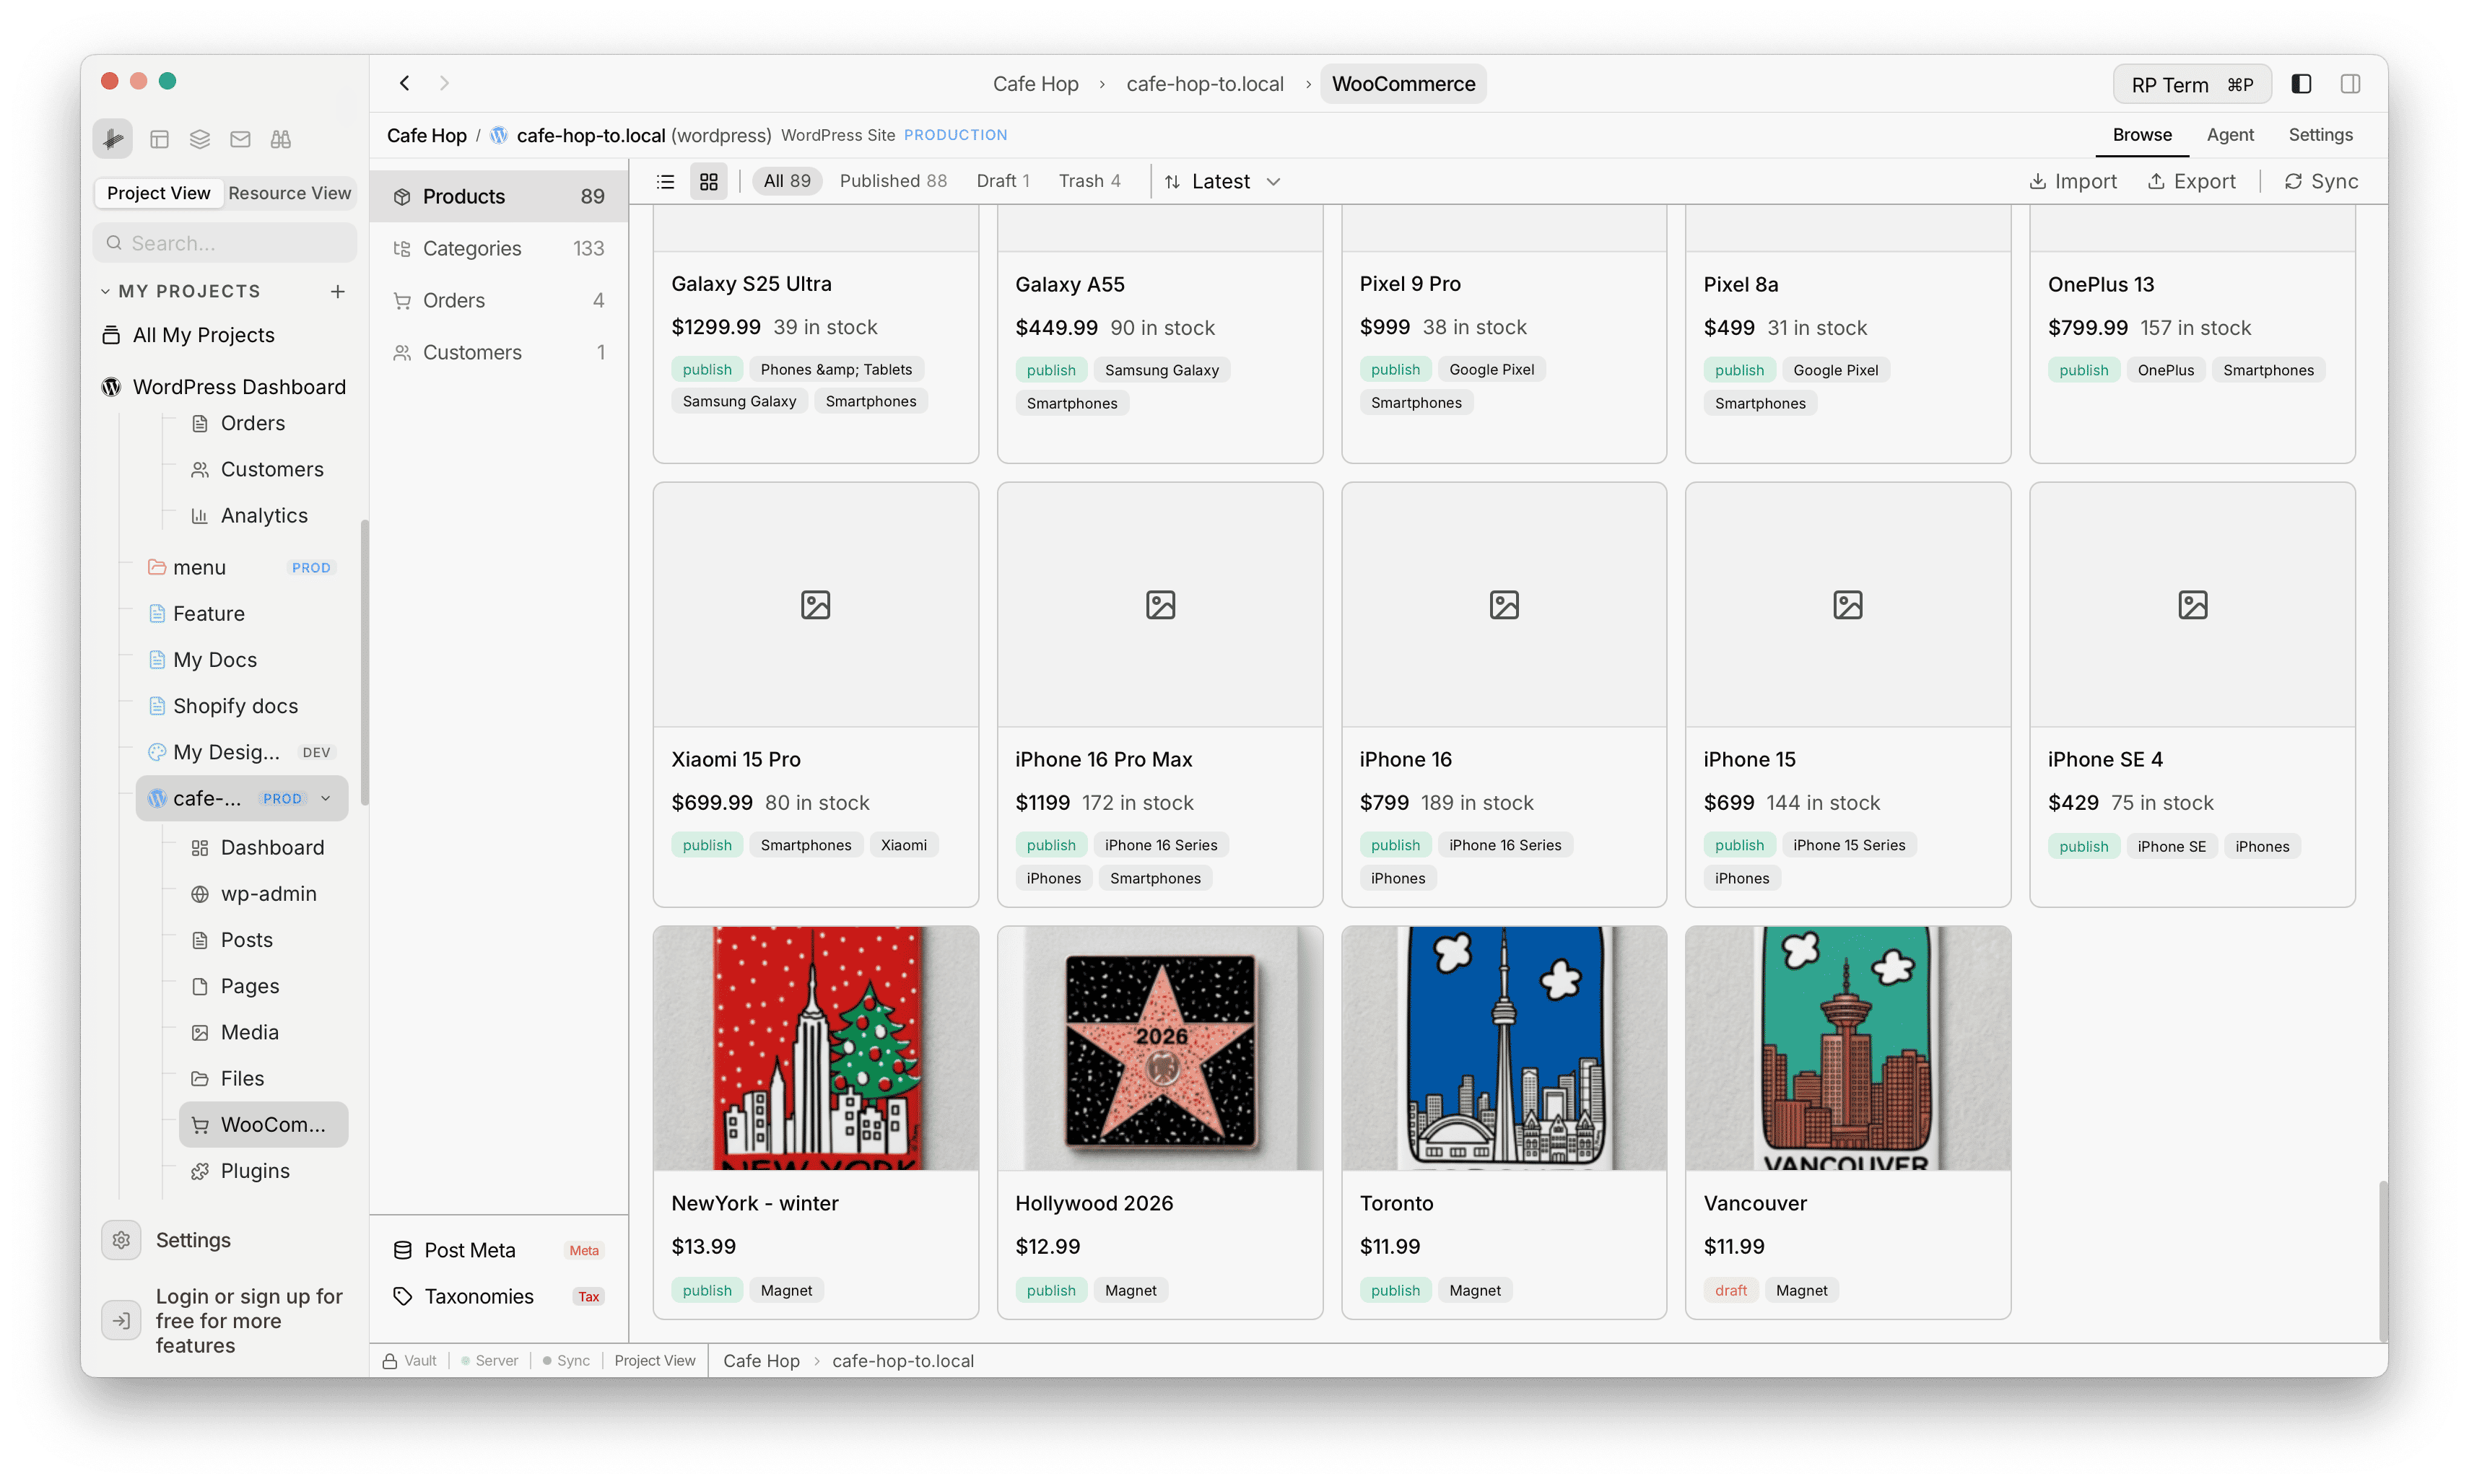
Card (grid) view
- Switch to grid view for card tiles with image, title, price, stock line, and category pills
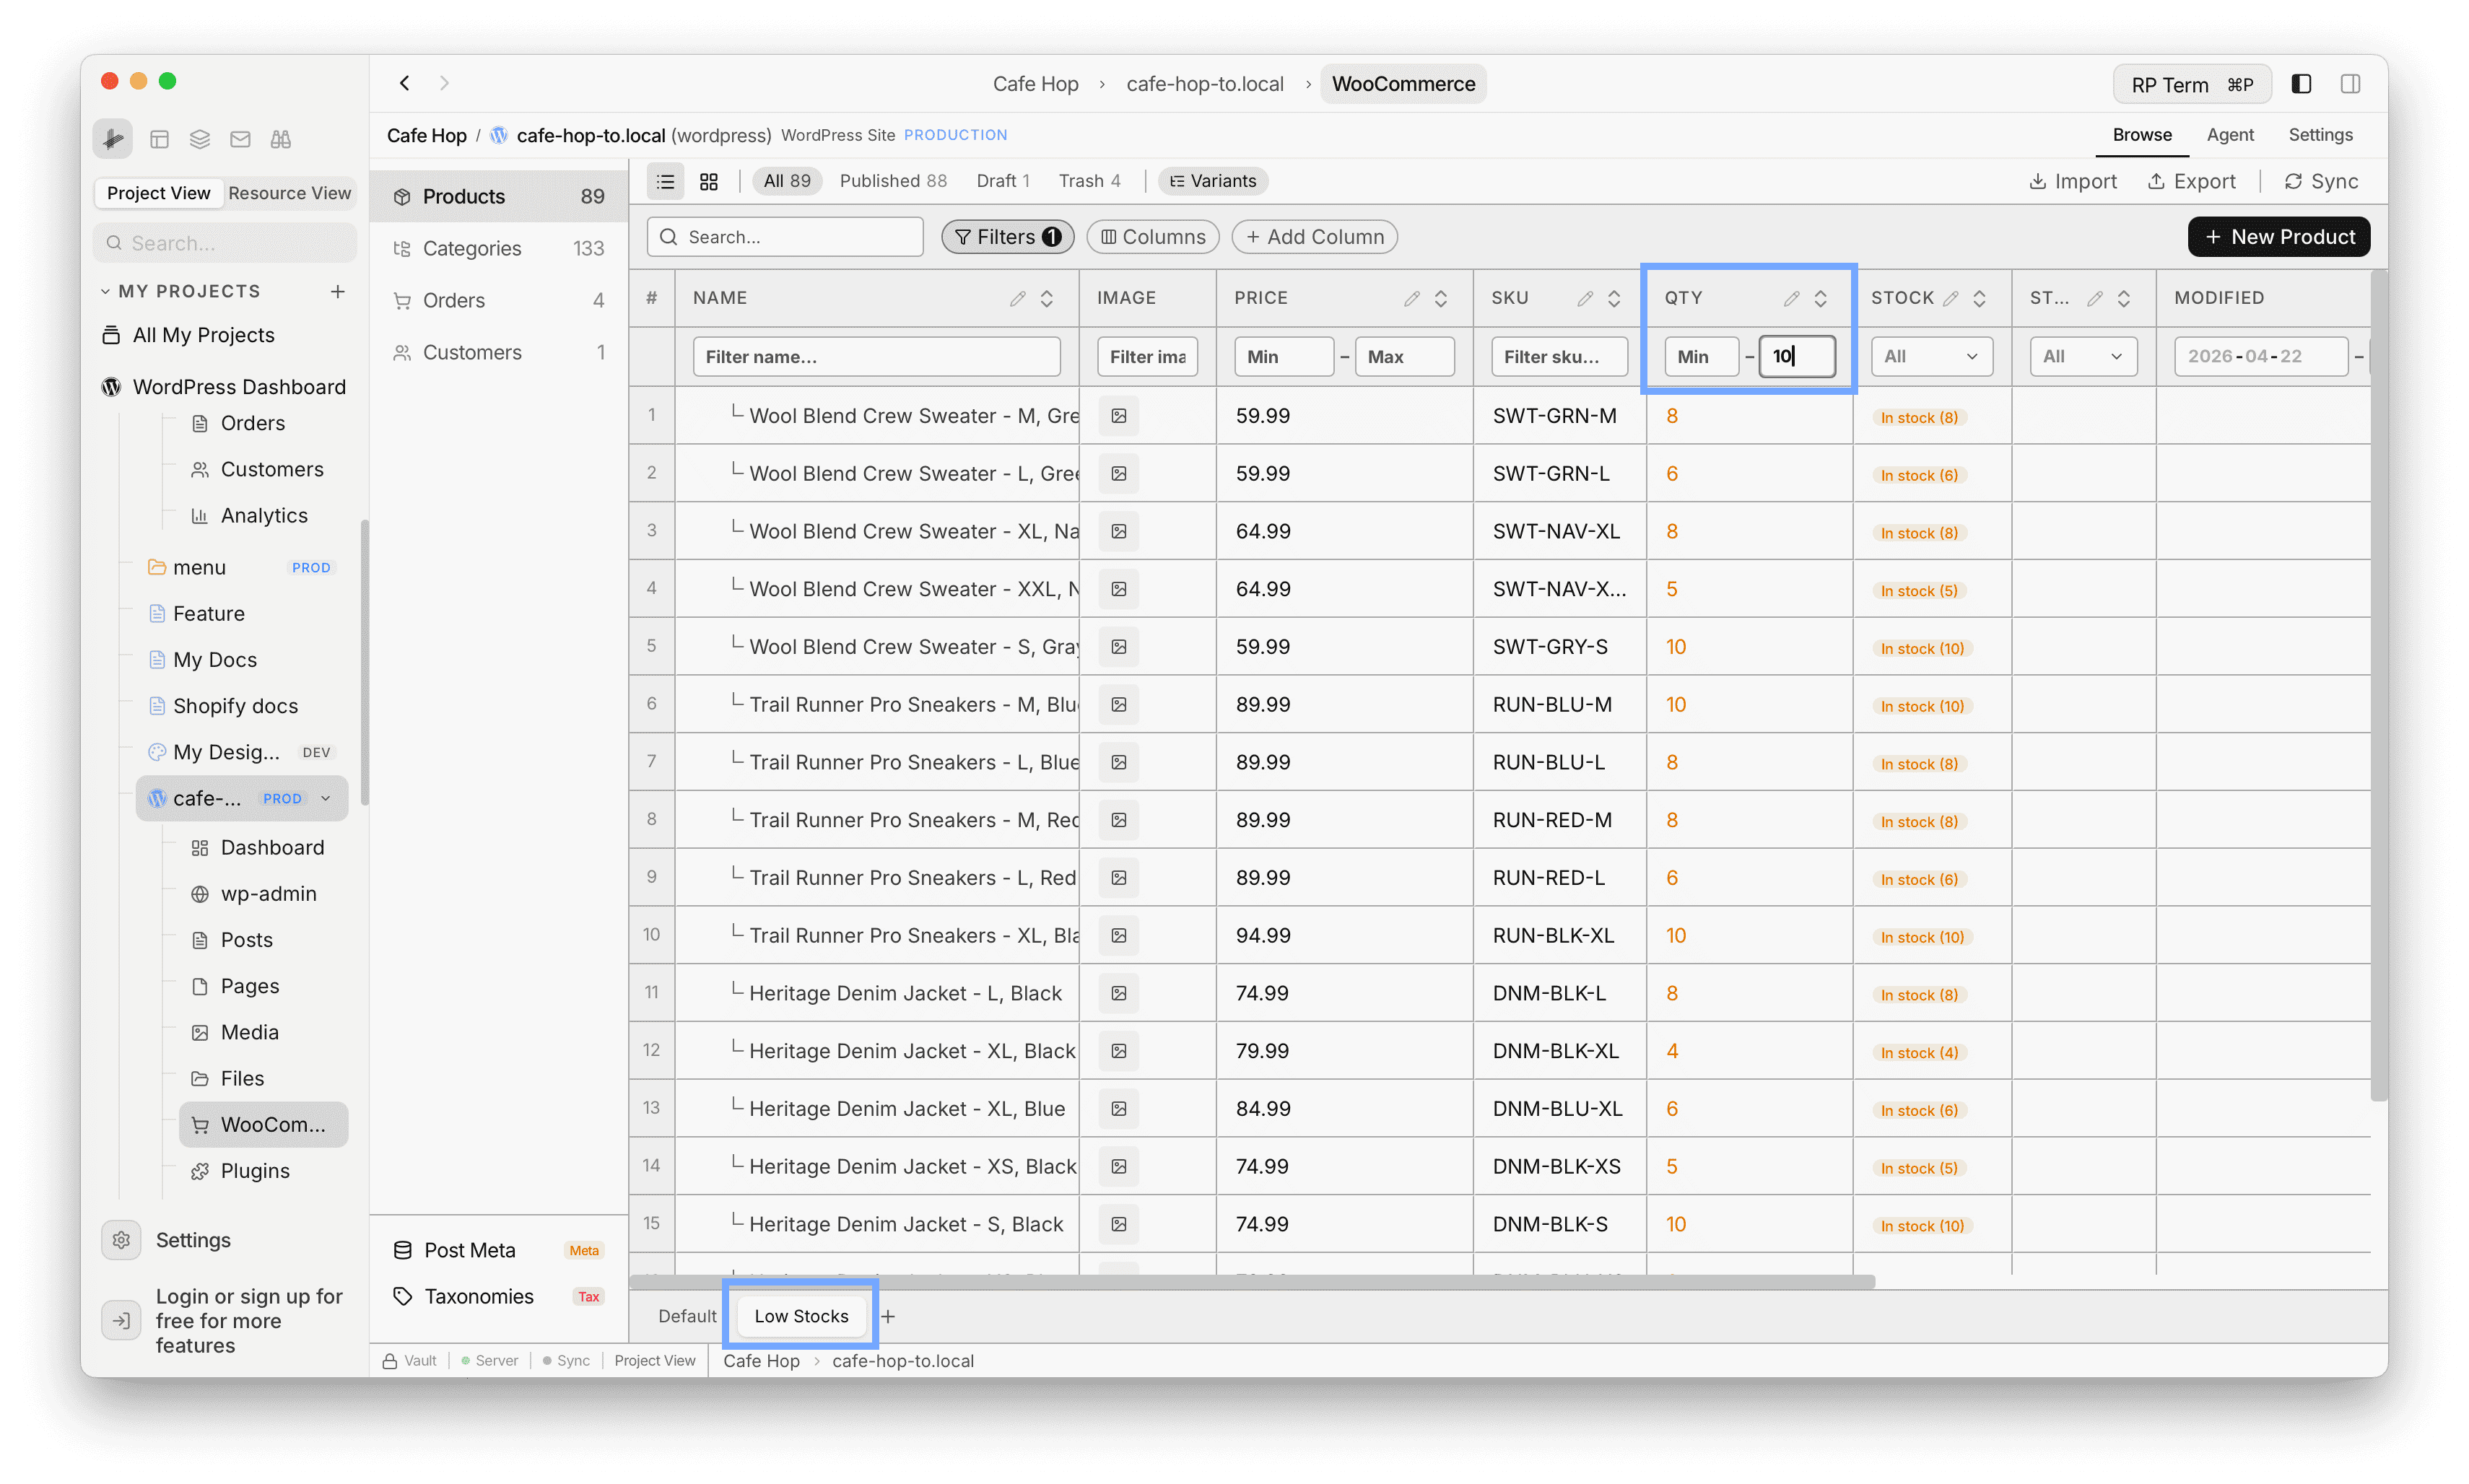
Saved views
- Bottom tabs store saved views for the product table (sort, filters, and column layout per tab)
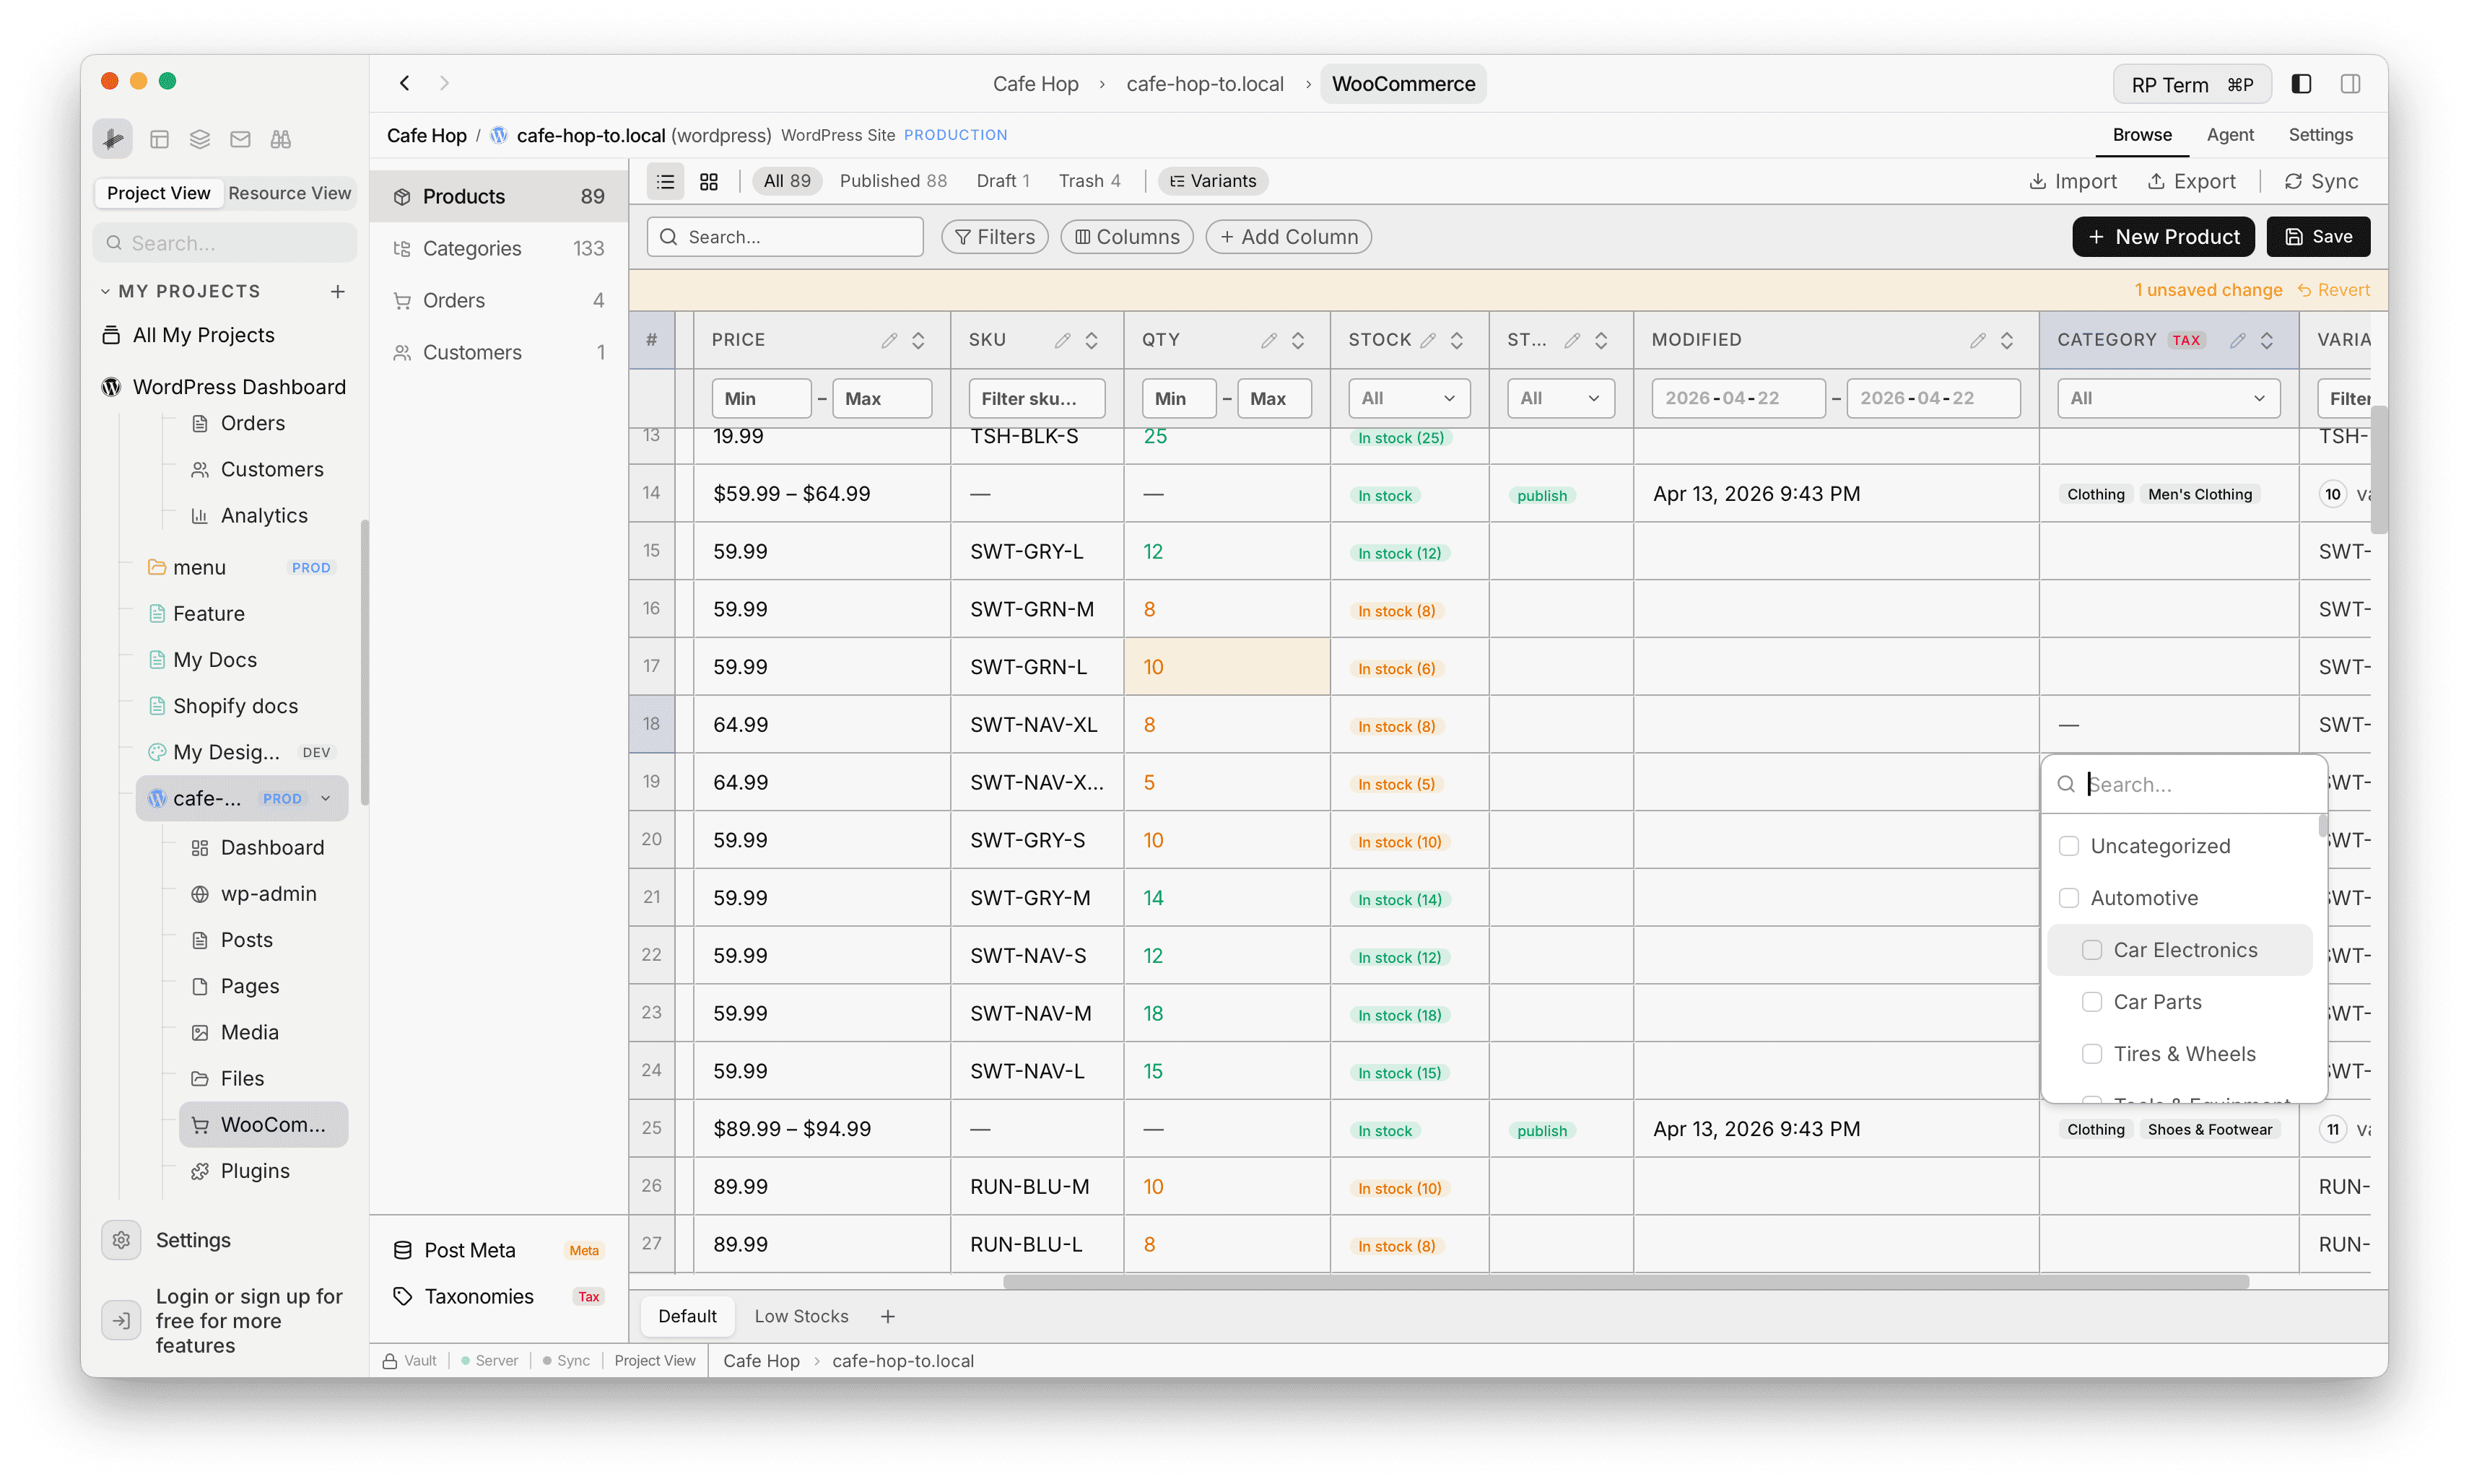
Inline editing
- Edit cells inline where the column allows it, then use Save when the table shows pending changes
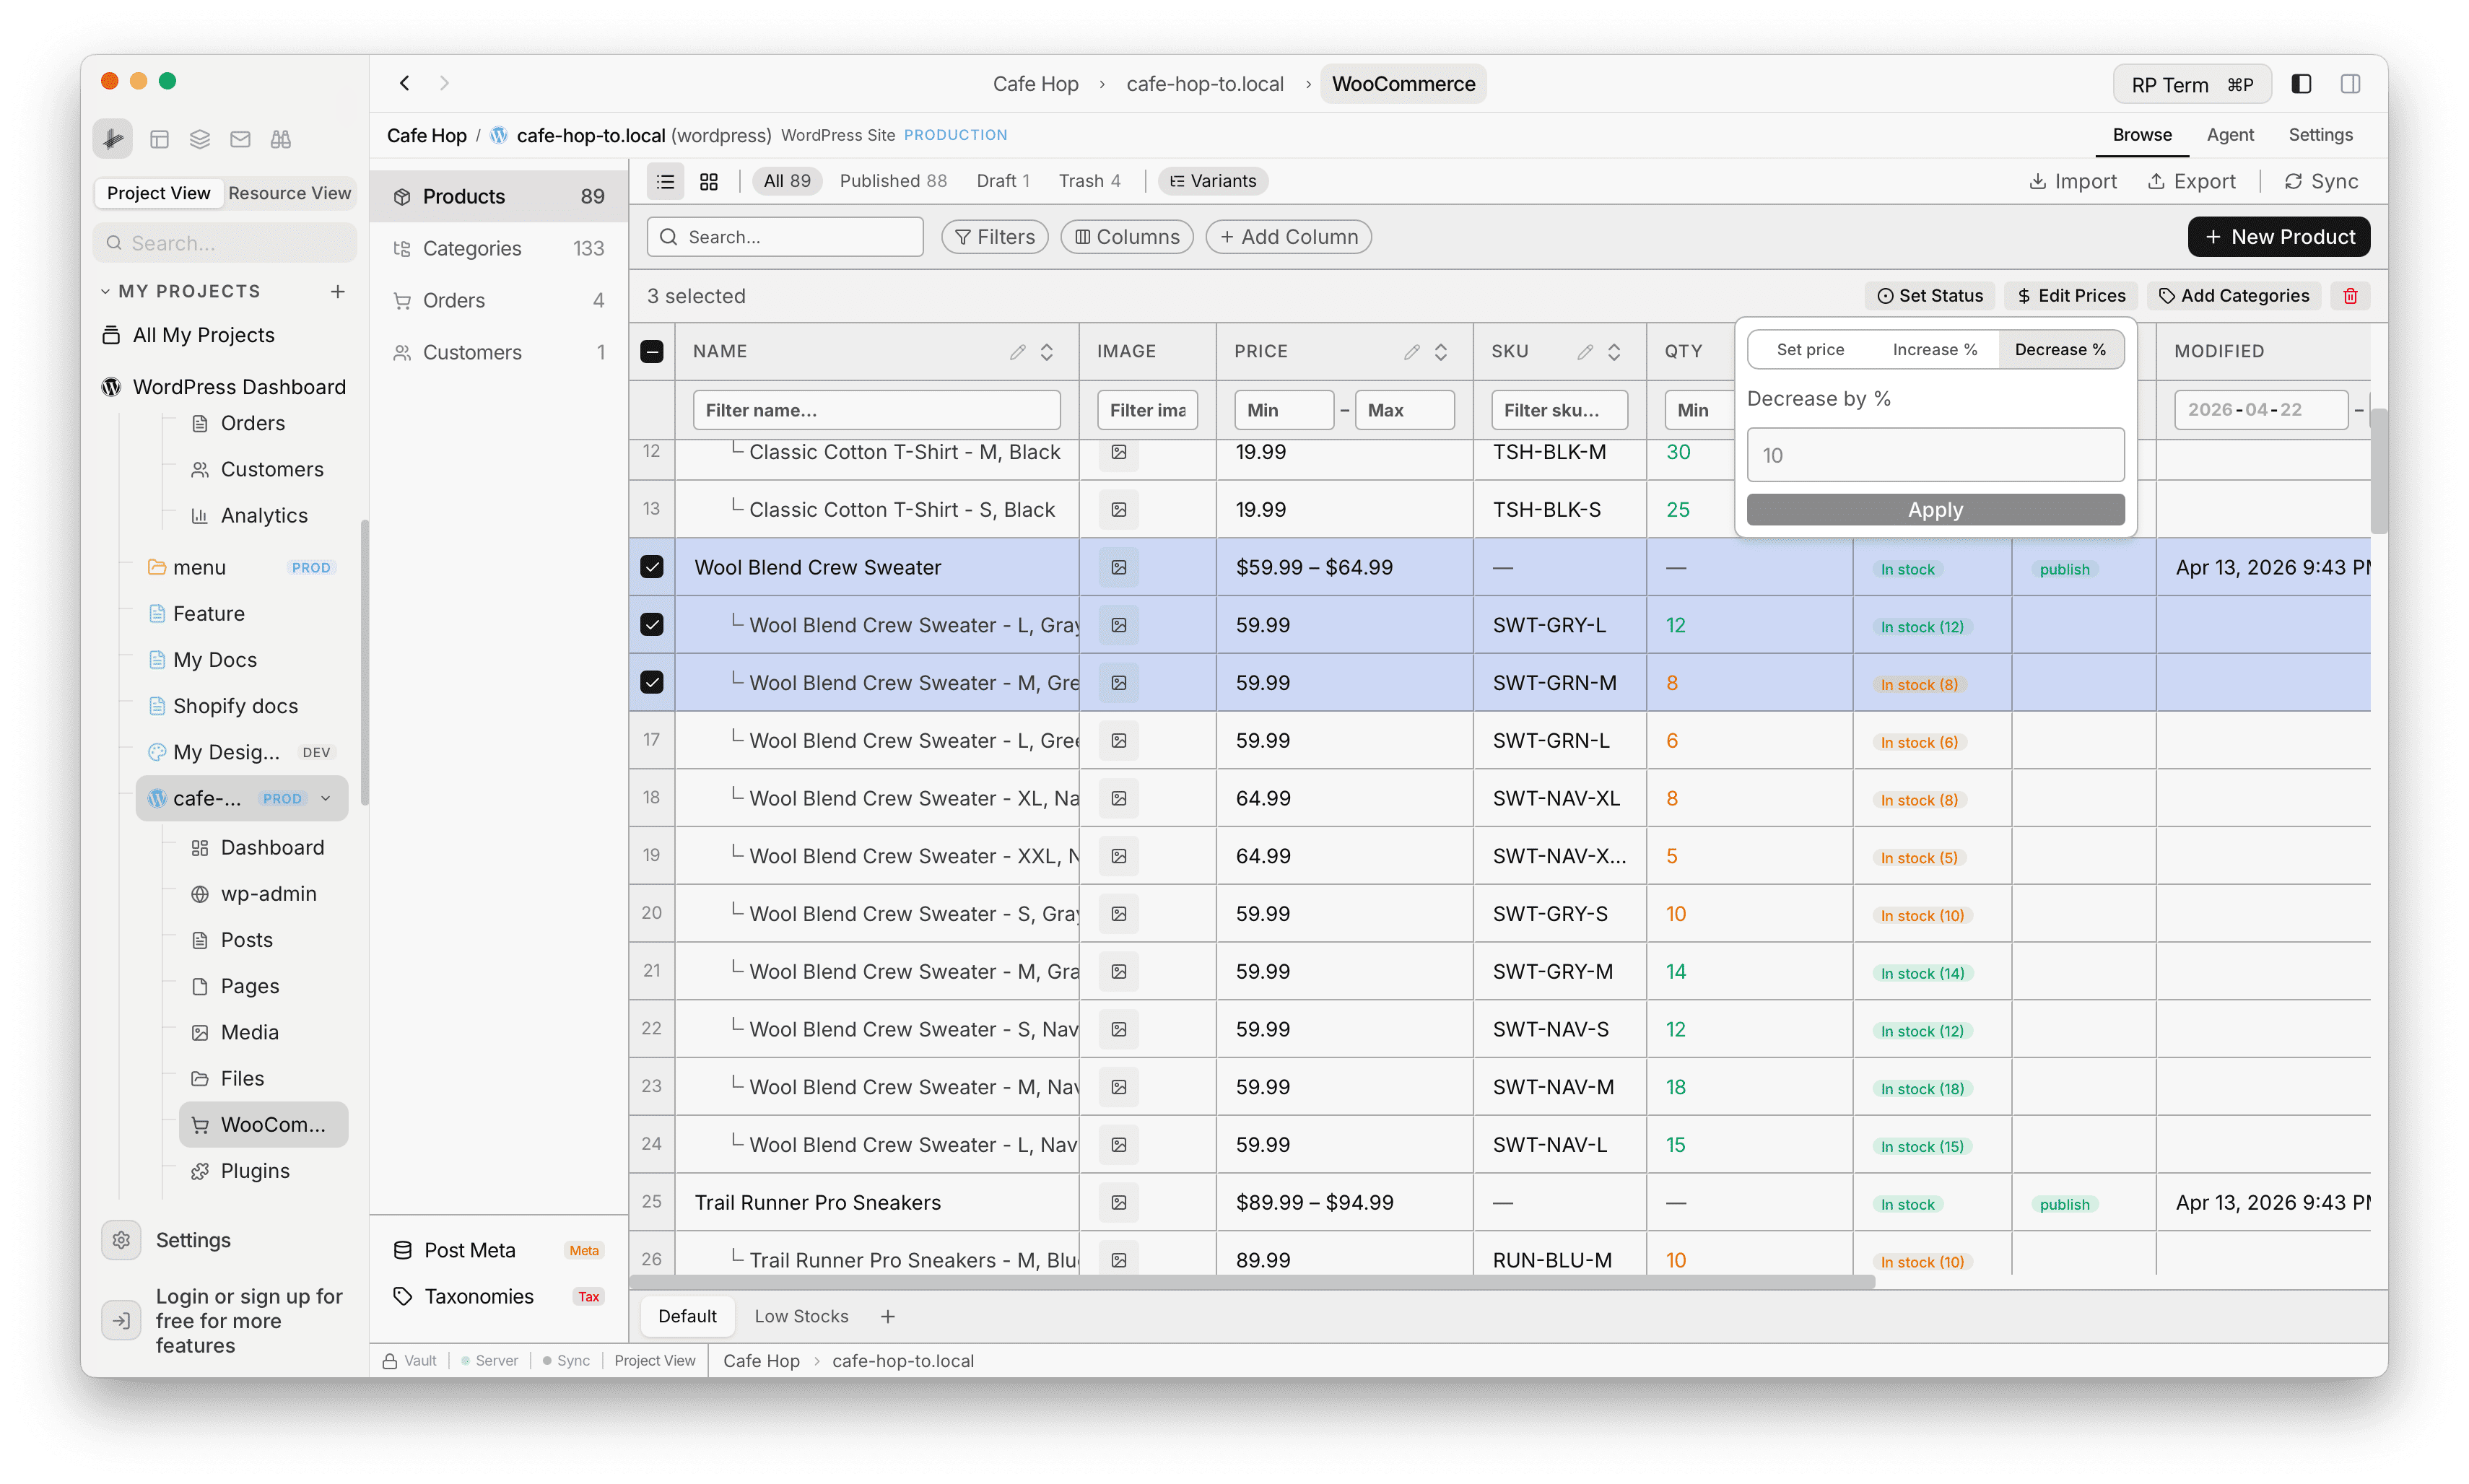
Bulk actions
- Select rows with checkboxes to run bulk actions such as Set status, Edit prices, and Add categories
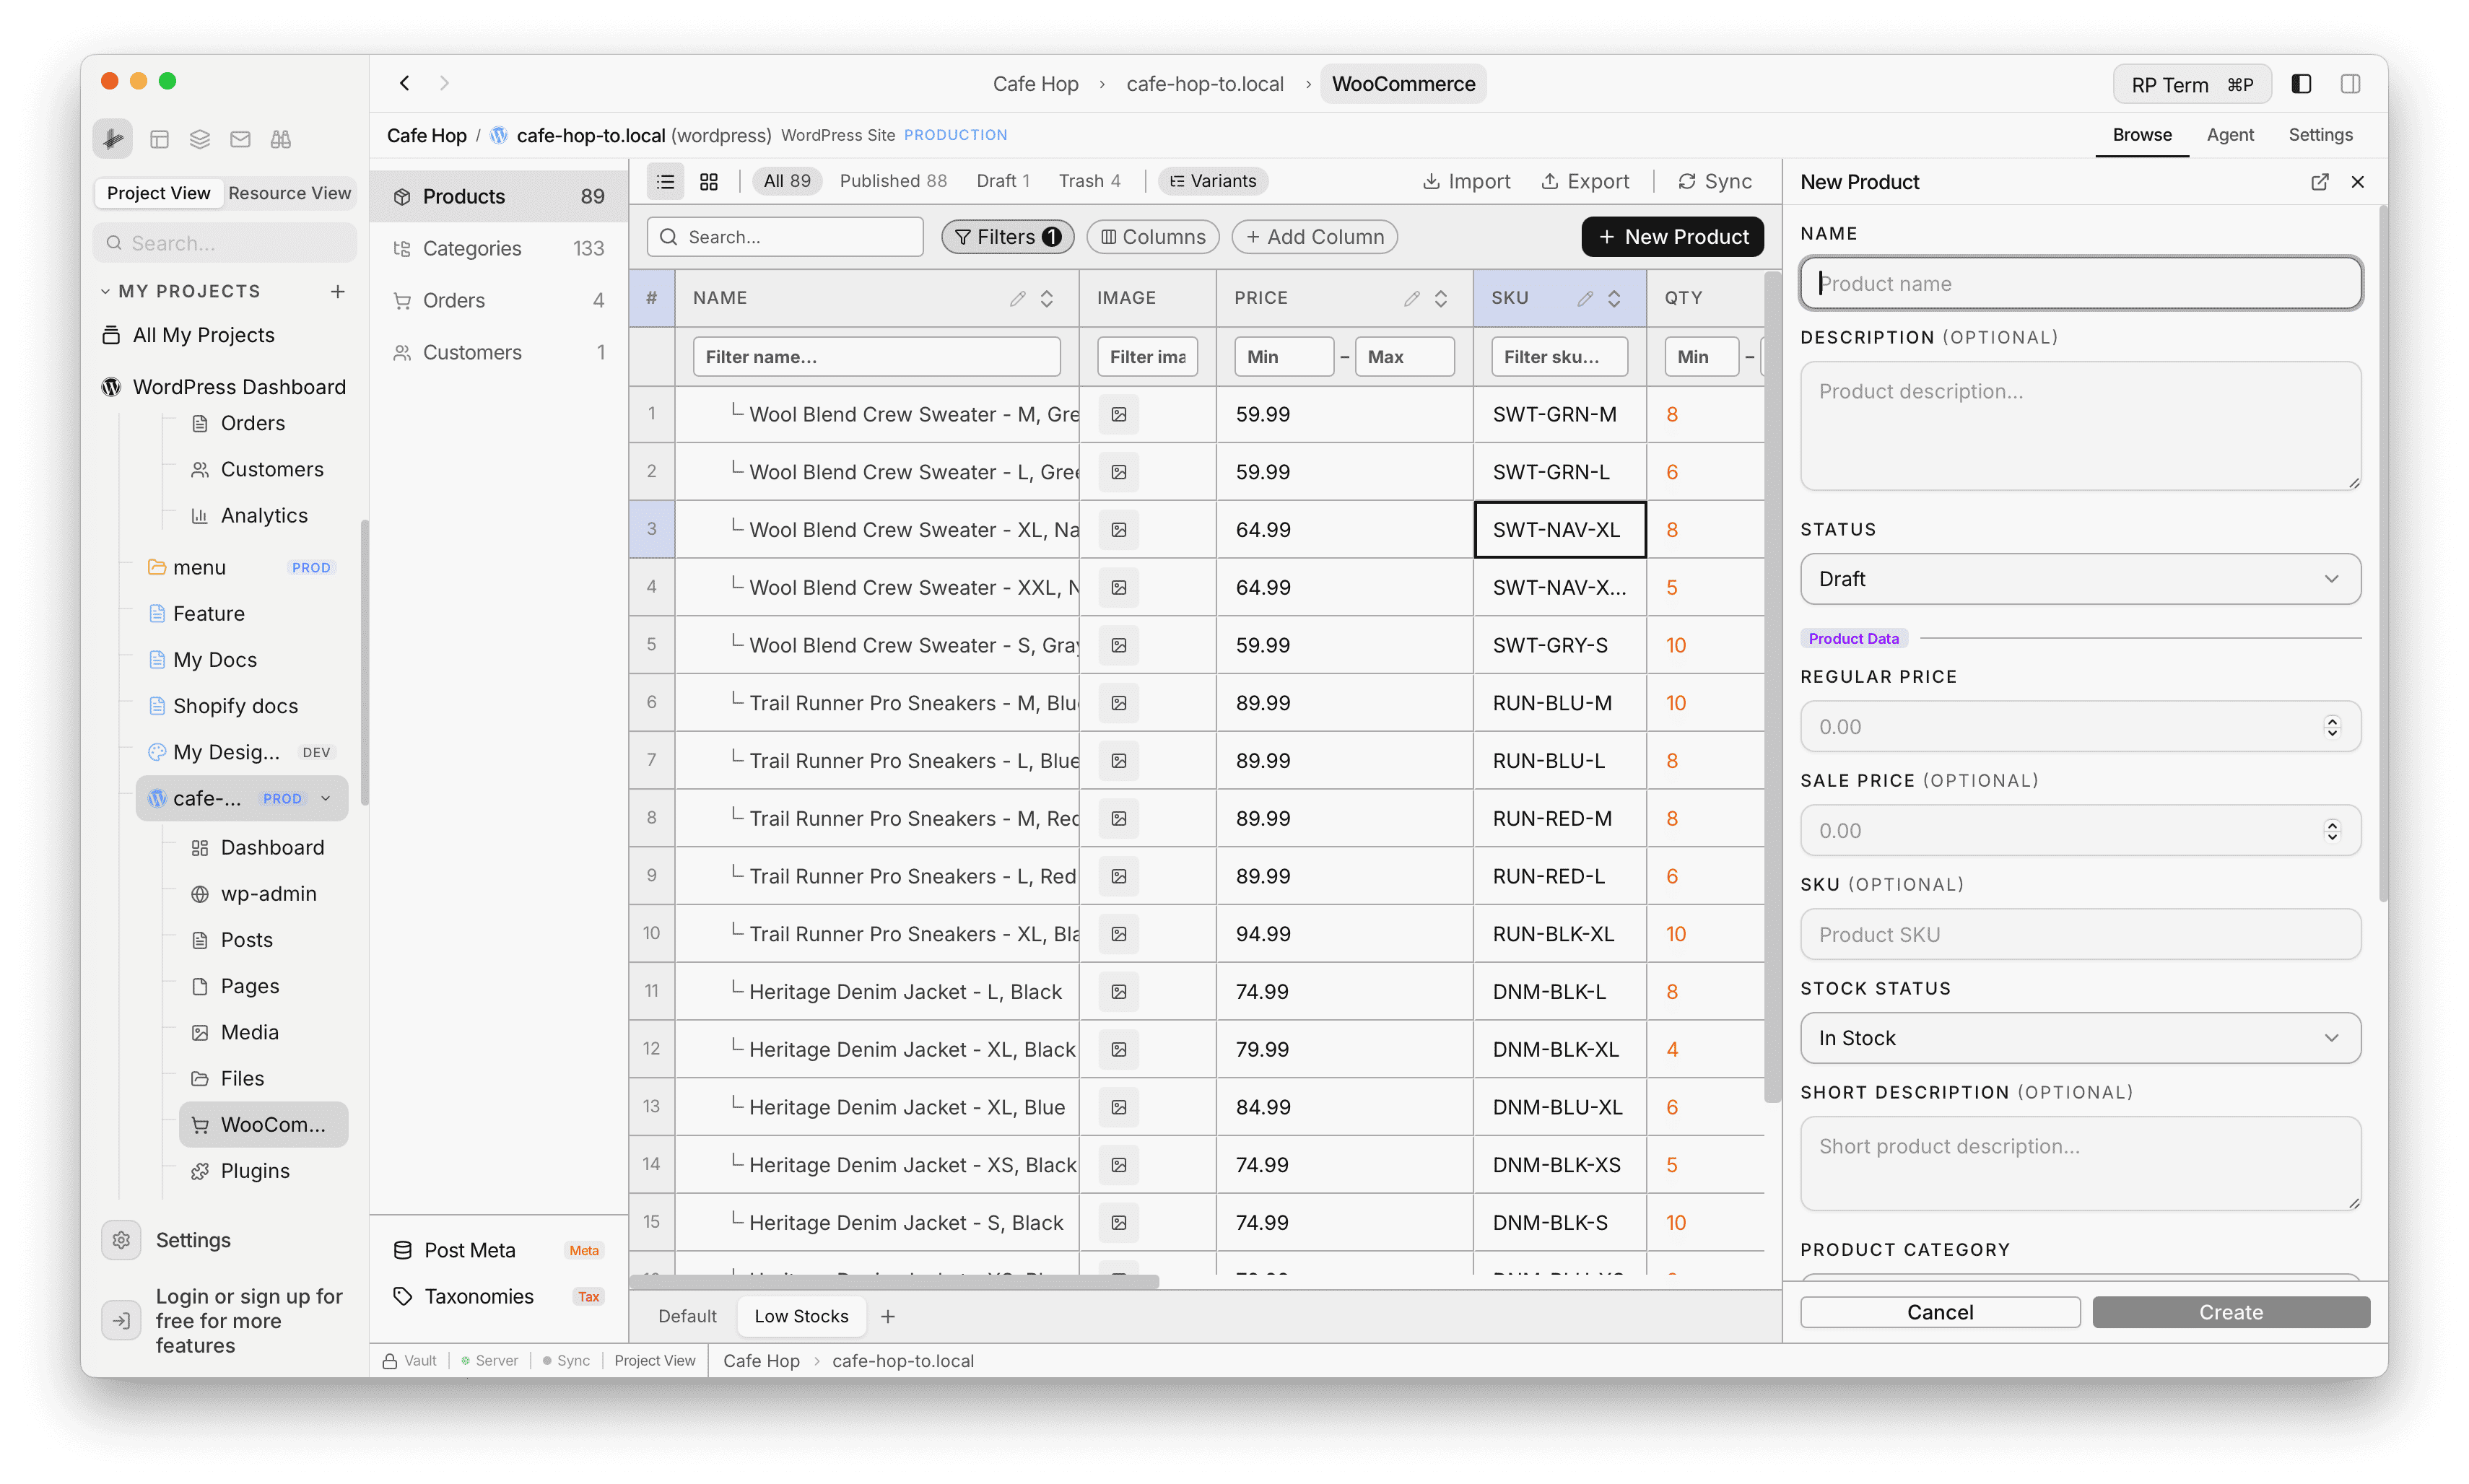
New product
Use New product to open the create flow in a side panel (title, catalog fields, and actions match the in-app form).
Post Meta and Taxonomies
Below the main product workspace, Post Meta and Taxonomies panels expose extra product metadata and taxonomy tools for power users.
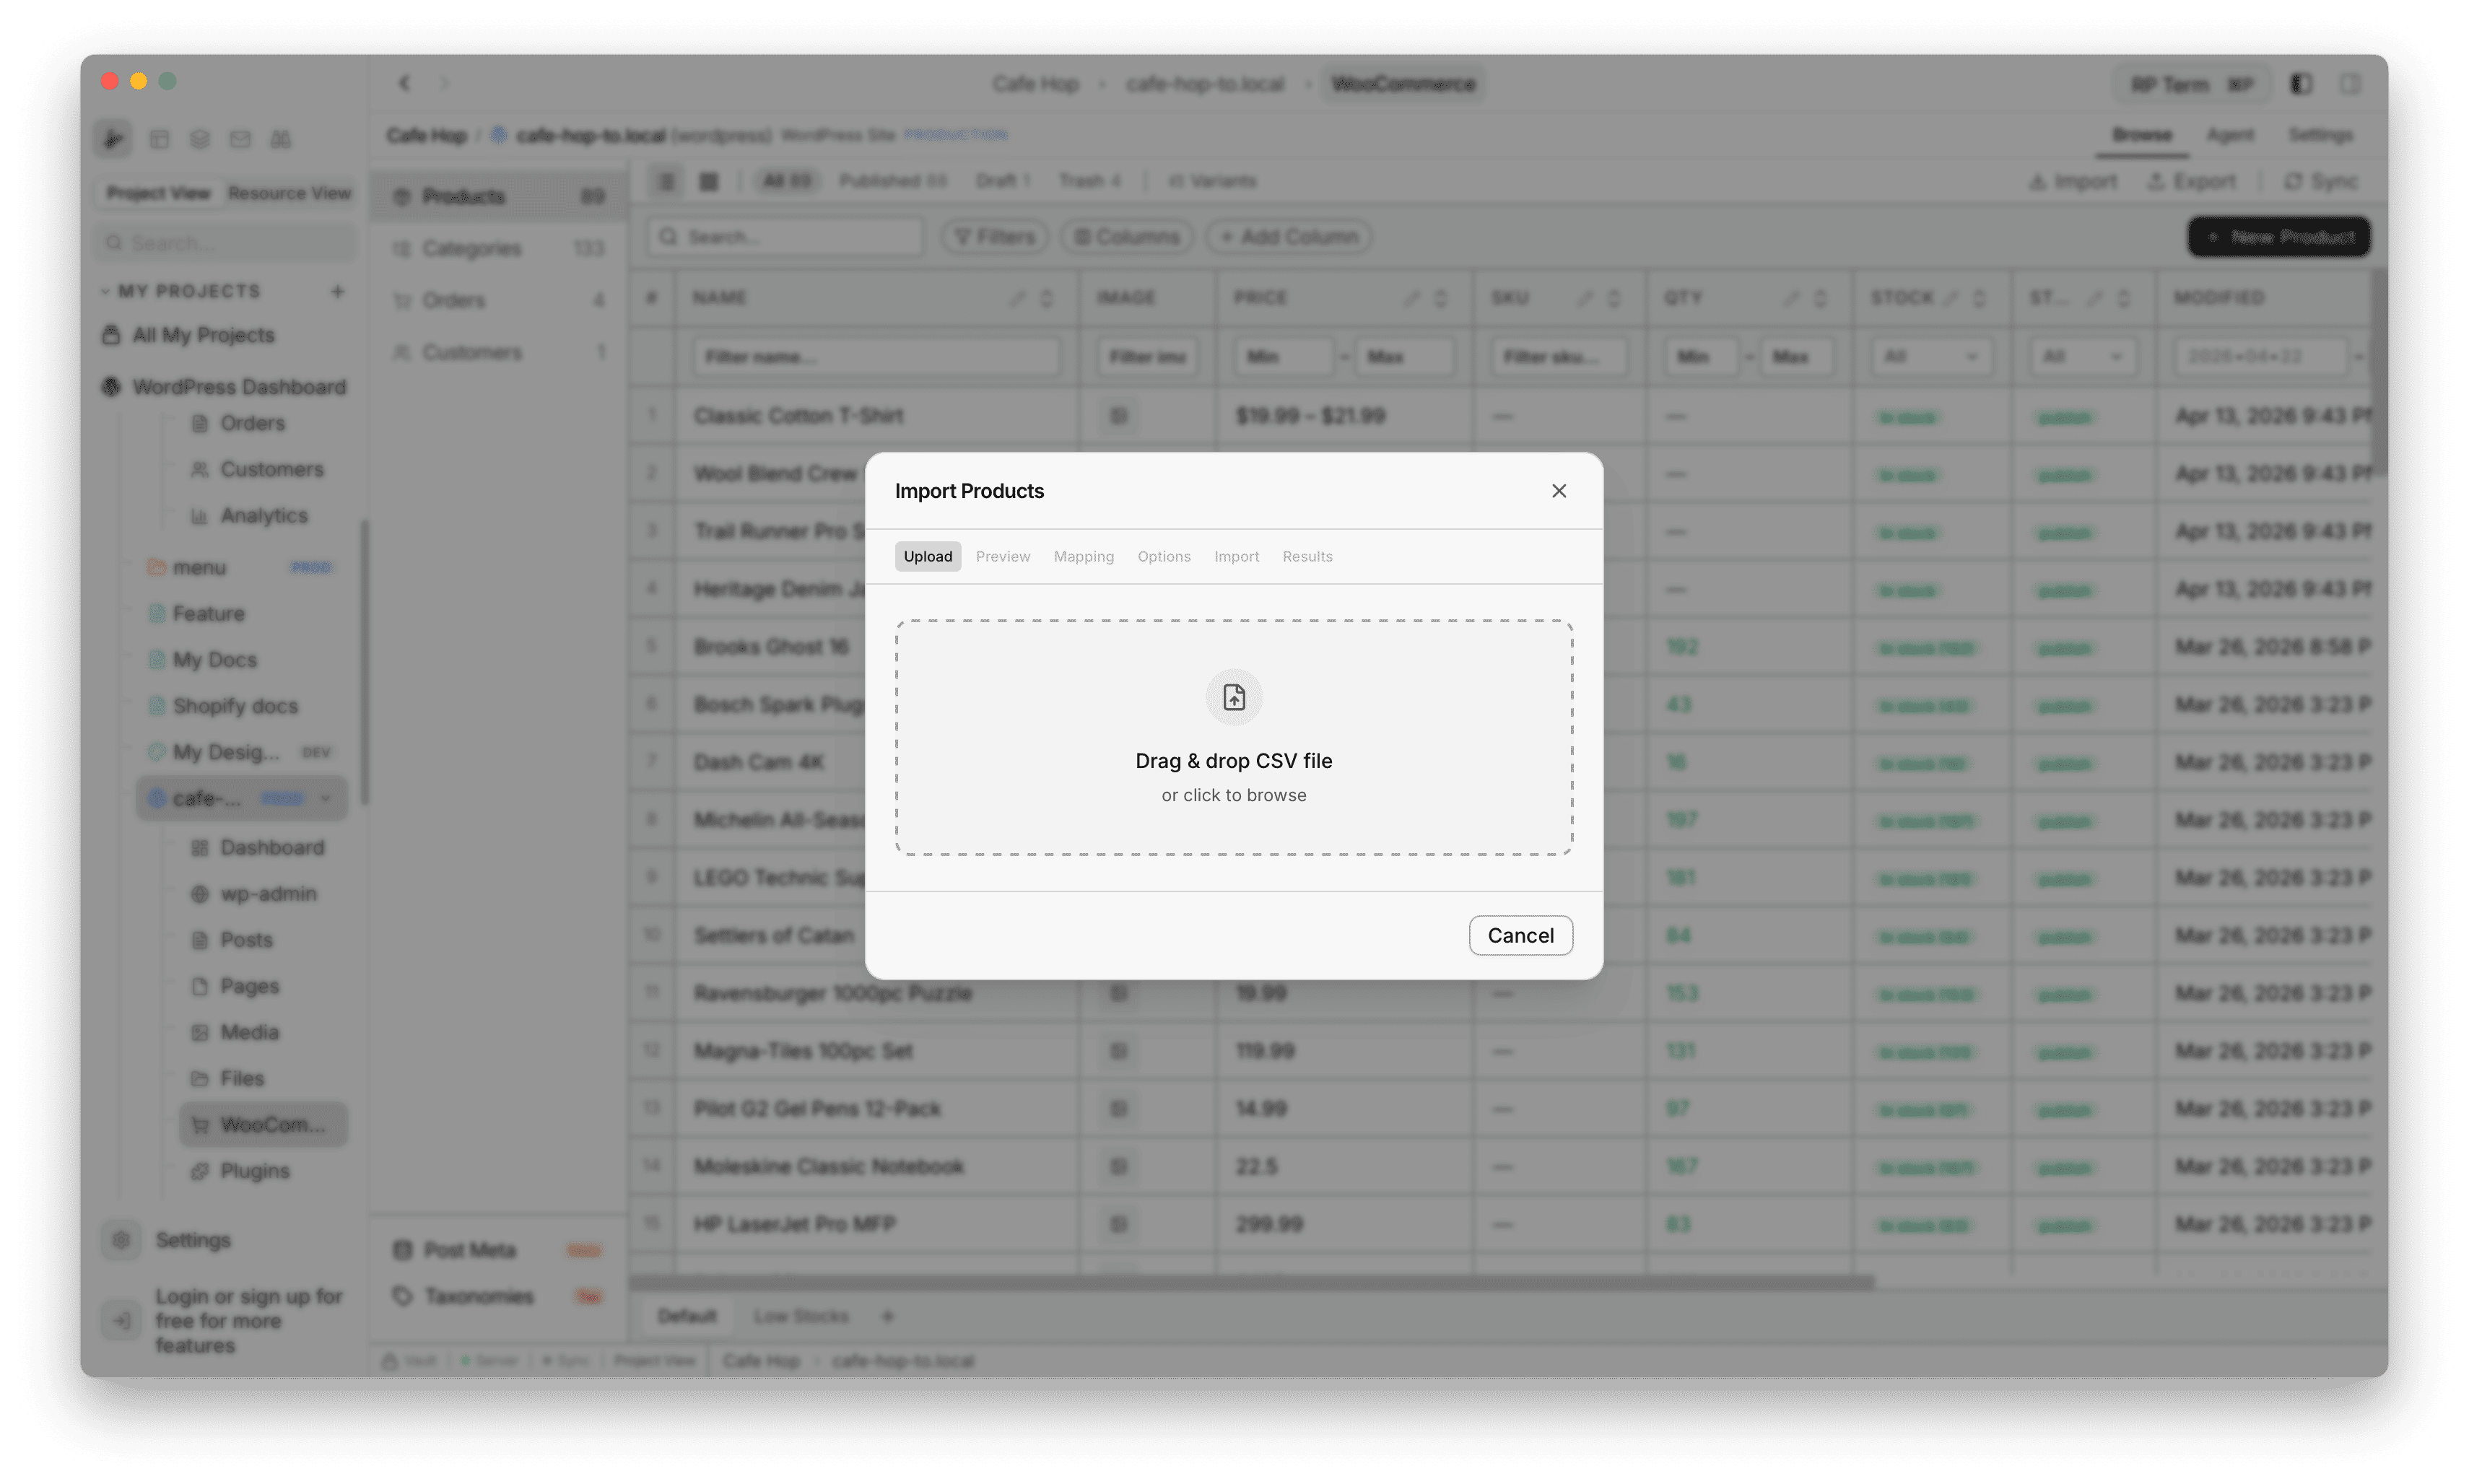
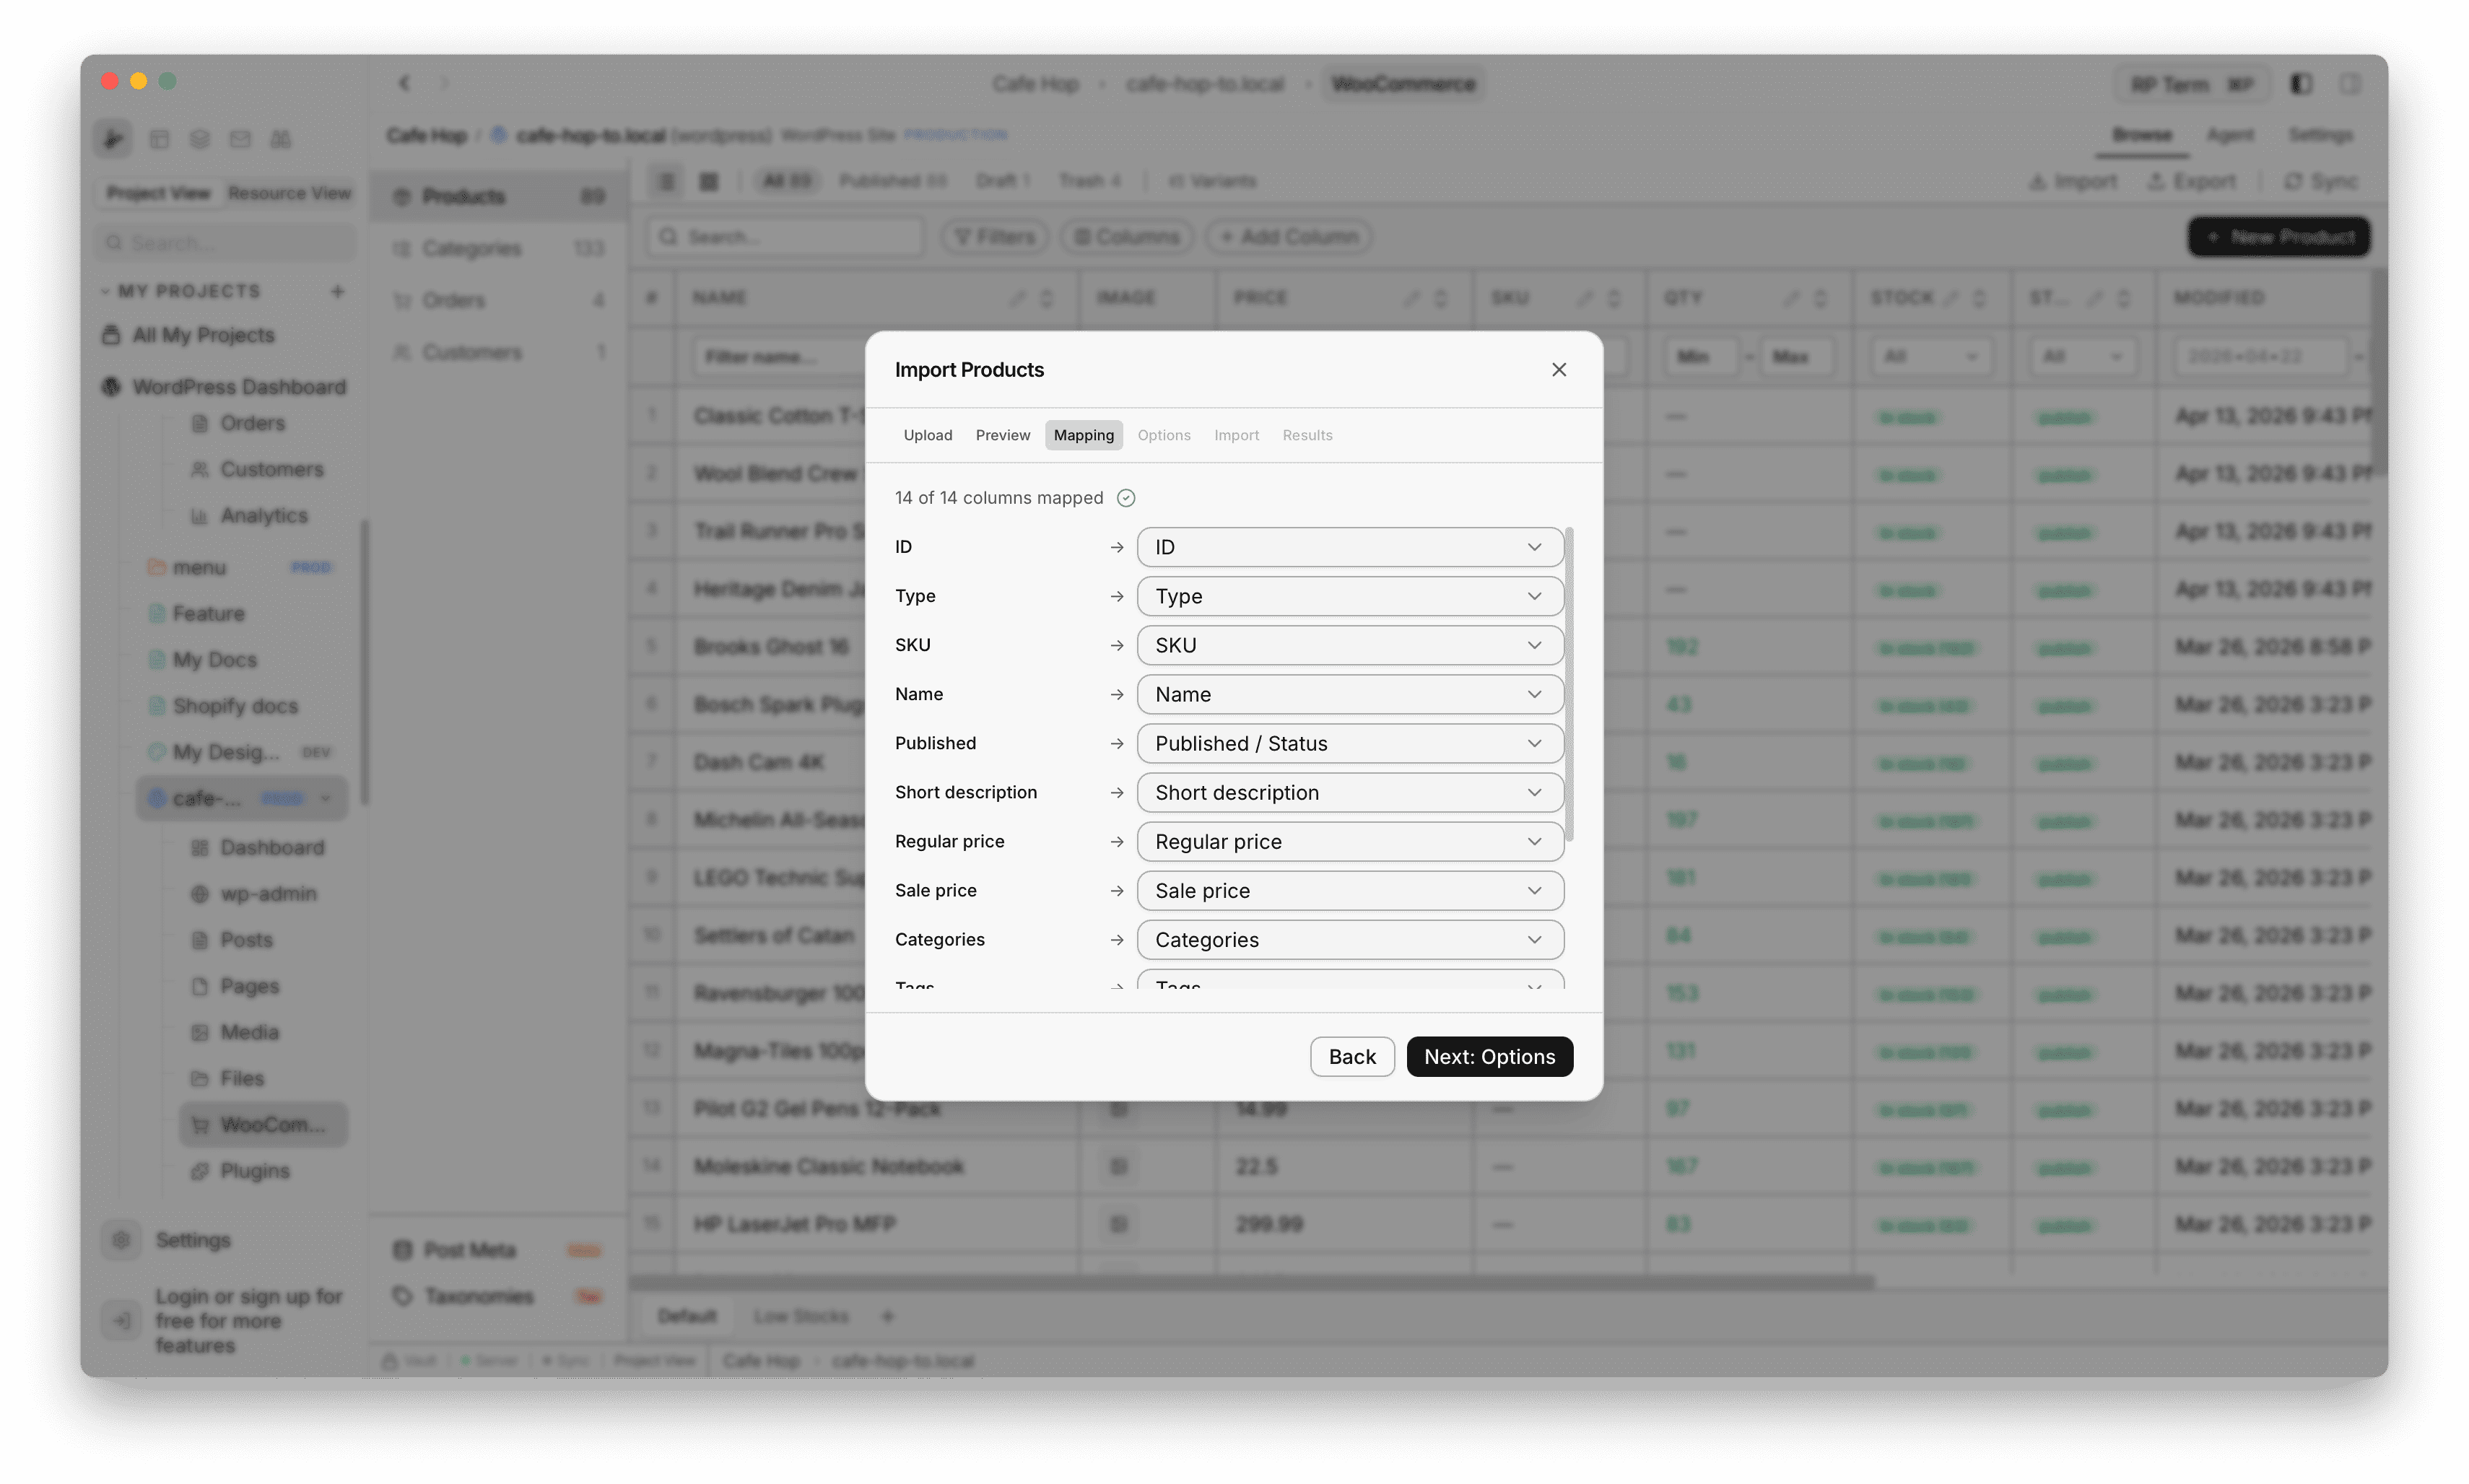
Import products
Import opens Import Products with a step strip: Upload, Preview, Mapping, Options, Import, Results. The dialog title stays the same on every step. Each Step below is an h3 under this section, with the matching screenshot immediately after.
Step 1: Upload
- Drop a
.csvfile onto the dashed zone, or click the zone to pick a file from disk - Only Cancel appears in the footer until a valid file is loaded (then the flow advances to Preview automatically)
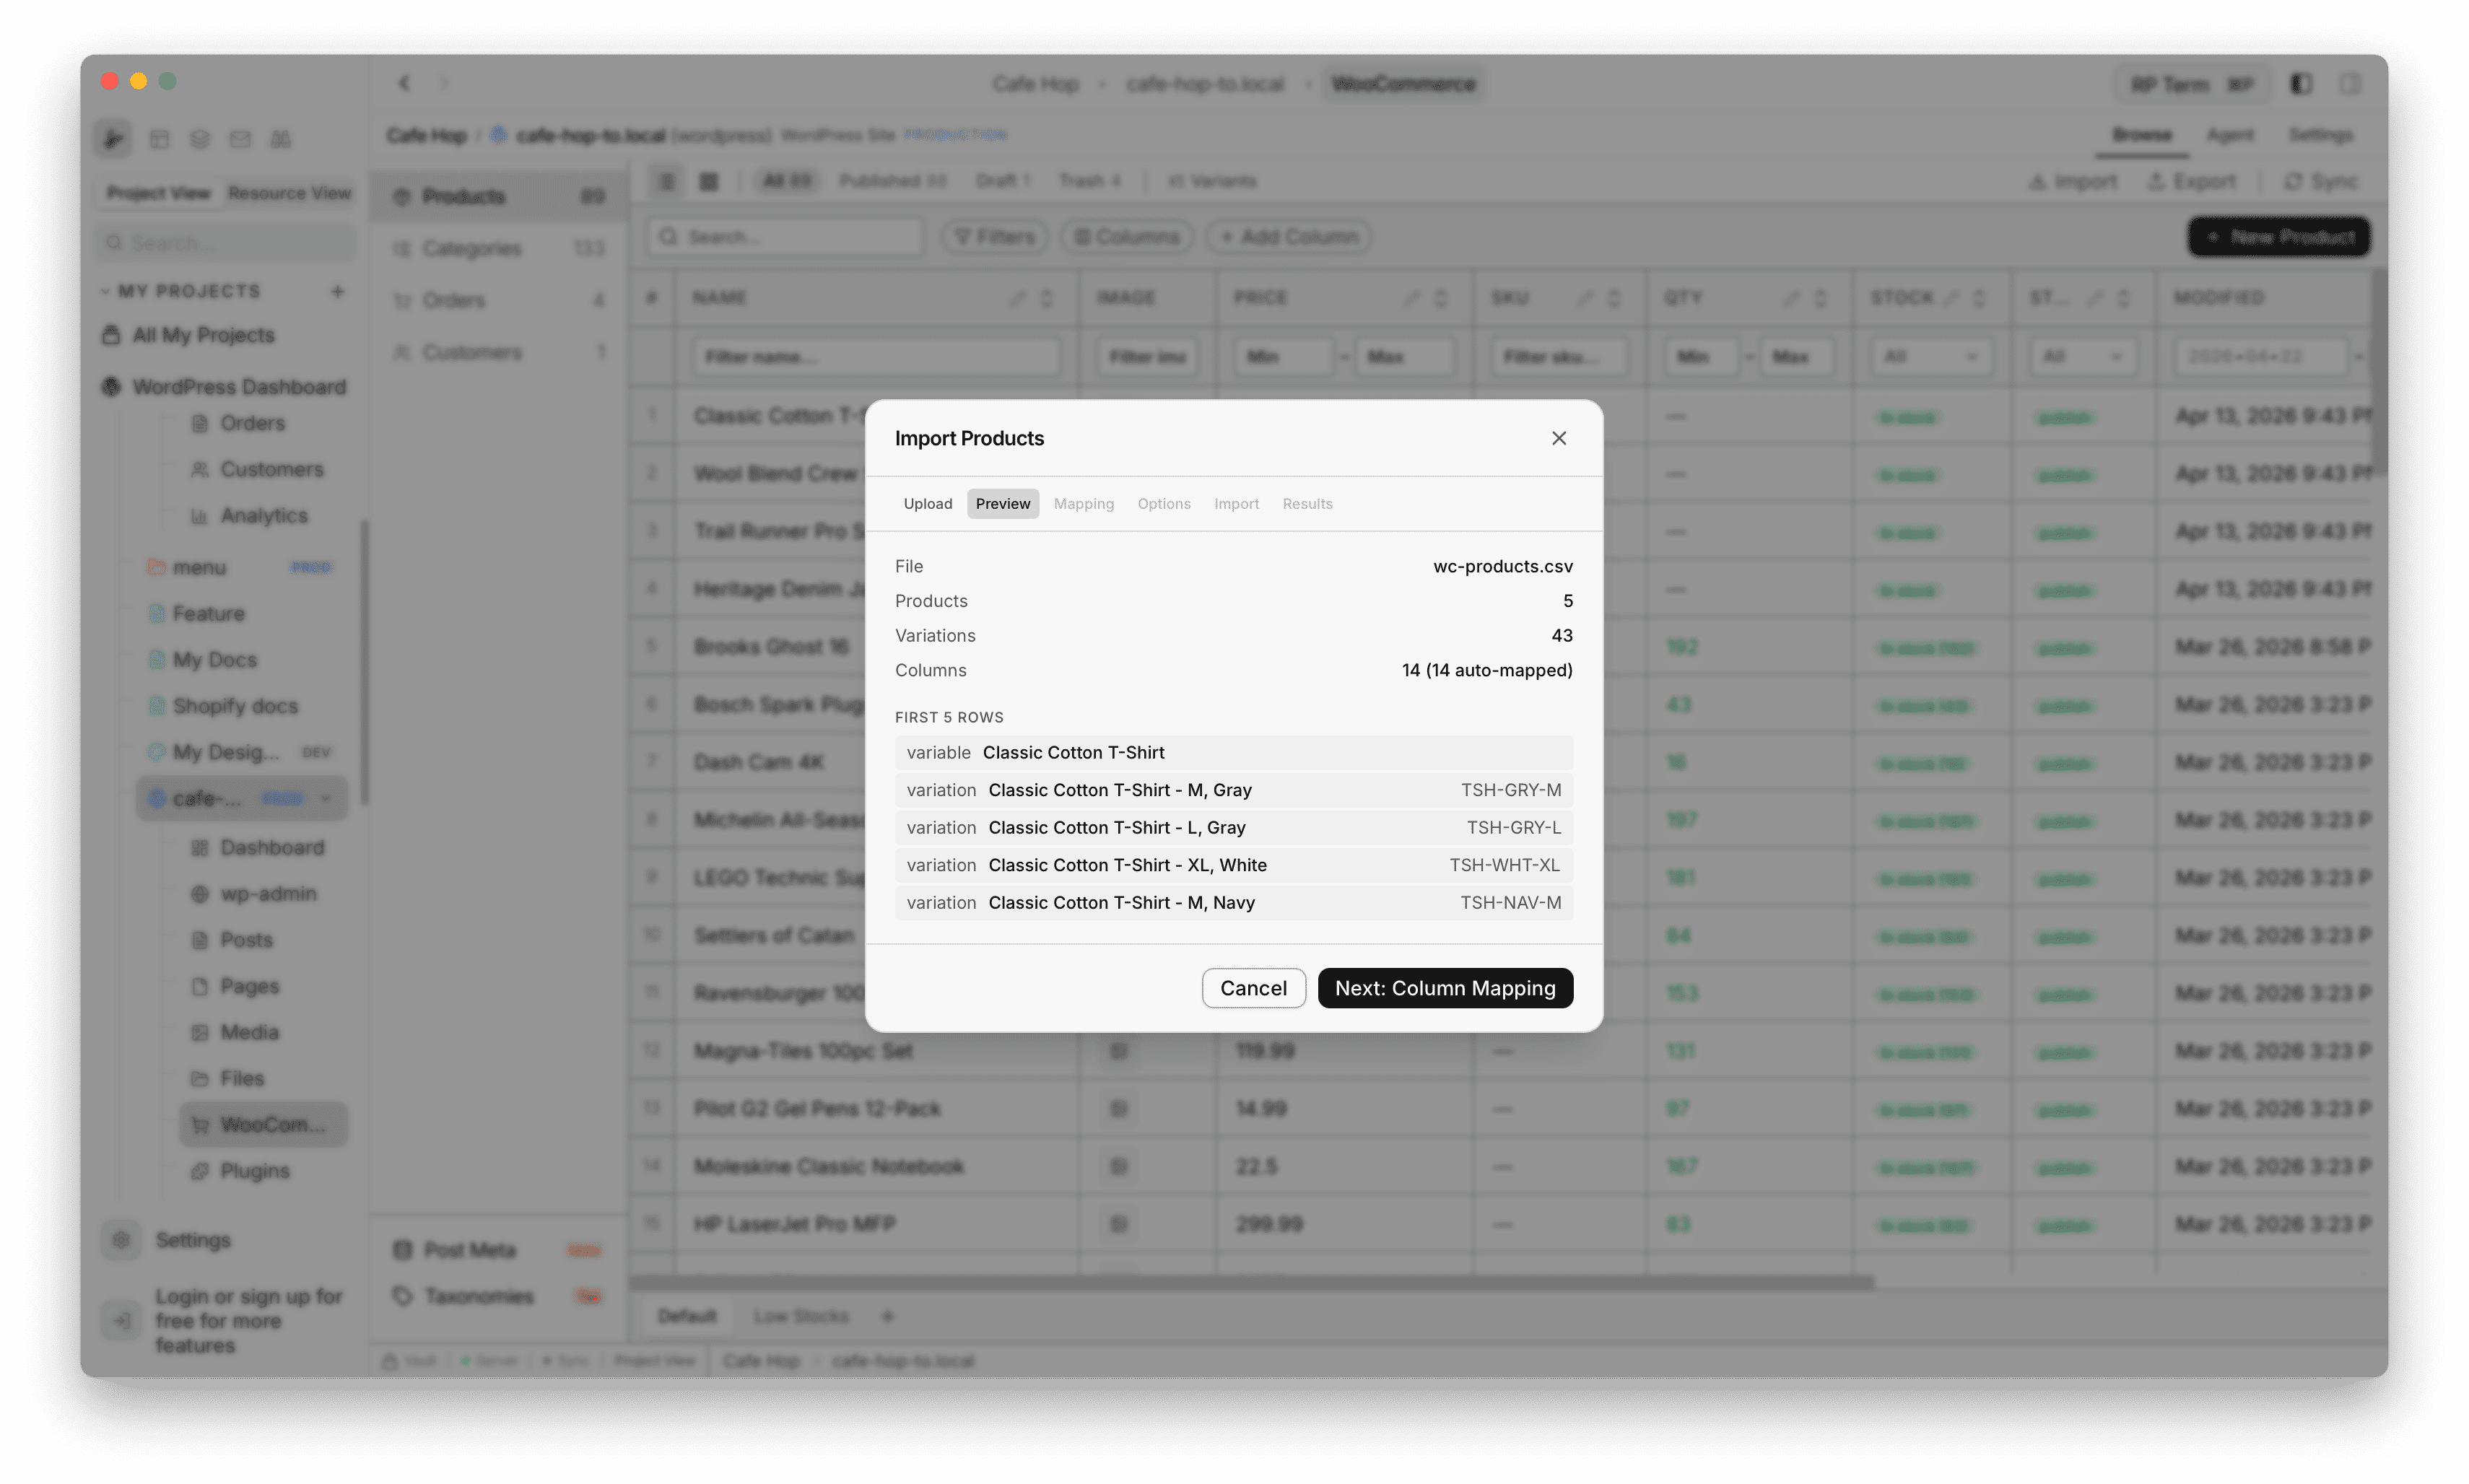
Step 2: Preview
- Read File, Products, Variations (if any), and Columns counts (including how many columns were auto-mapped)
- Scroll the sample rows at the bottom to sanity-check the file
- Cancel or Next: Column Mapping
Step 3: Mapping
- Each CSV column maps to a WooCommerce field (dropdown per row, or Skip for a column)
- Typical mappings include Type, SKU, Name, prices, Categories, Tags, and so on
- Back returns to Preview, Next: Options continues
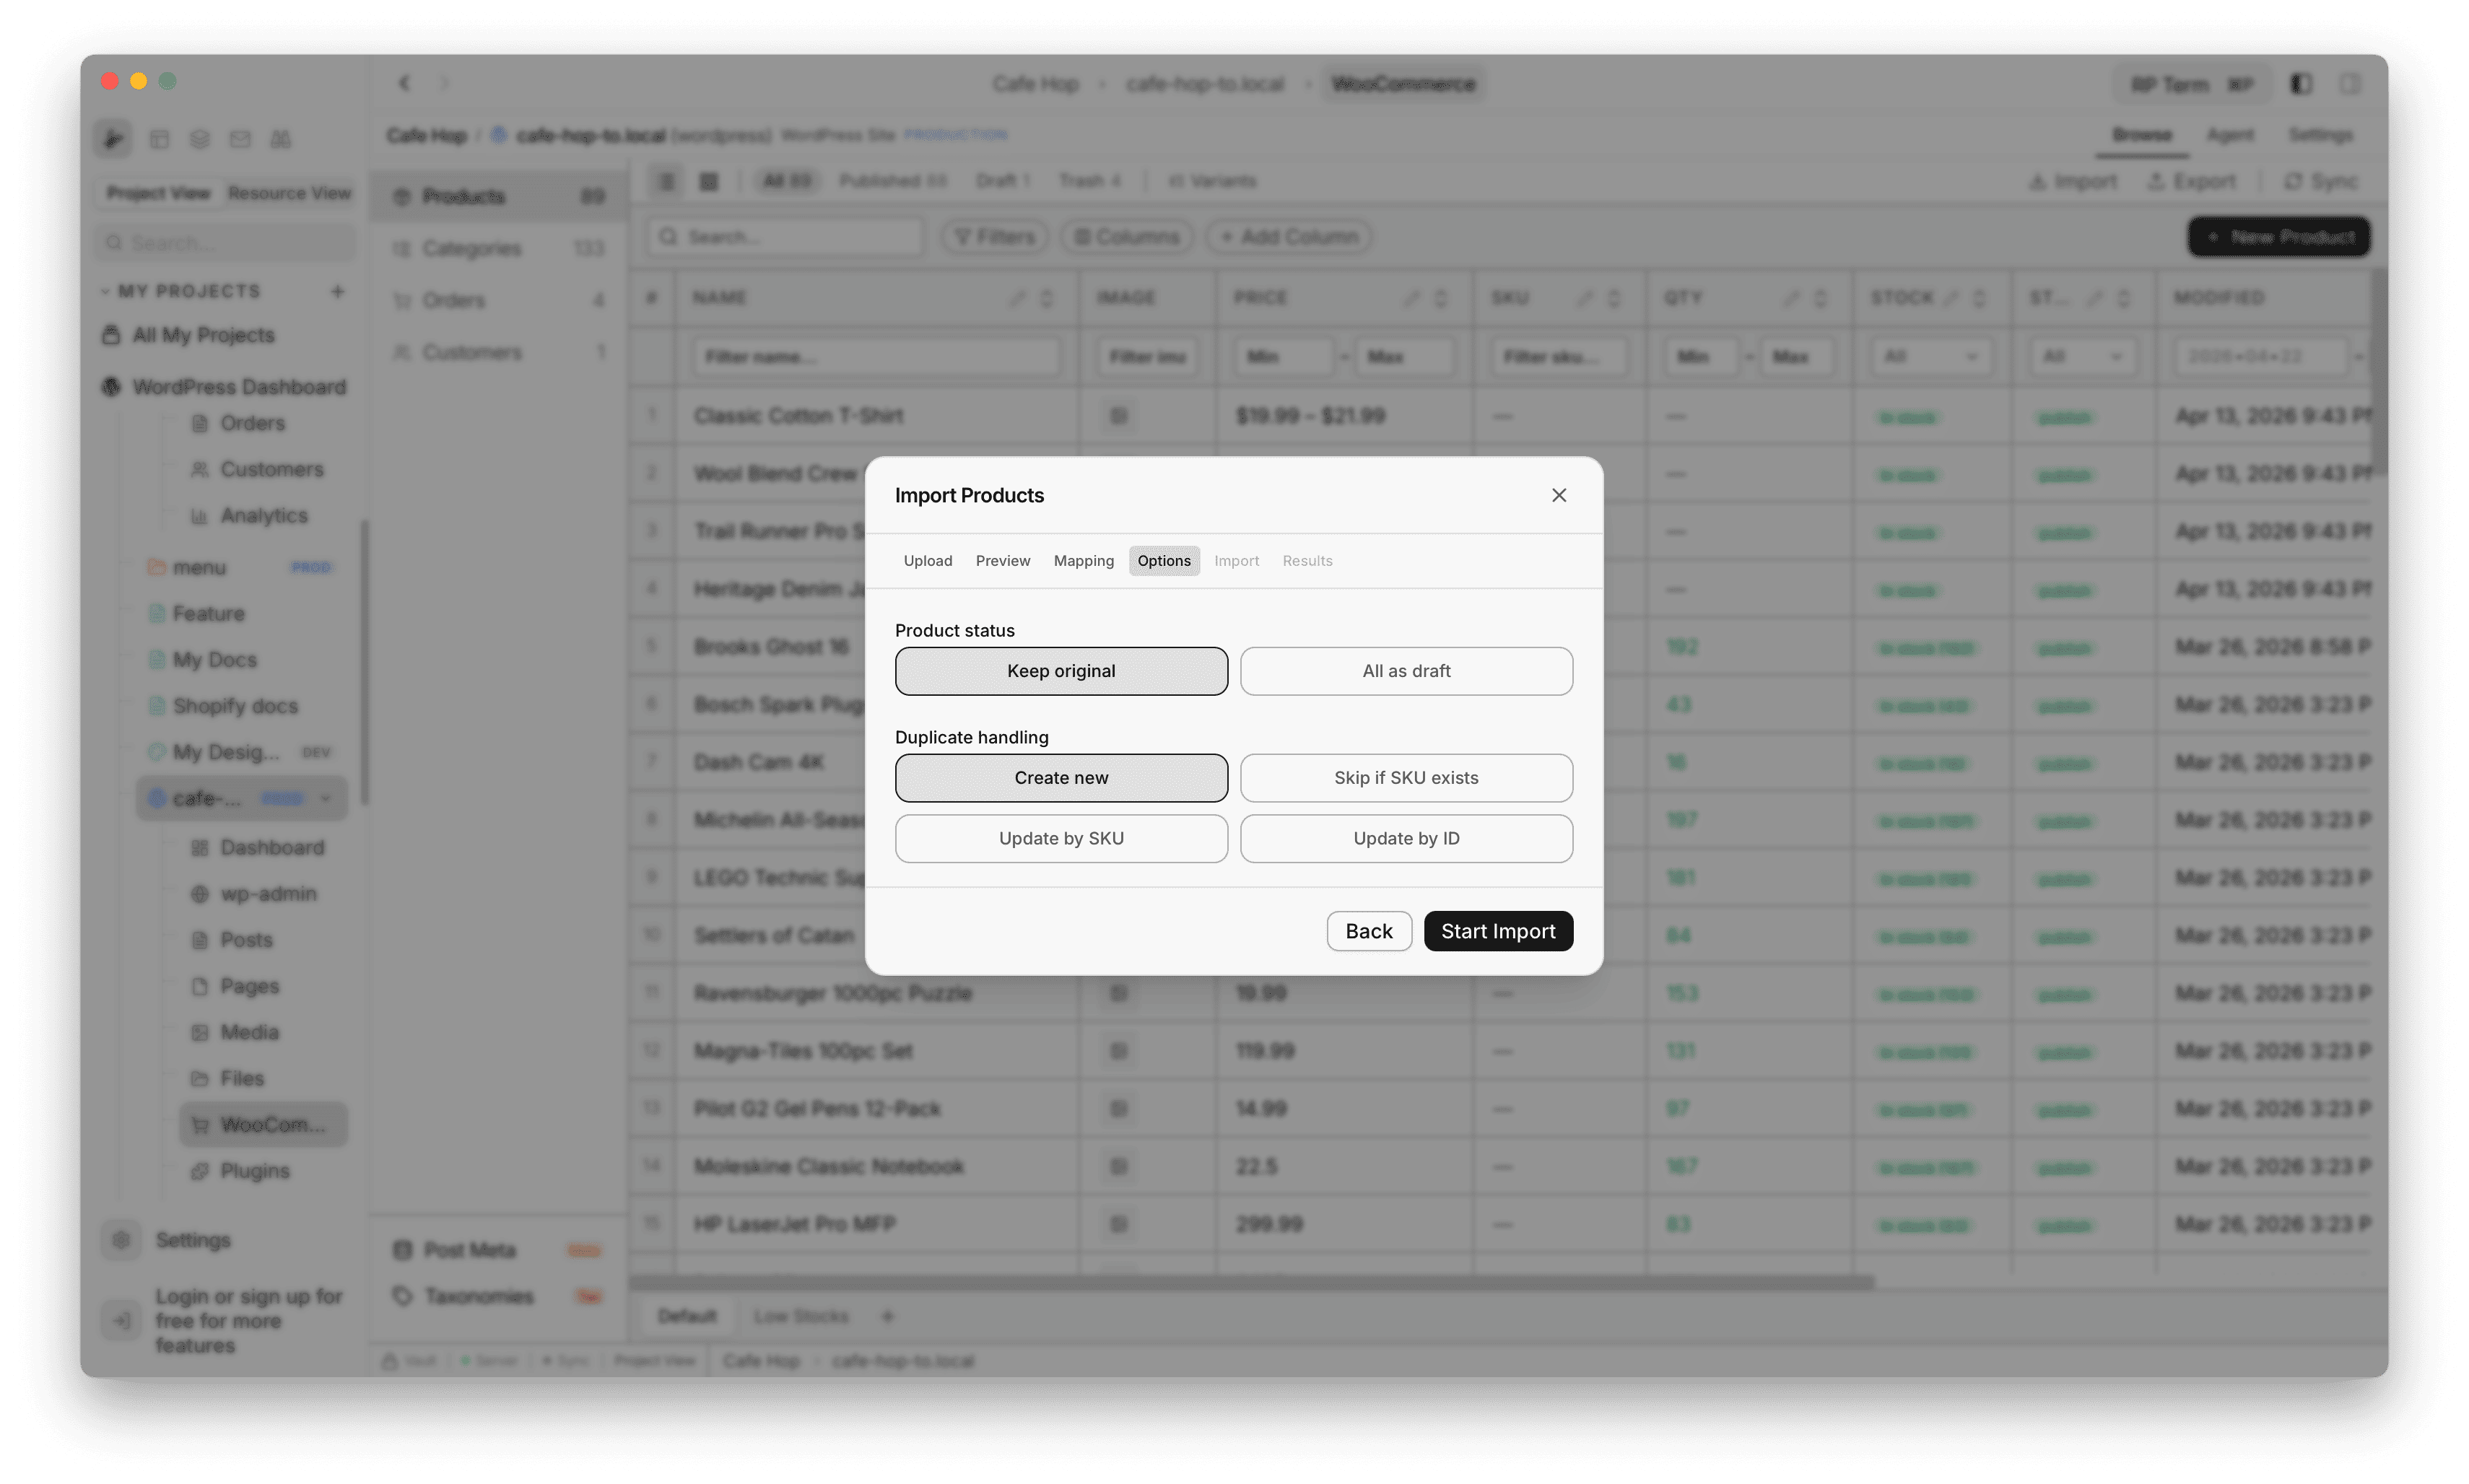
Step 4: Options
- Product status: Keep original (from the file) or All as draft
- Duplicate handling (one choice):
- Create new
- Skip if SKU exists
- Update by SKU
- Update by ID
- Back returns to Mapping, Start Import begins the write phase
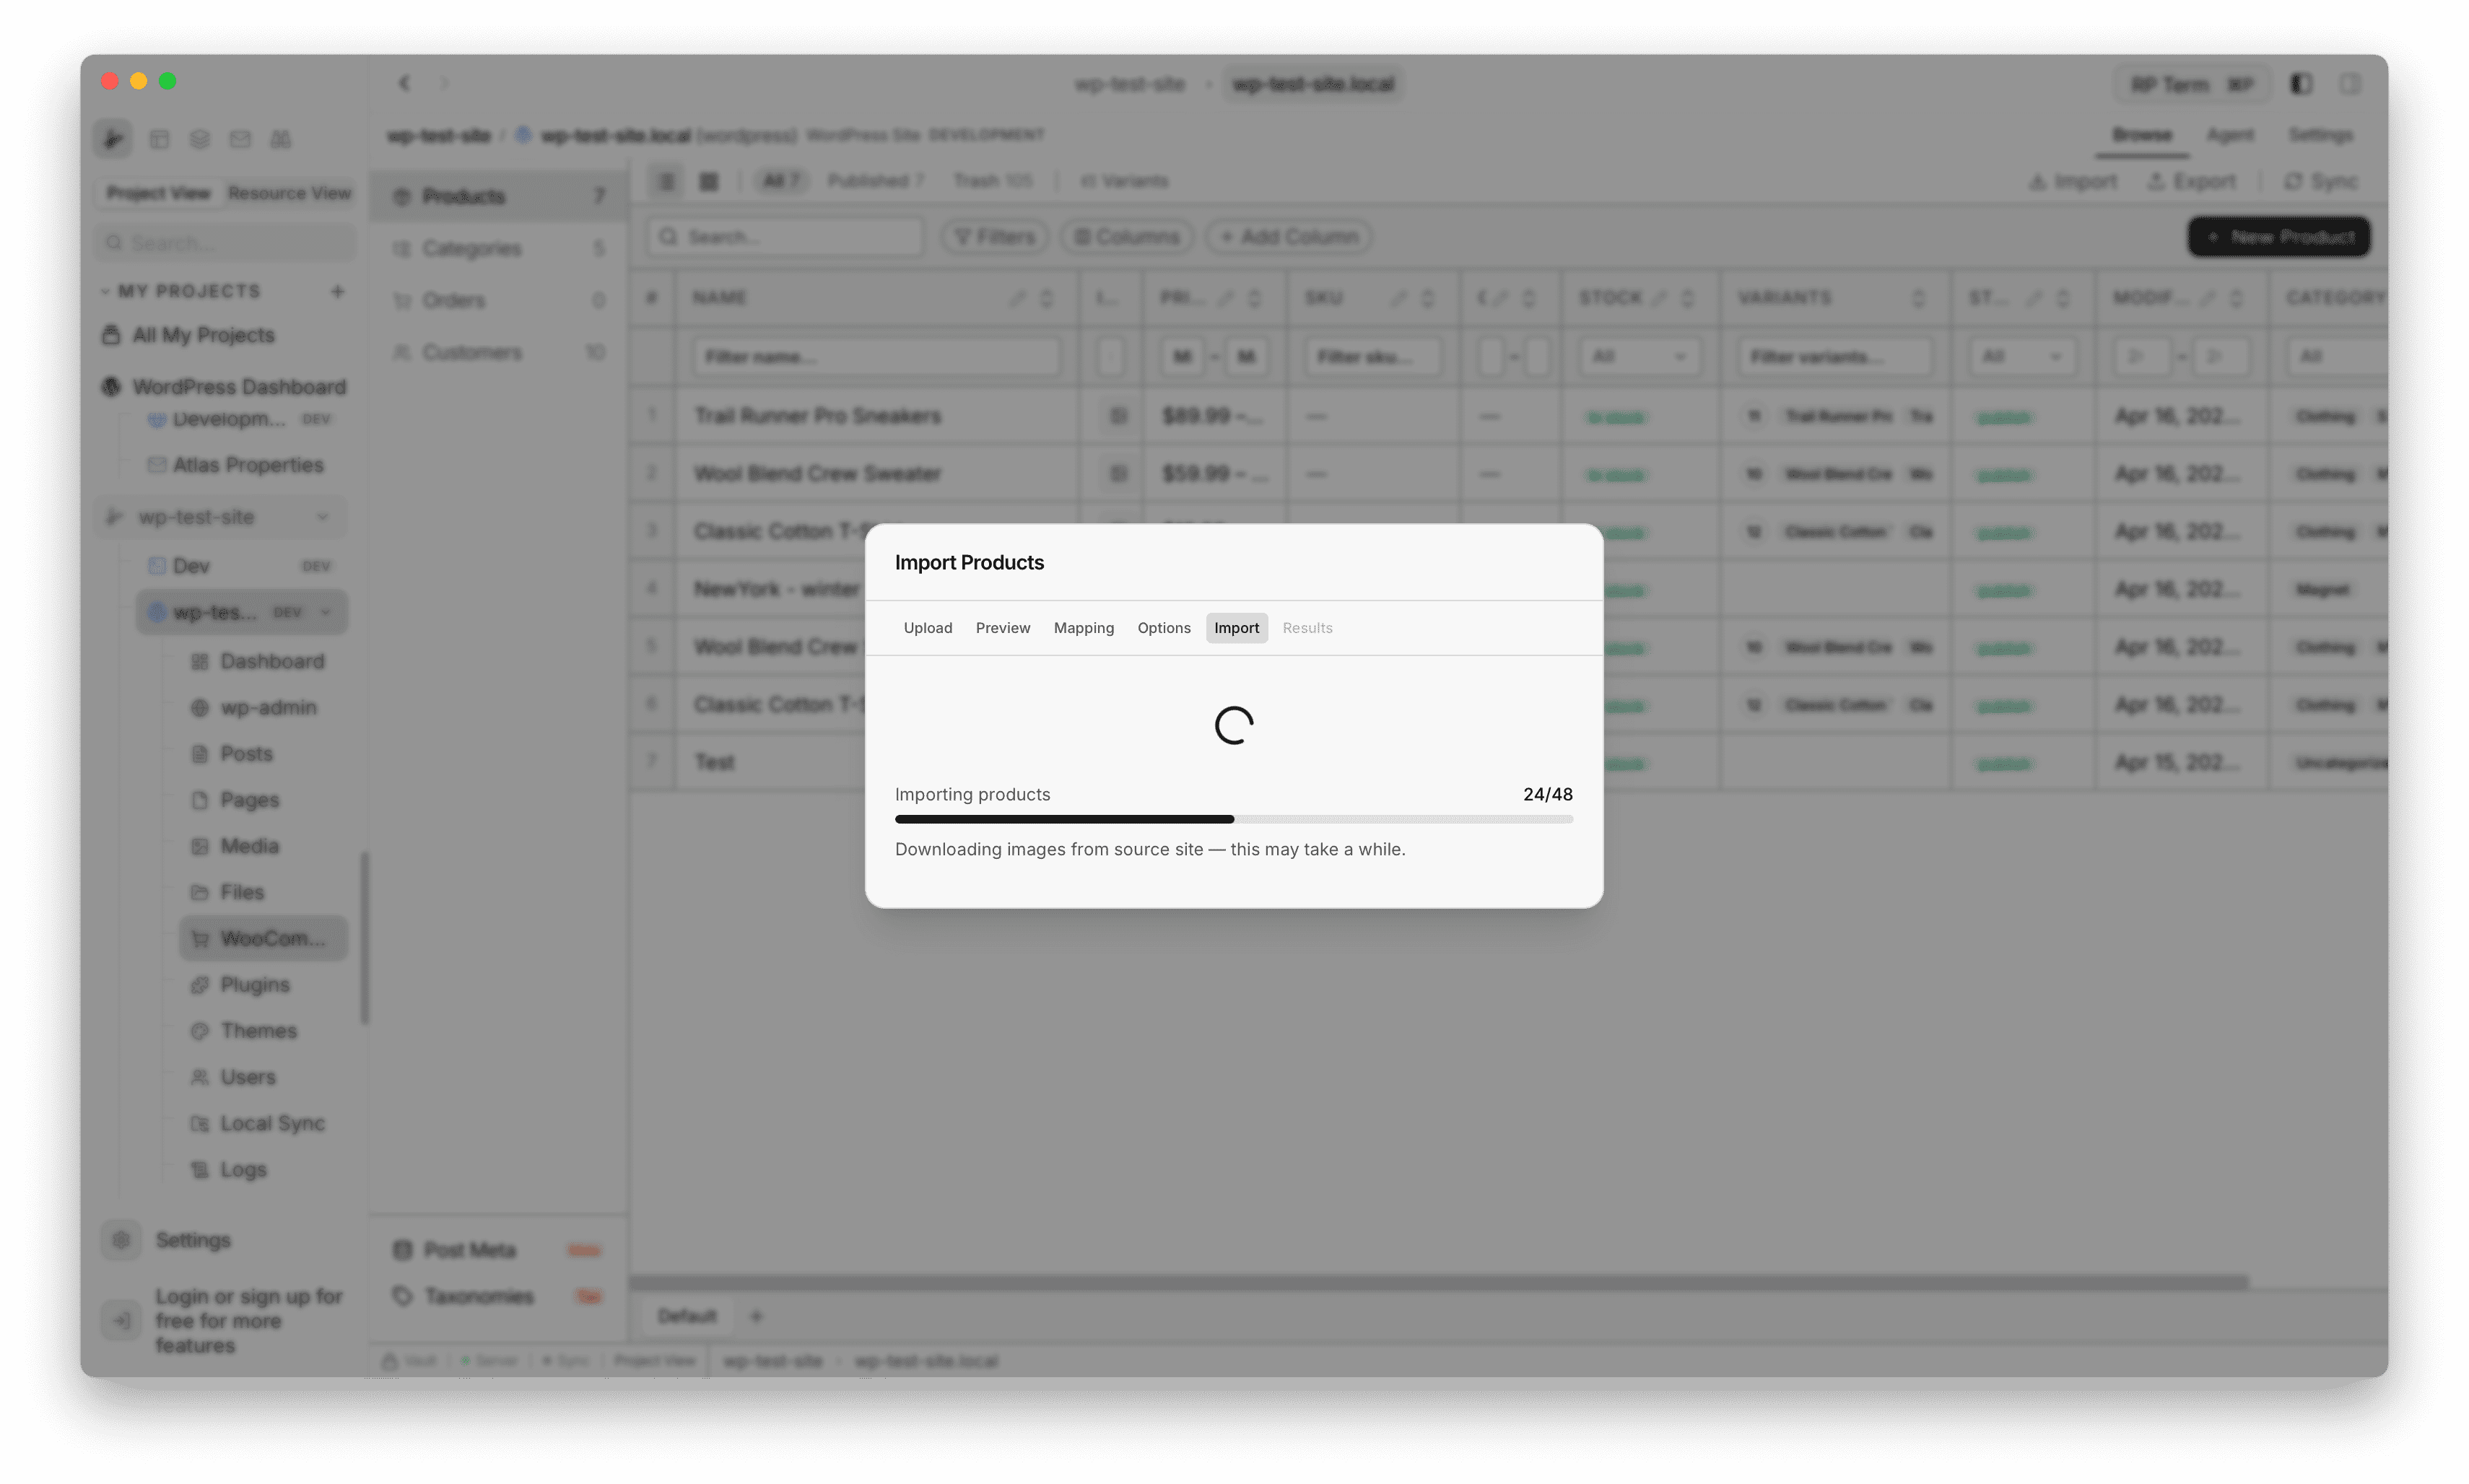
Step 5: Import
- Progress UI runs while products (and images when needed) are created or updated on the site
- The footer is hidden so you cannot close mid-run by accident (backdrop click is disabled during this step)
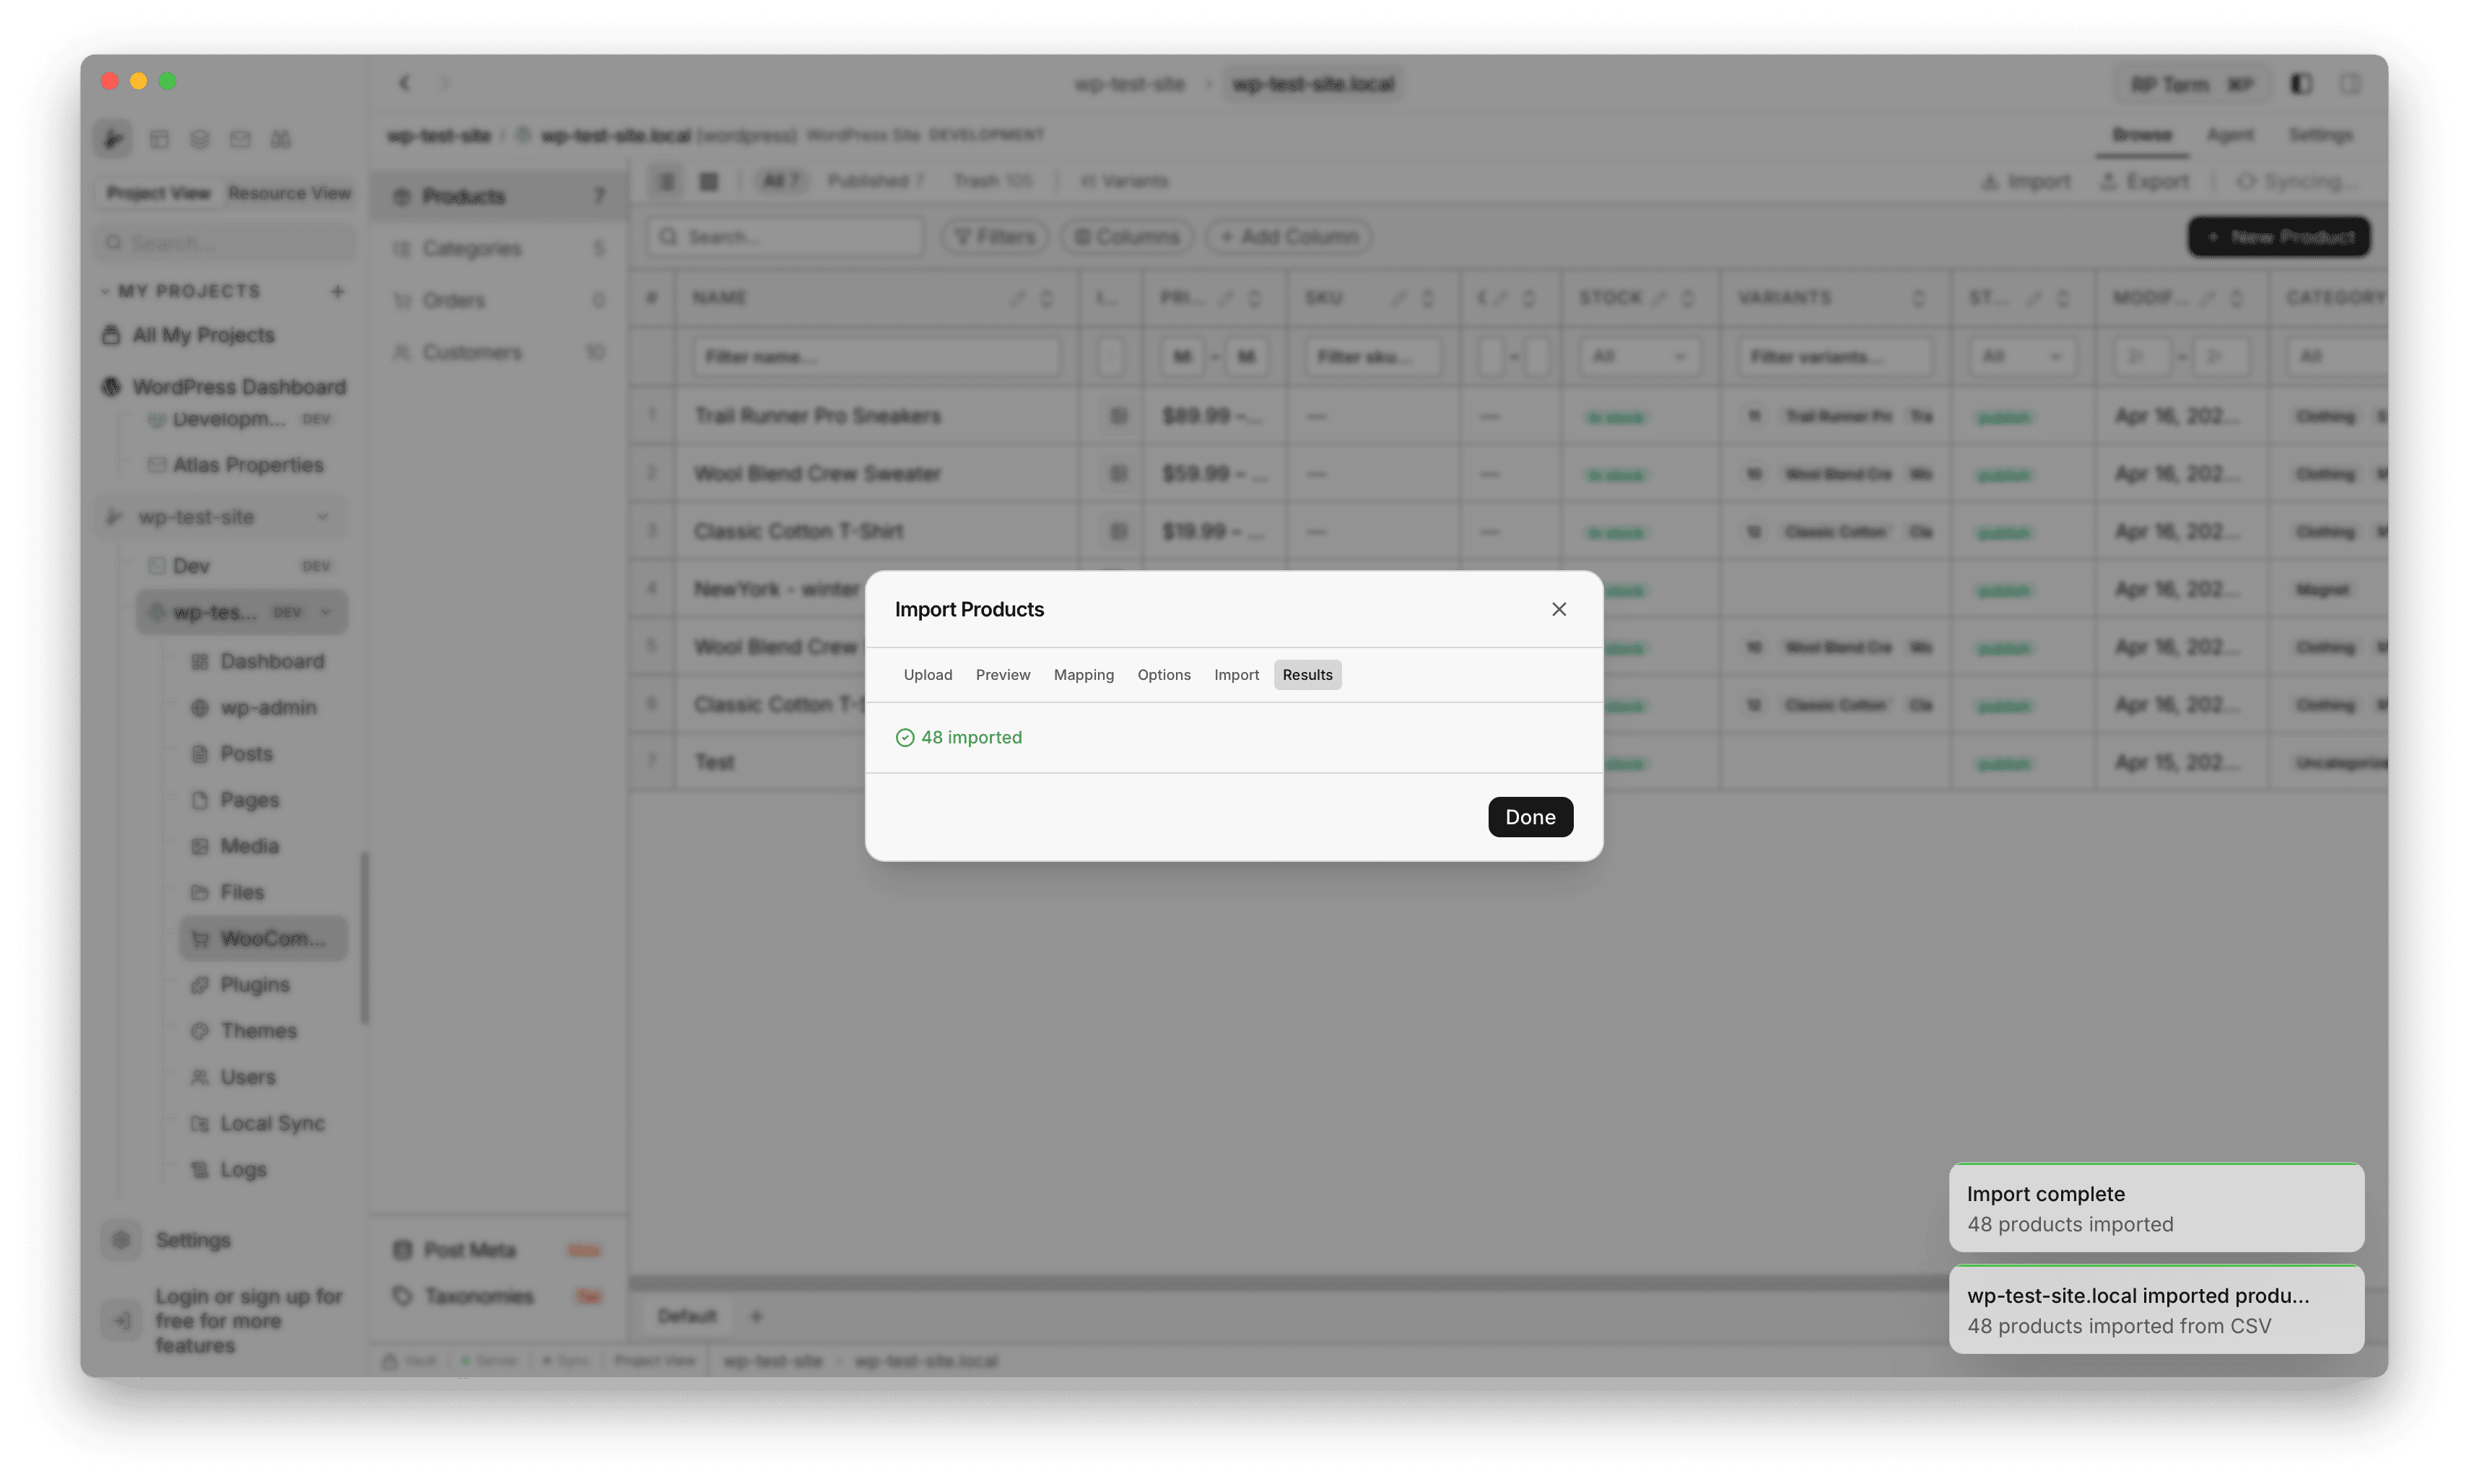
Step 6: Results
- Summary of imported rows, plus Errors or Image warnings sections when something needs attention
- Done closes the dialog
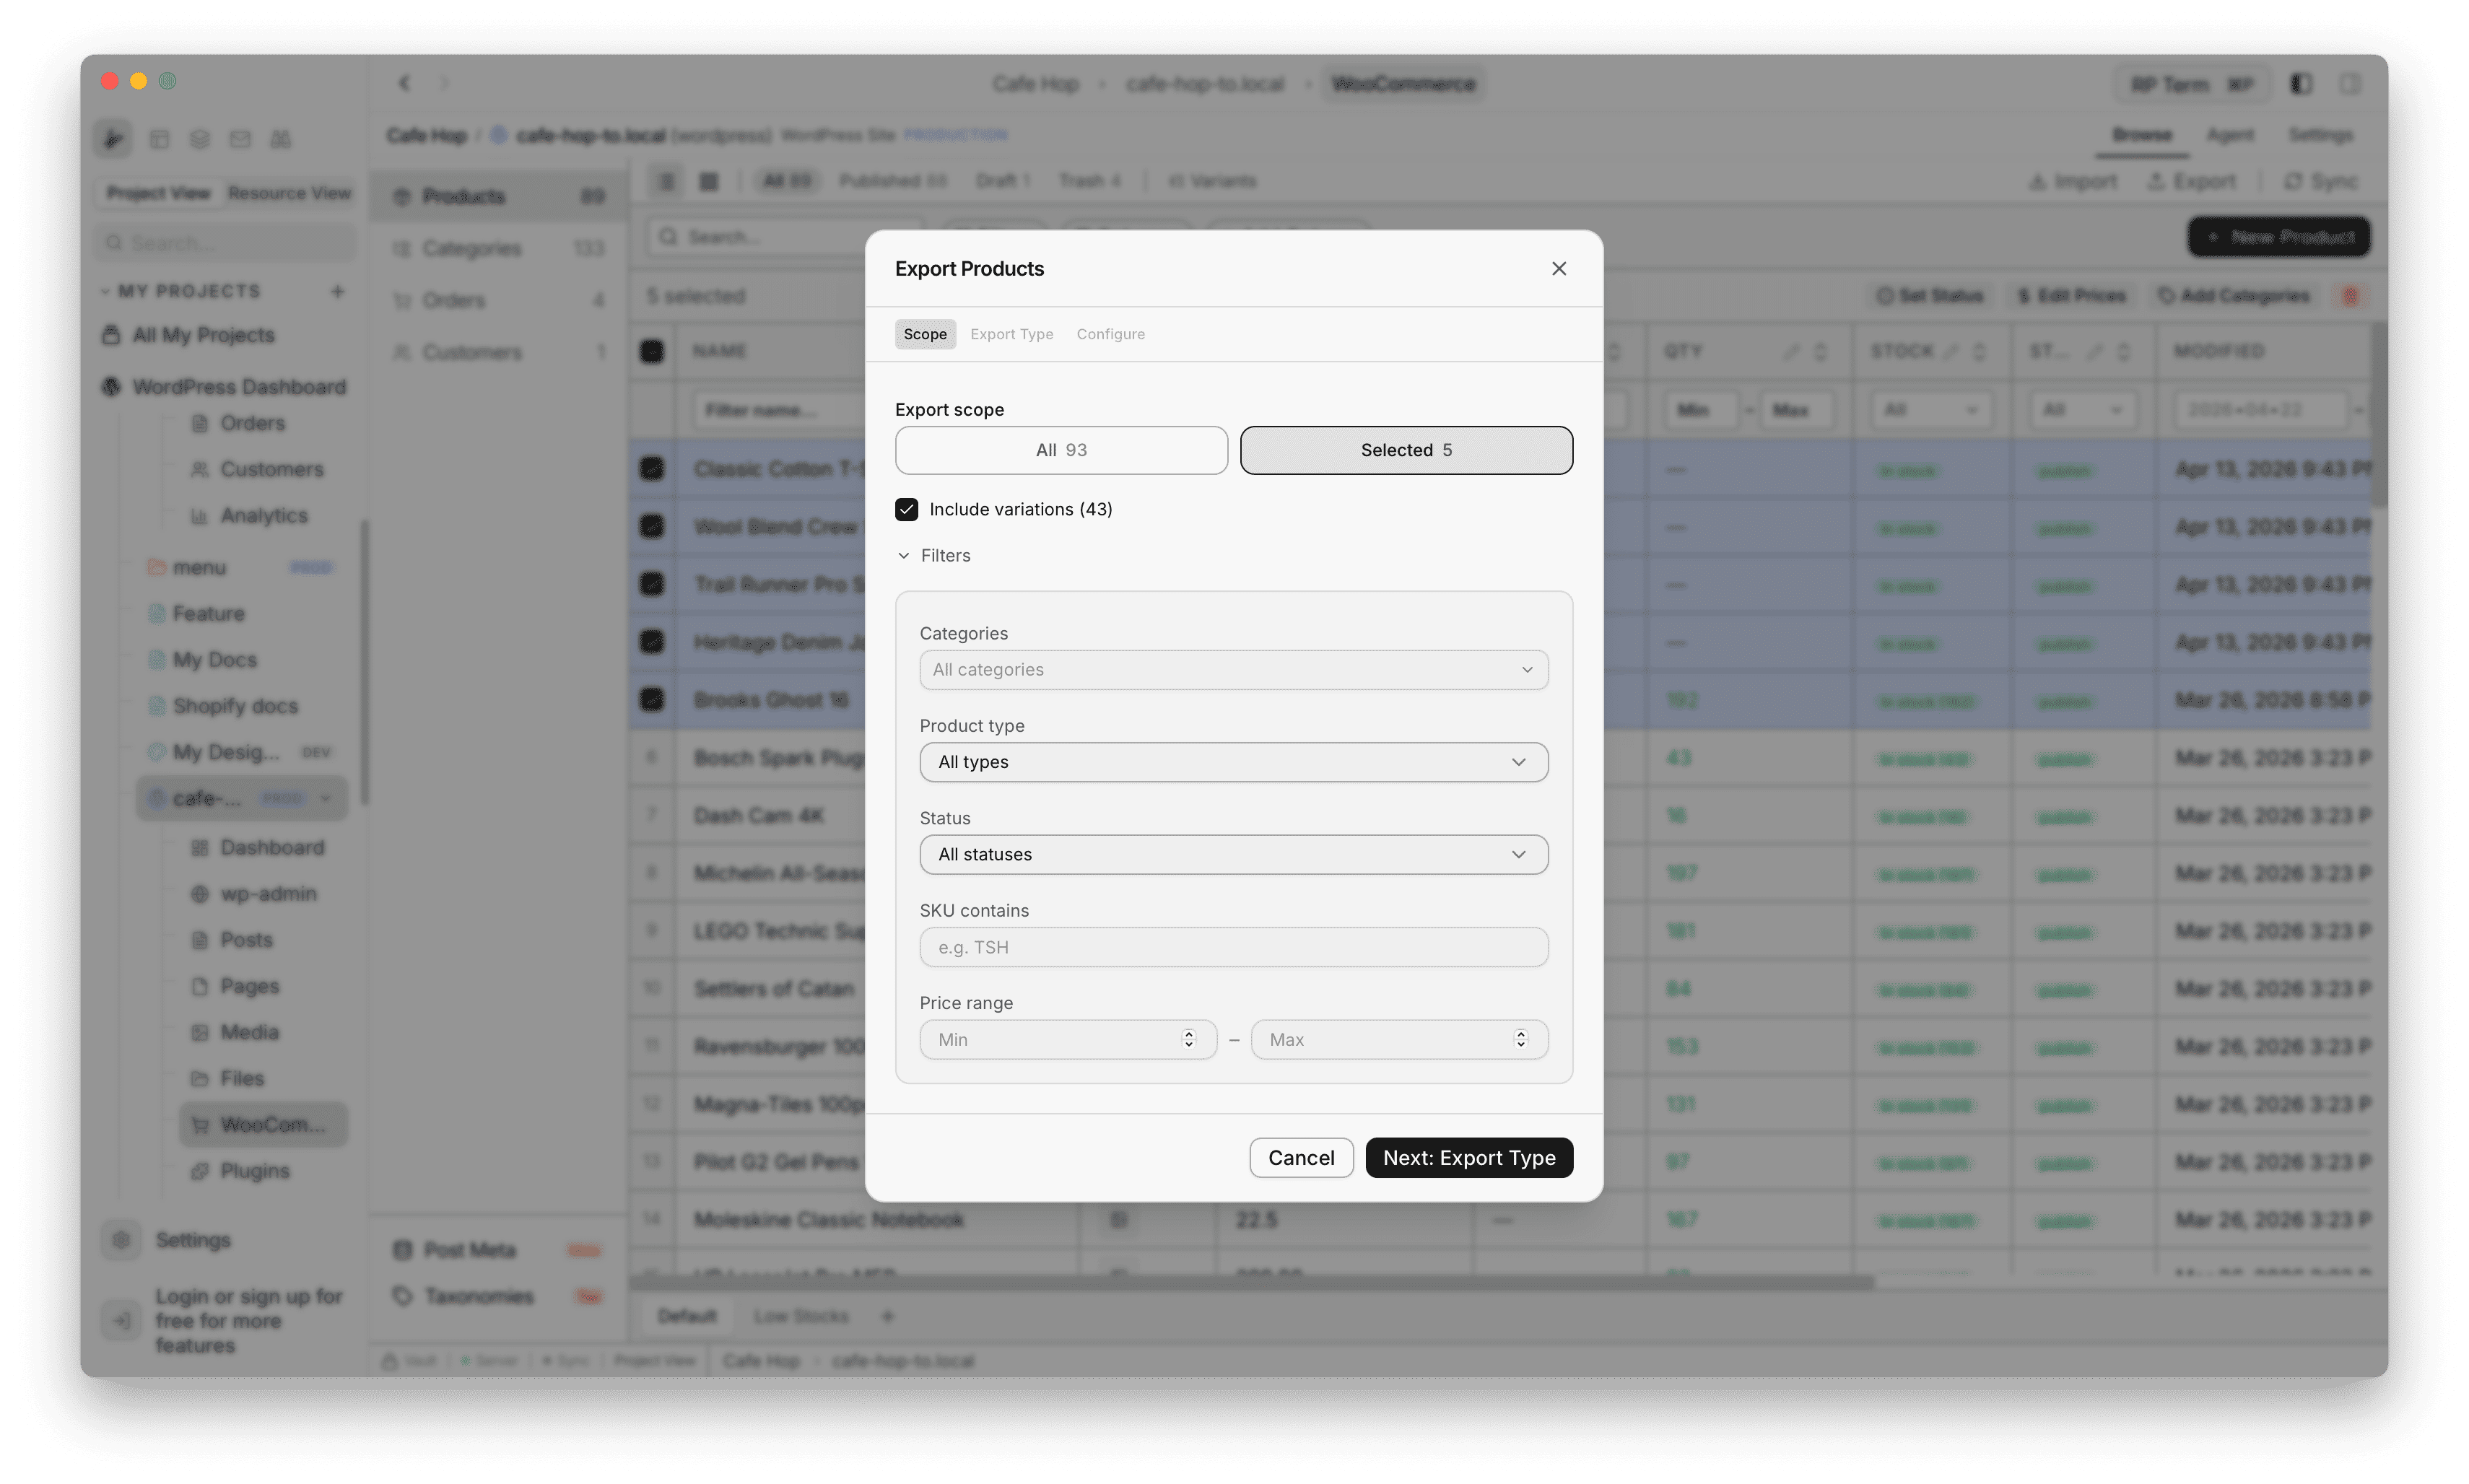
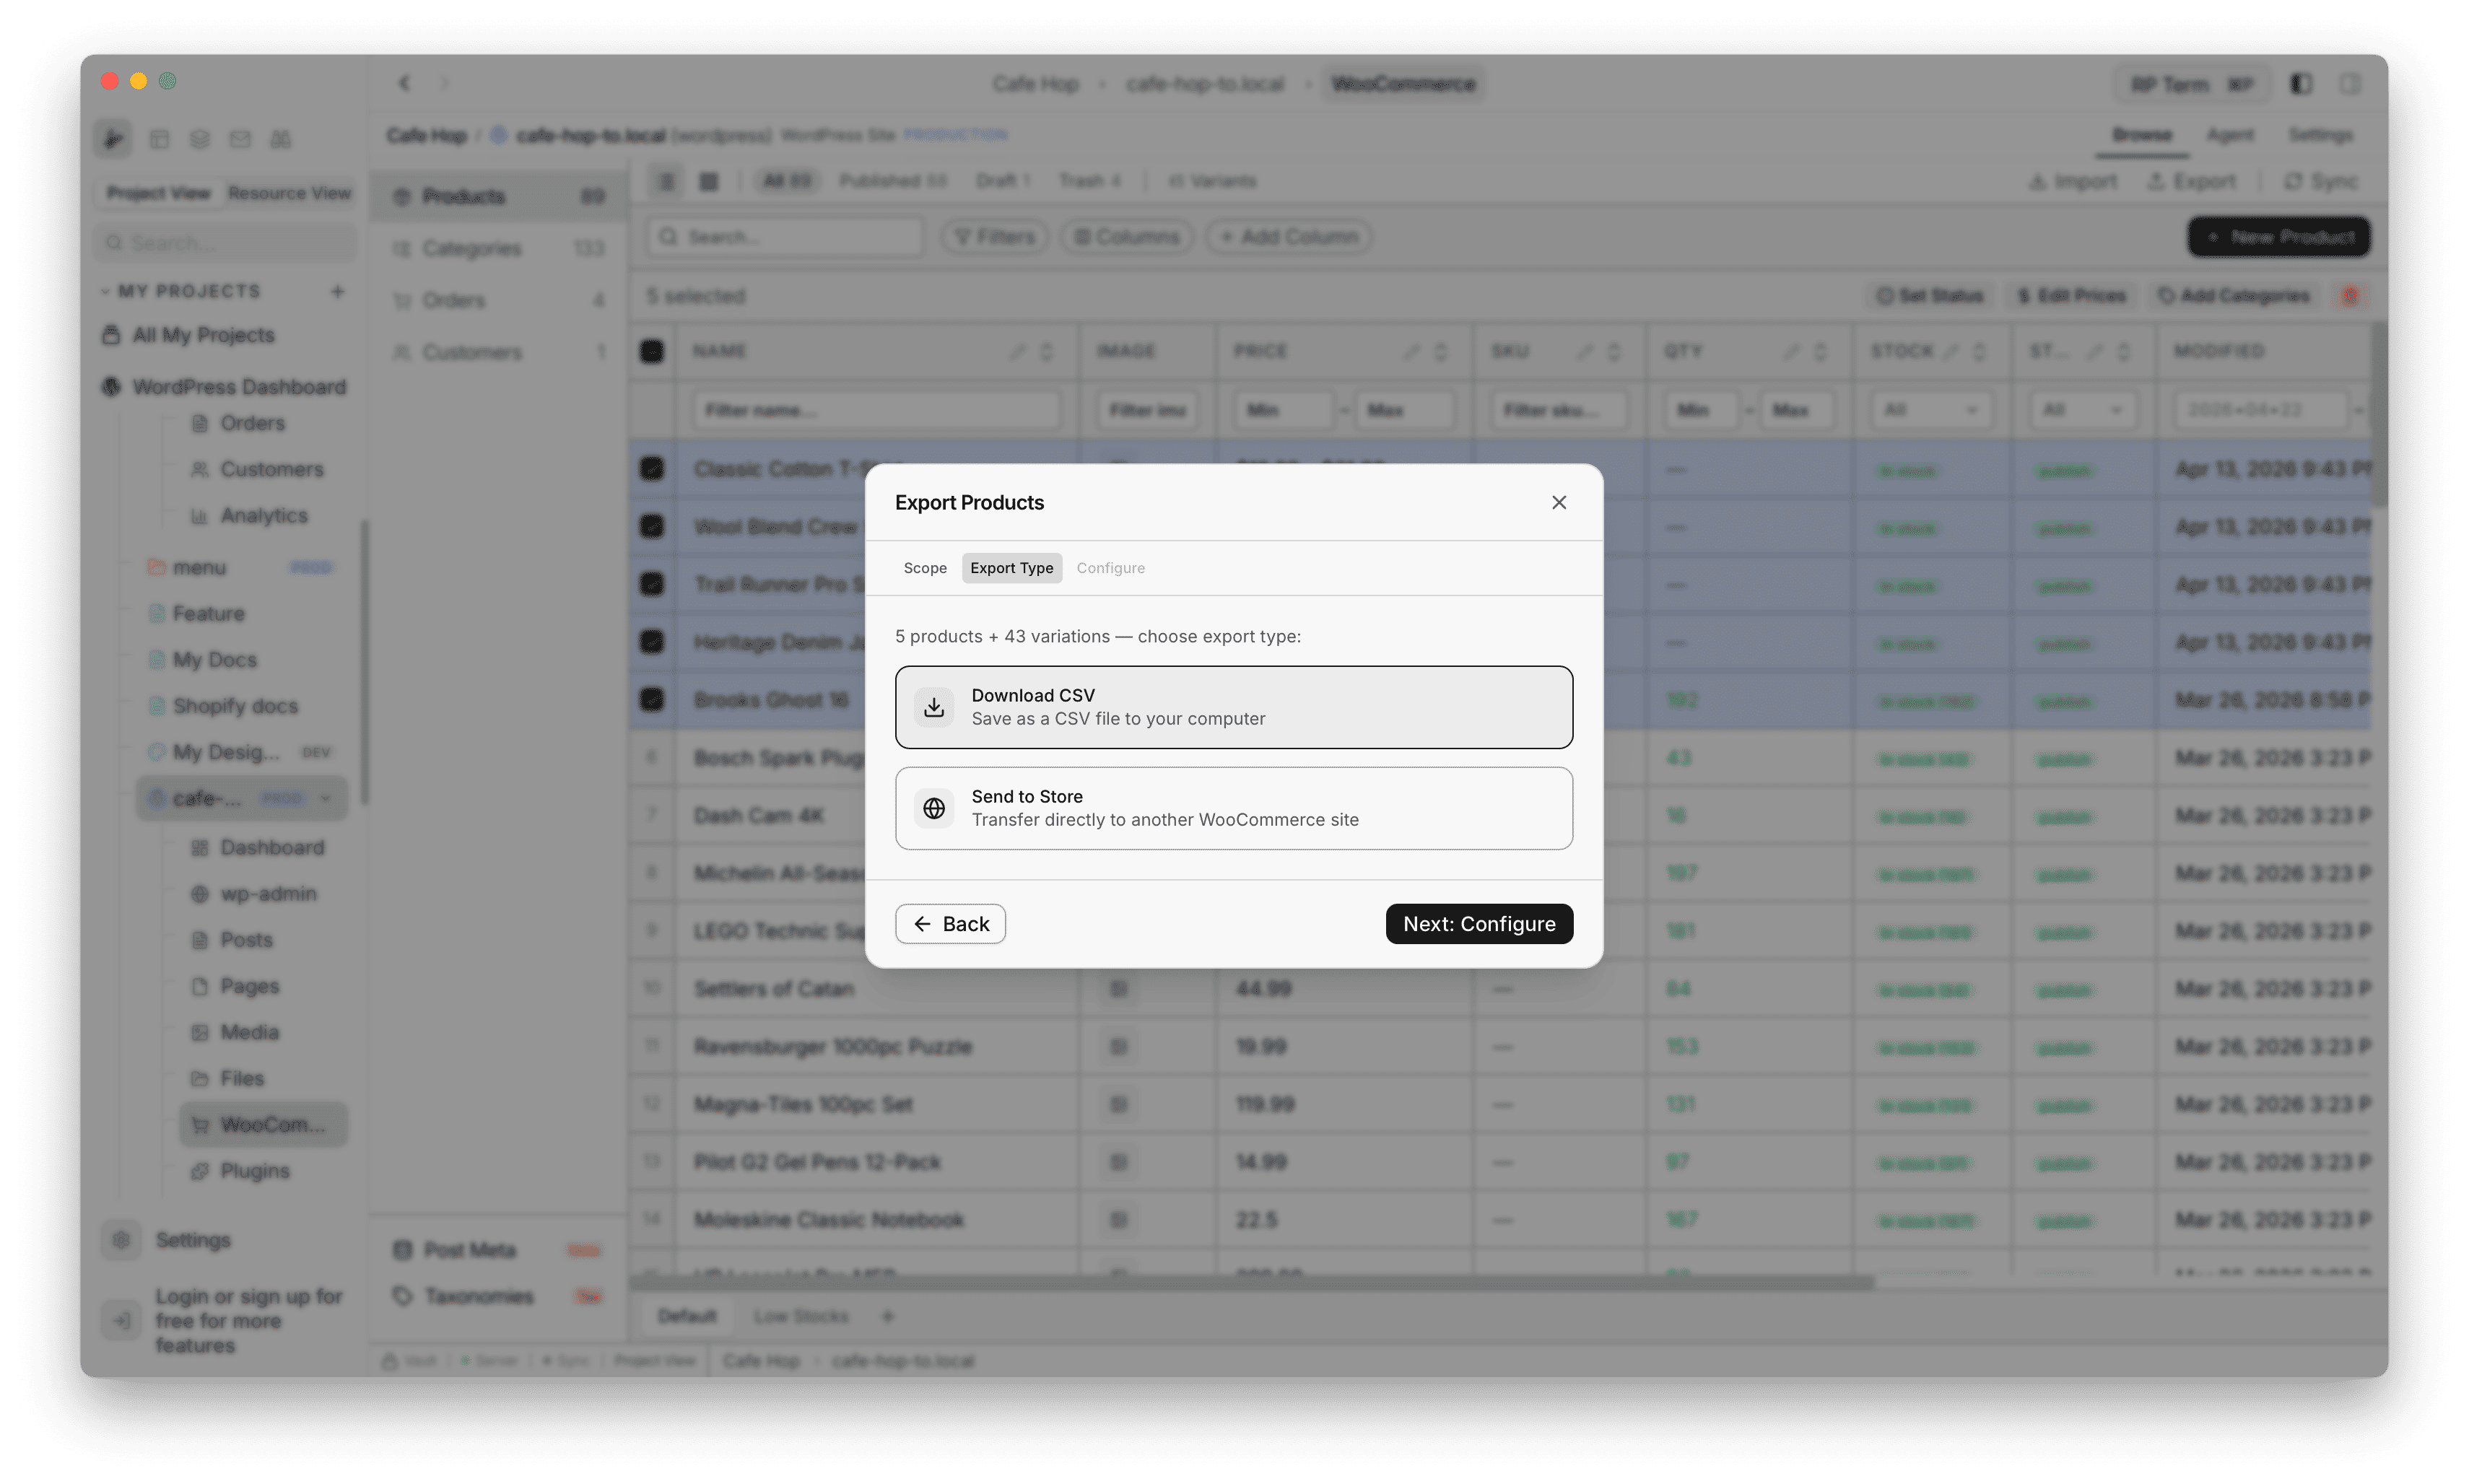
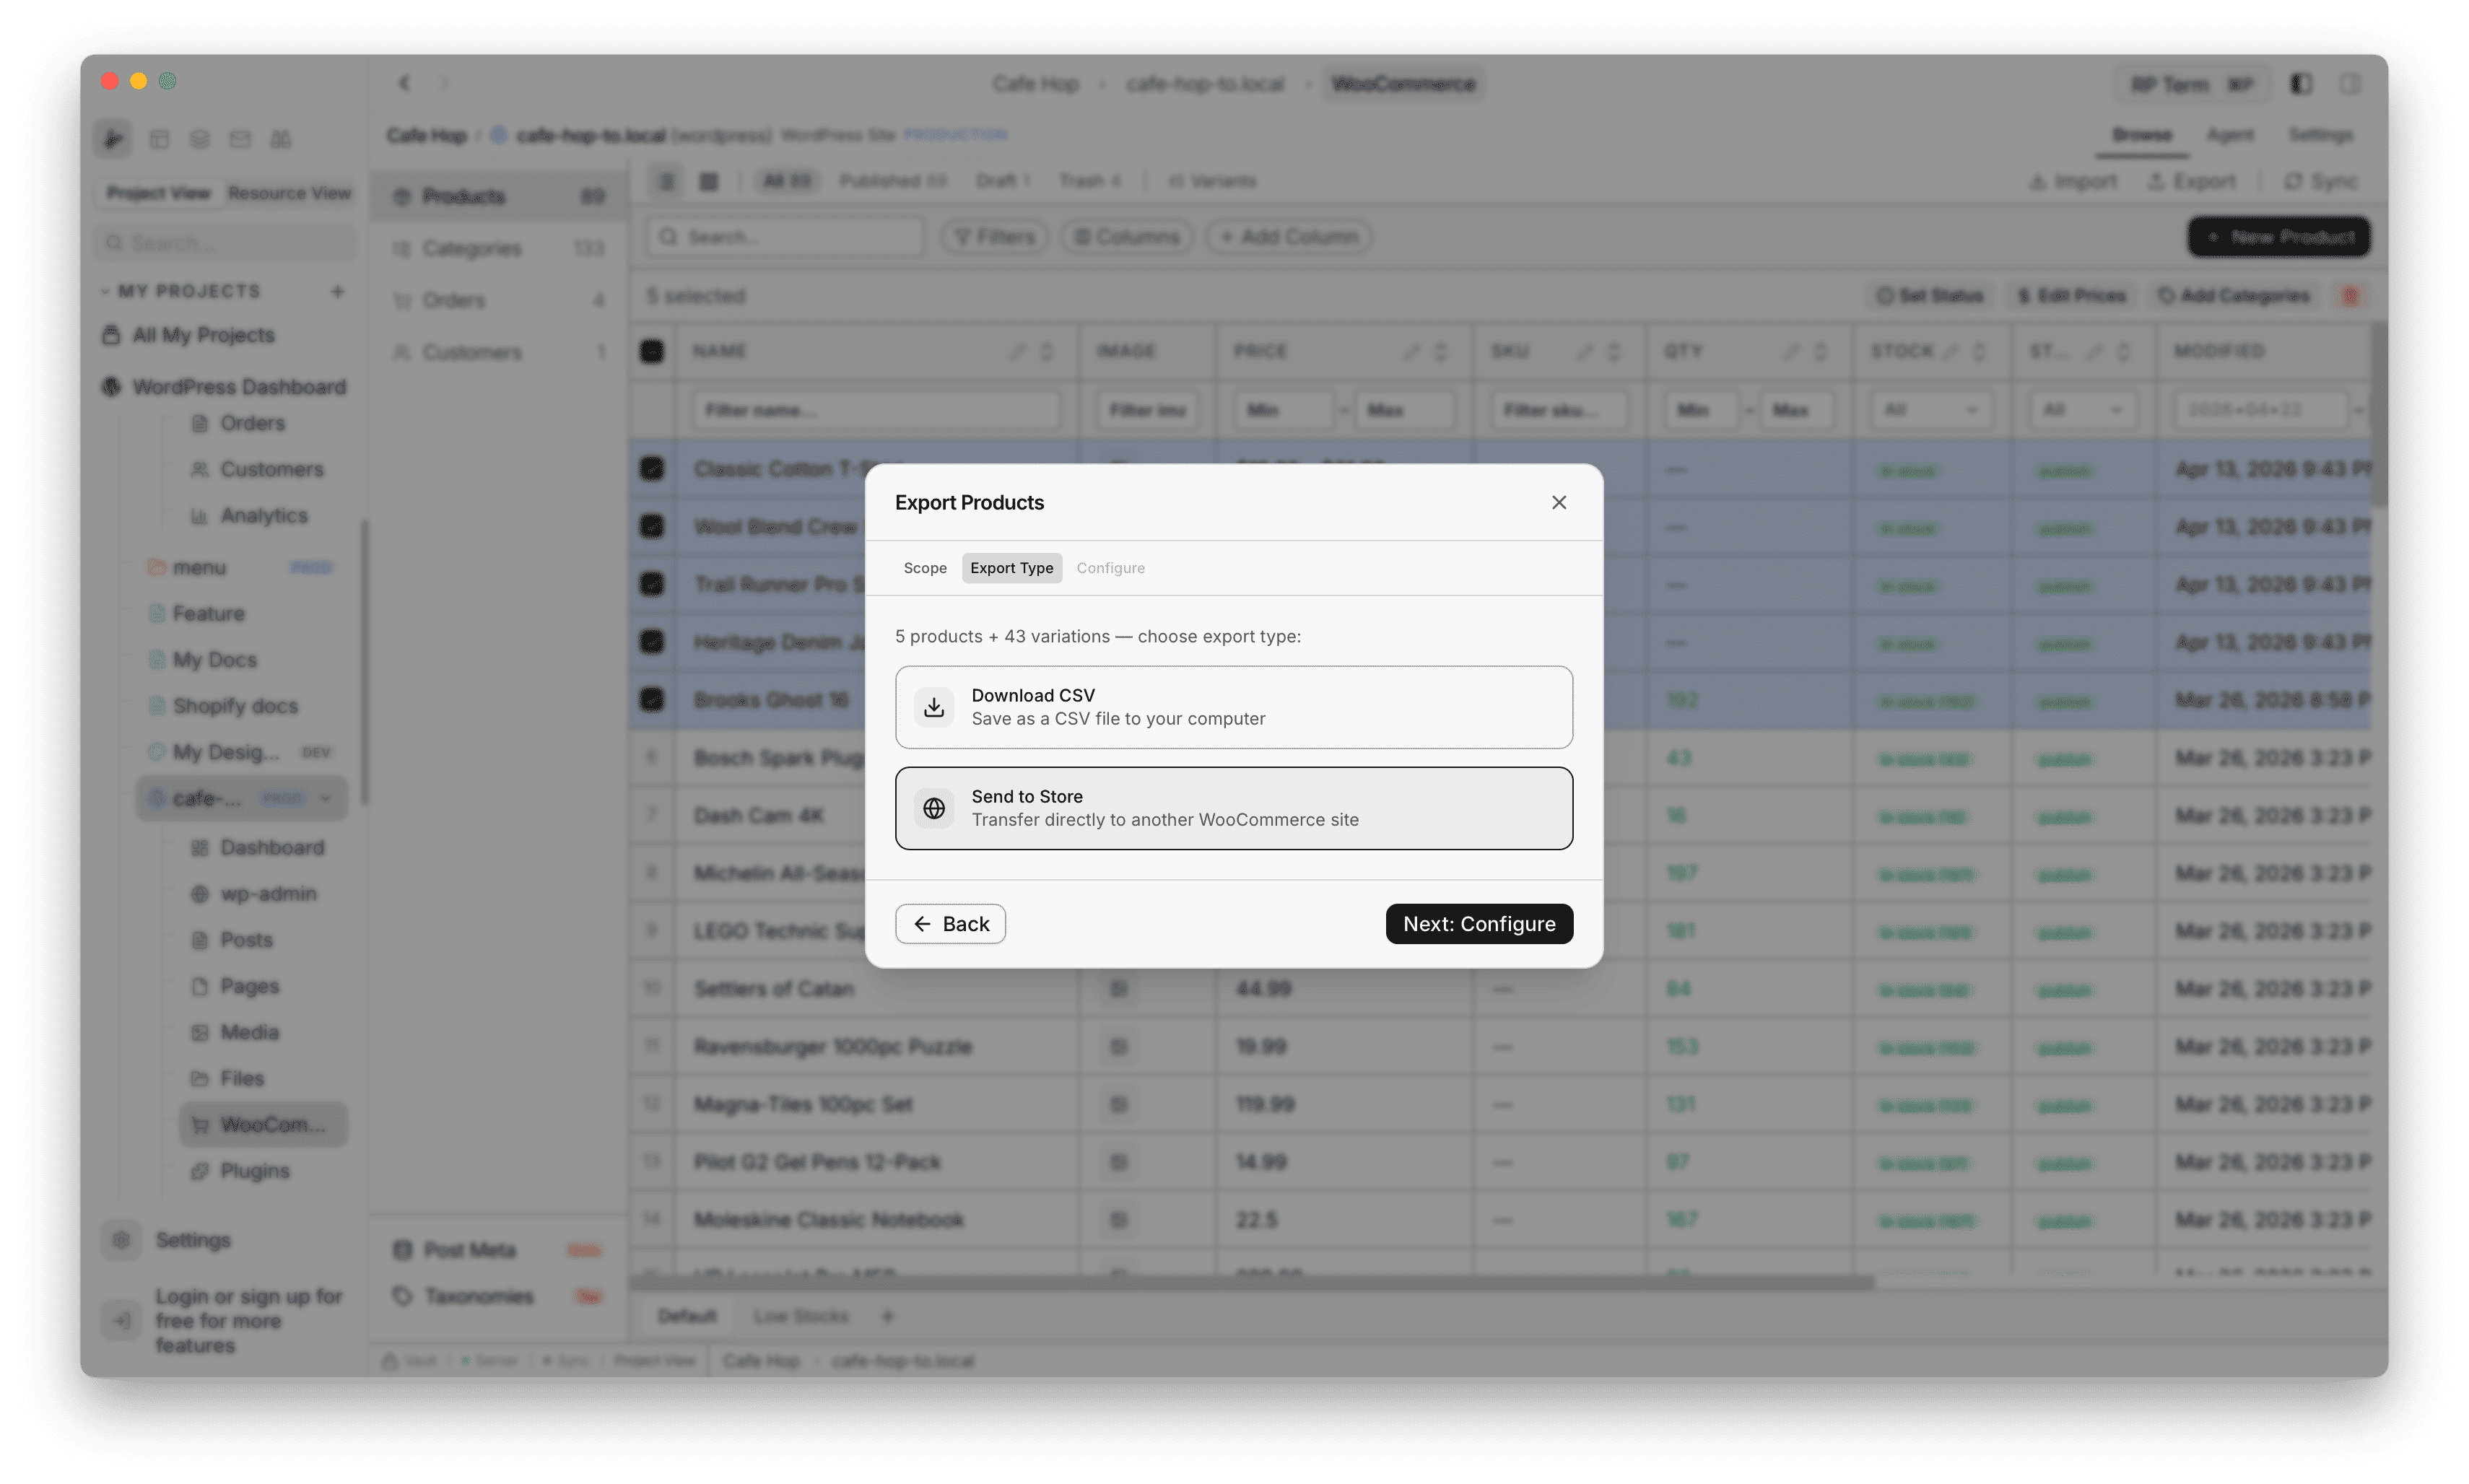
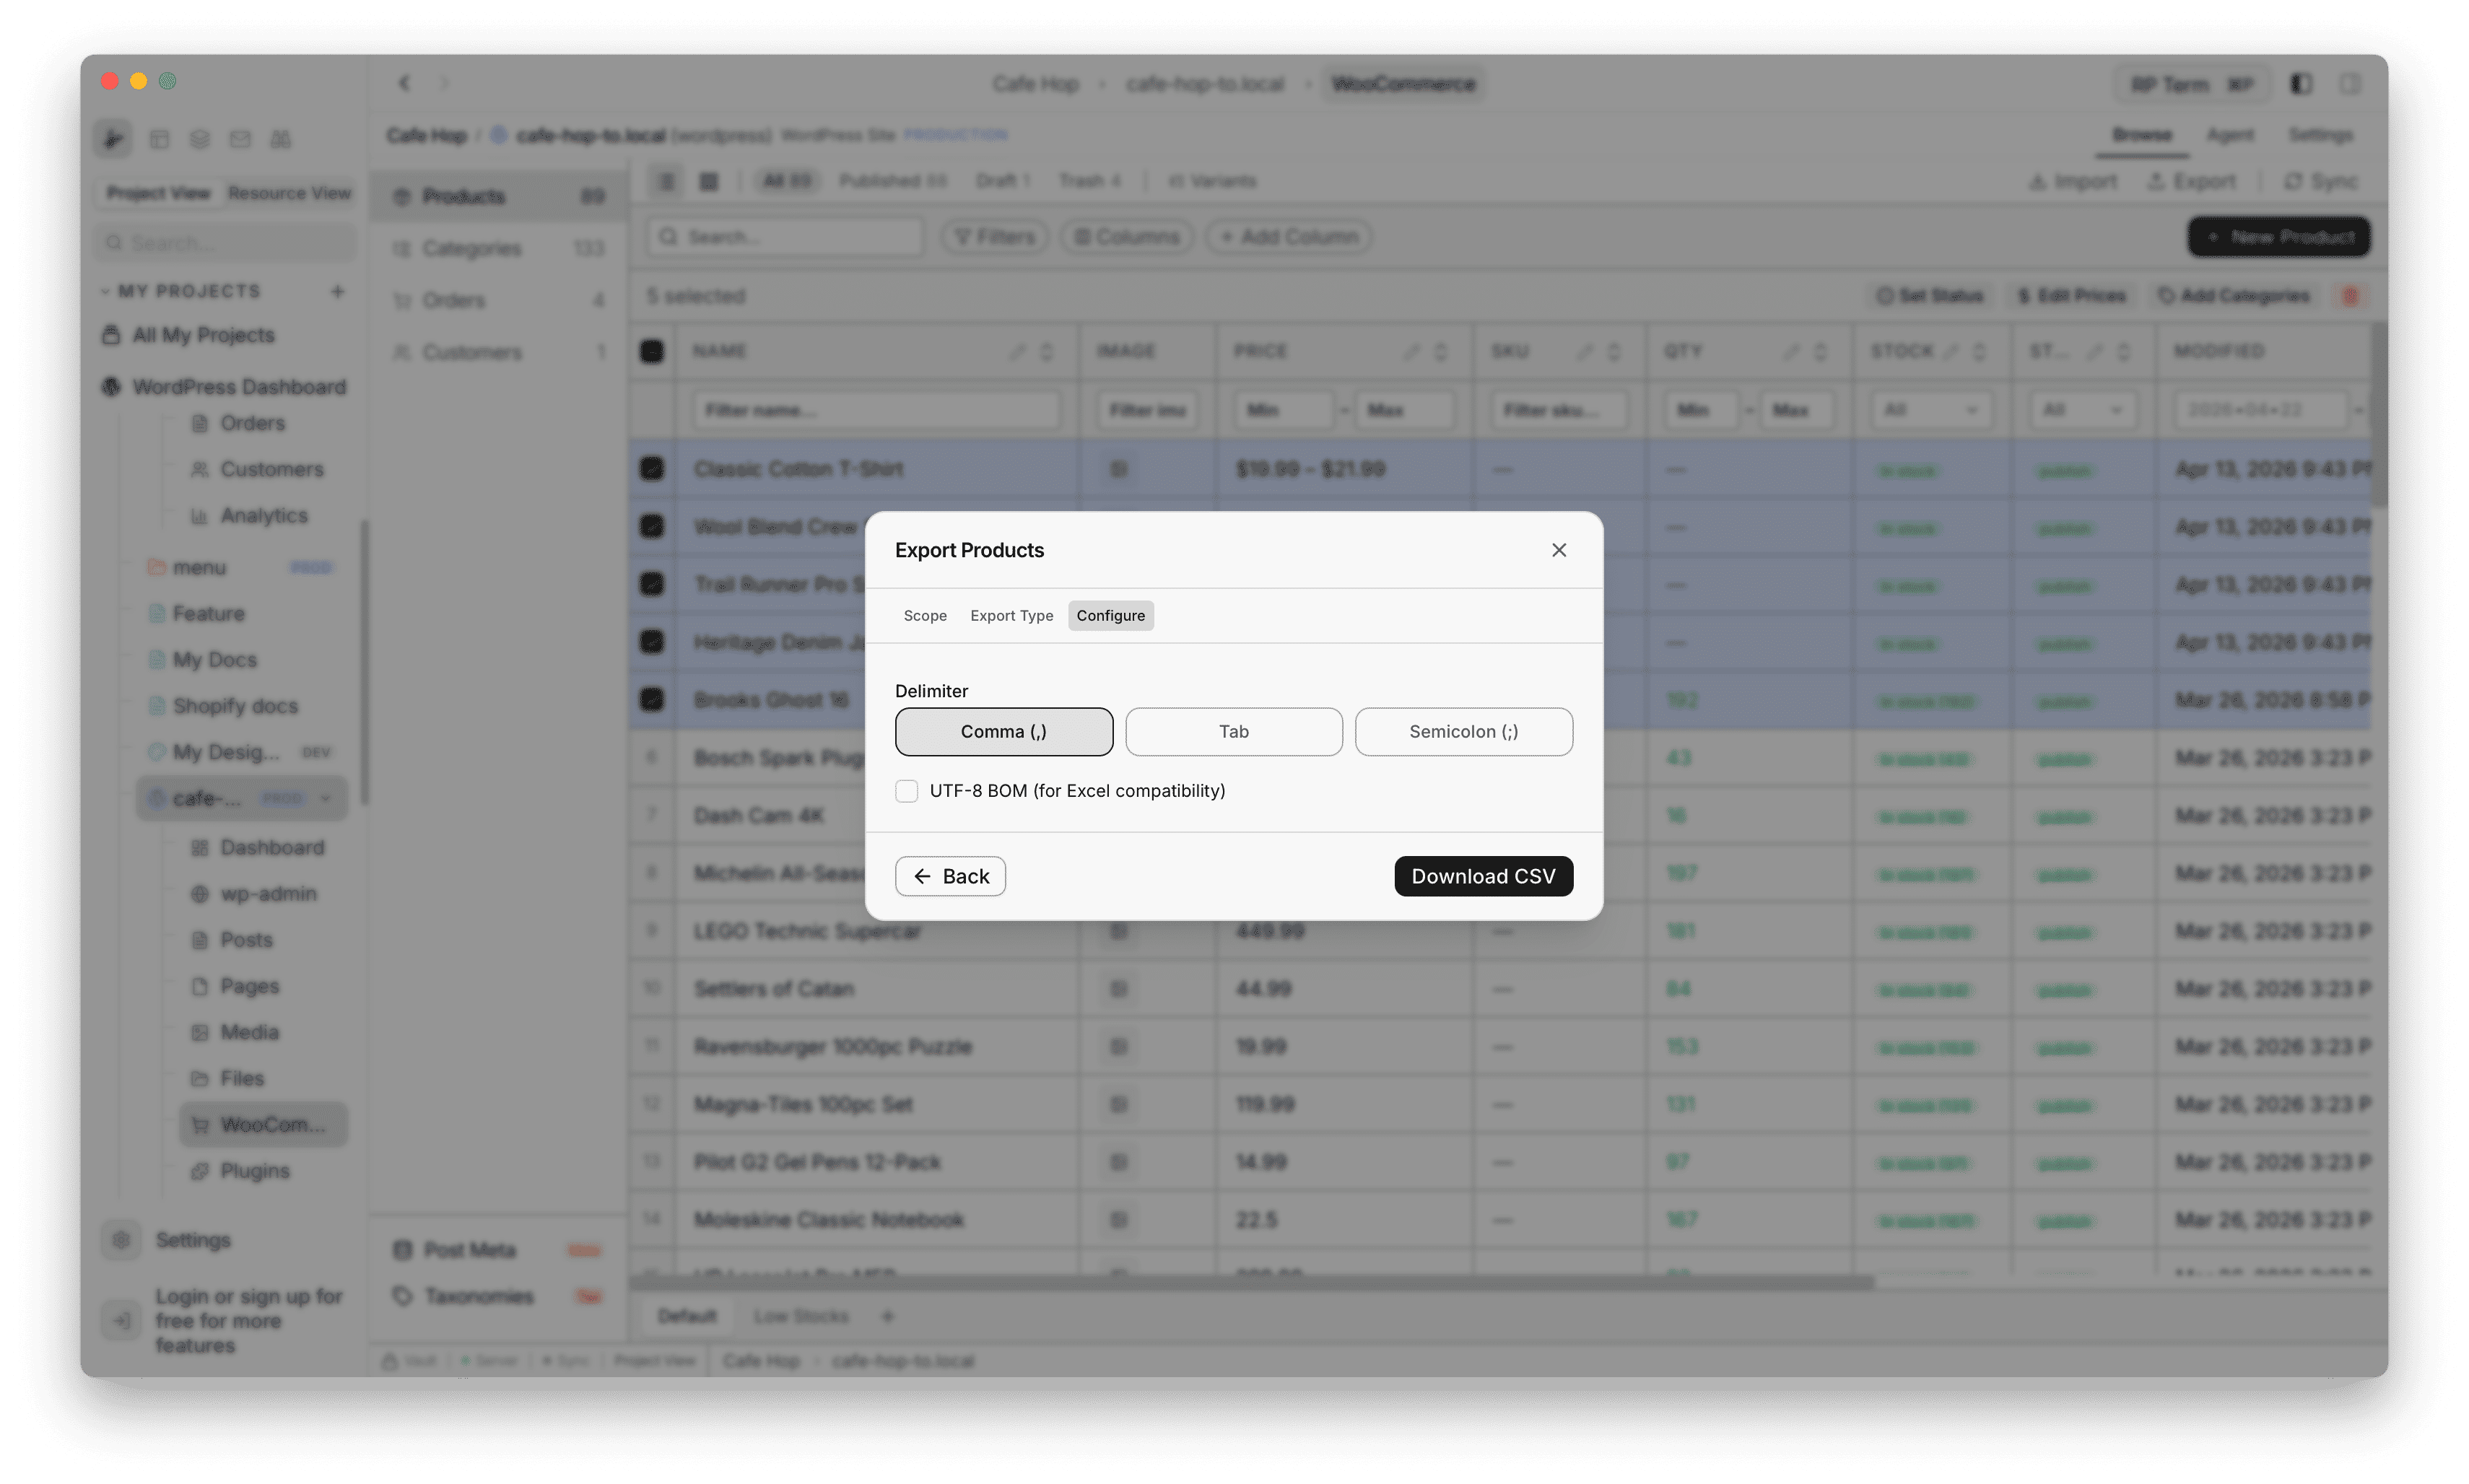
Export products
Export opens Export Products with a step strip: Scope, Export Type, Configure. Each Step below is an h3 under this section, with the matching screenshot immediately after. Step 2 uses two headings because the Export type screen differs when Download CSV vs Send to Store is selected.
Step 1: Scope
- Choose All products or Selected (only checked rows in the product table)
- Toggle Include variations when you want variation rows in the export set
- Expand Filters to narrow by Categories, Product type, Status, SKU contains, and Price range (min and max)
- Use Clear filters when you want the full set again
- Footer: Cancel or Next: Export Type (disabled when the current scope would export zero products after filters)
Step 2: Export type (Download CSV)
- The line under the step strip shows how many products and optional variations are in the export set
- Select the Download CSV card (subtitle: save a CSV file on this computer). You need one card selected before Next: Configure enables
- Footer: Back (returns to Scope and clears the type choice) or Next: Configure
Step 2: Export type (Send to Store)
- The same count line appears under the step strip
- Select the Send to Store card (subtitle: transfer to another WooCommerce site)
- Footer: Back or Next: Configure
Step 3: Configure (Download CSV)
Use this when you chose Download CSV in step 2.
- Delimiter: Comma (,), Tab, or Semicolon (;)
- Optional UTF-8 BOM (for Excel compatibility)
- Footer: Back or Download CSV (label switches to Exporting… while the file is built)
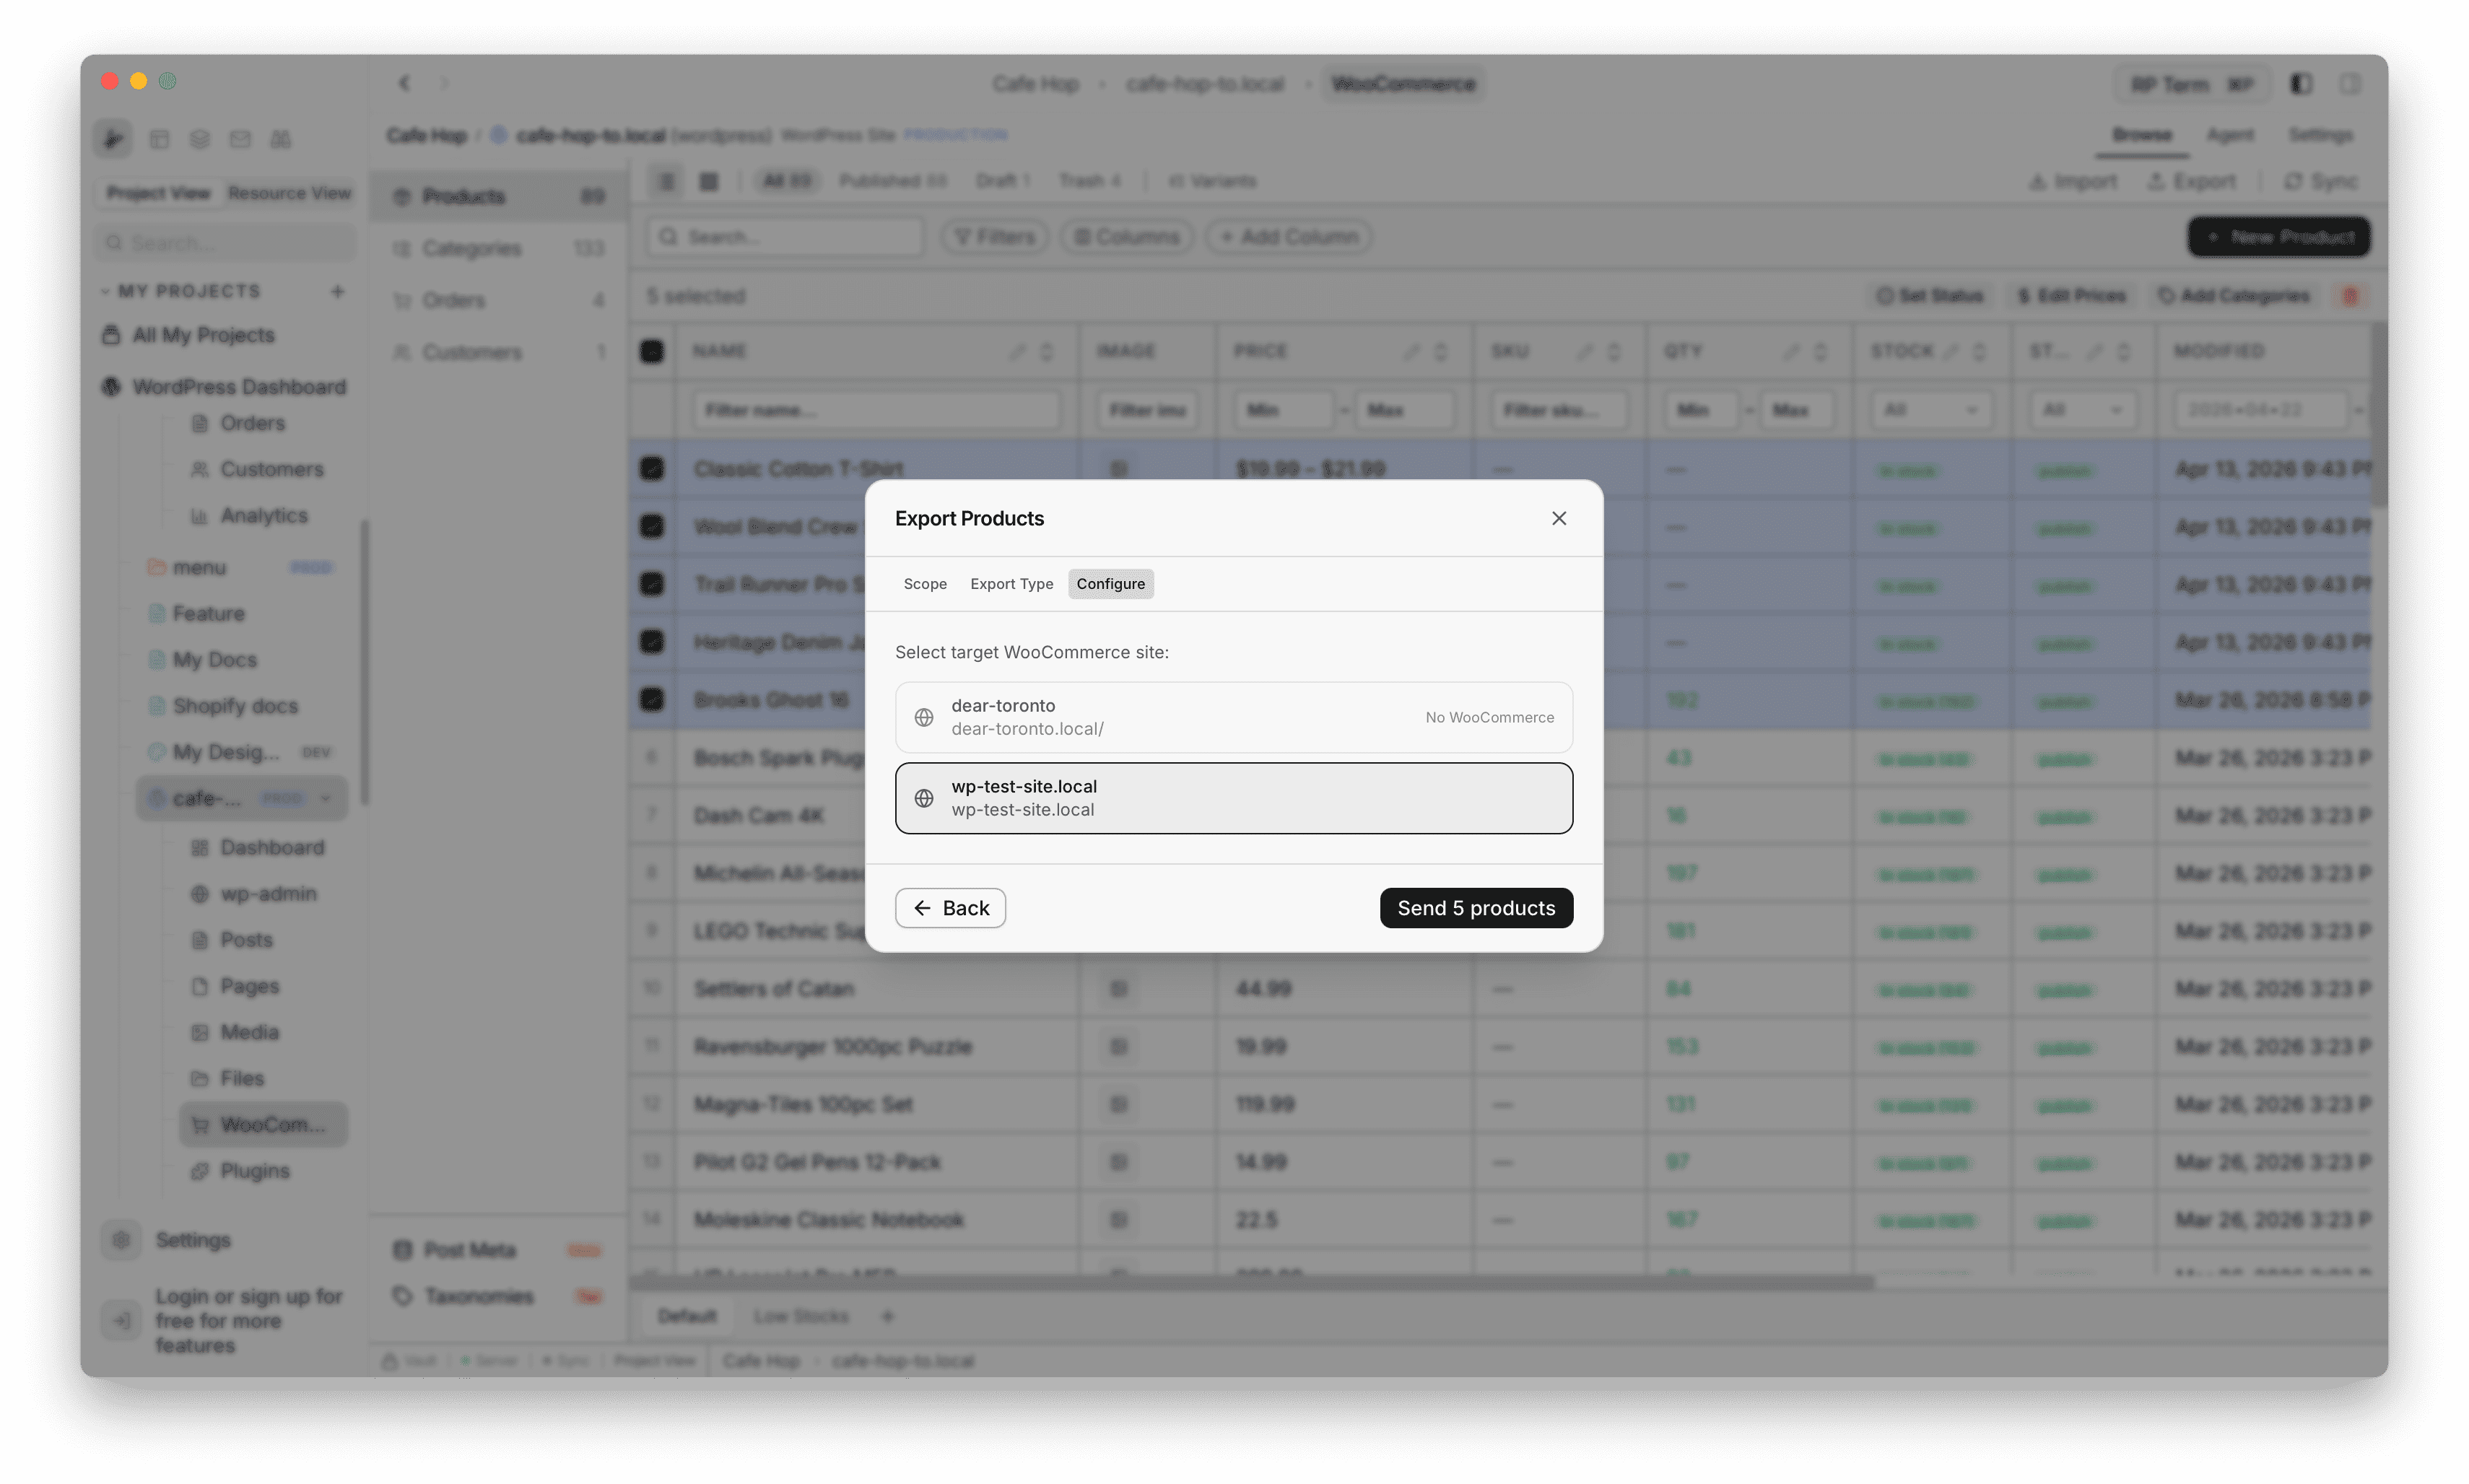
Step 3: Configure (Send to Store)
Use this when you chose Send to Store in step 2.
- Select target WooCommerce site lists every other WordPress resource in your vault
- Rows show Not paired or No WooCommerce when the target cannot receive a transfer
- Footer: Back or Send N products (the count in the label matches your export scope)
After Send N products, the dialog stays open and shows transfer progress (current and total, progress bar, and a note when downloading images may take longer), then a results summary (success, failed, skipped) and Done. Those screens are not shown as separate images here.
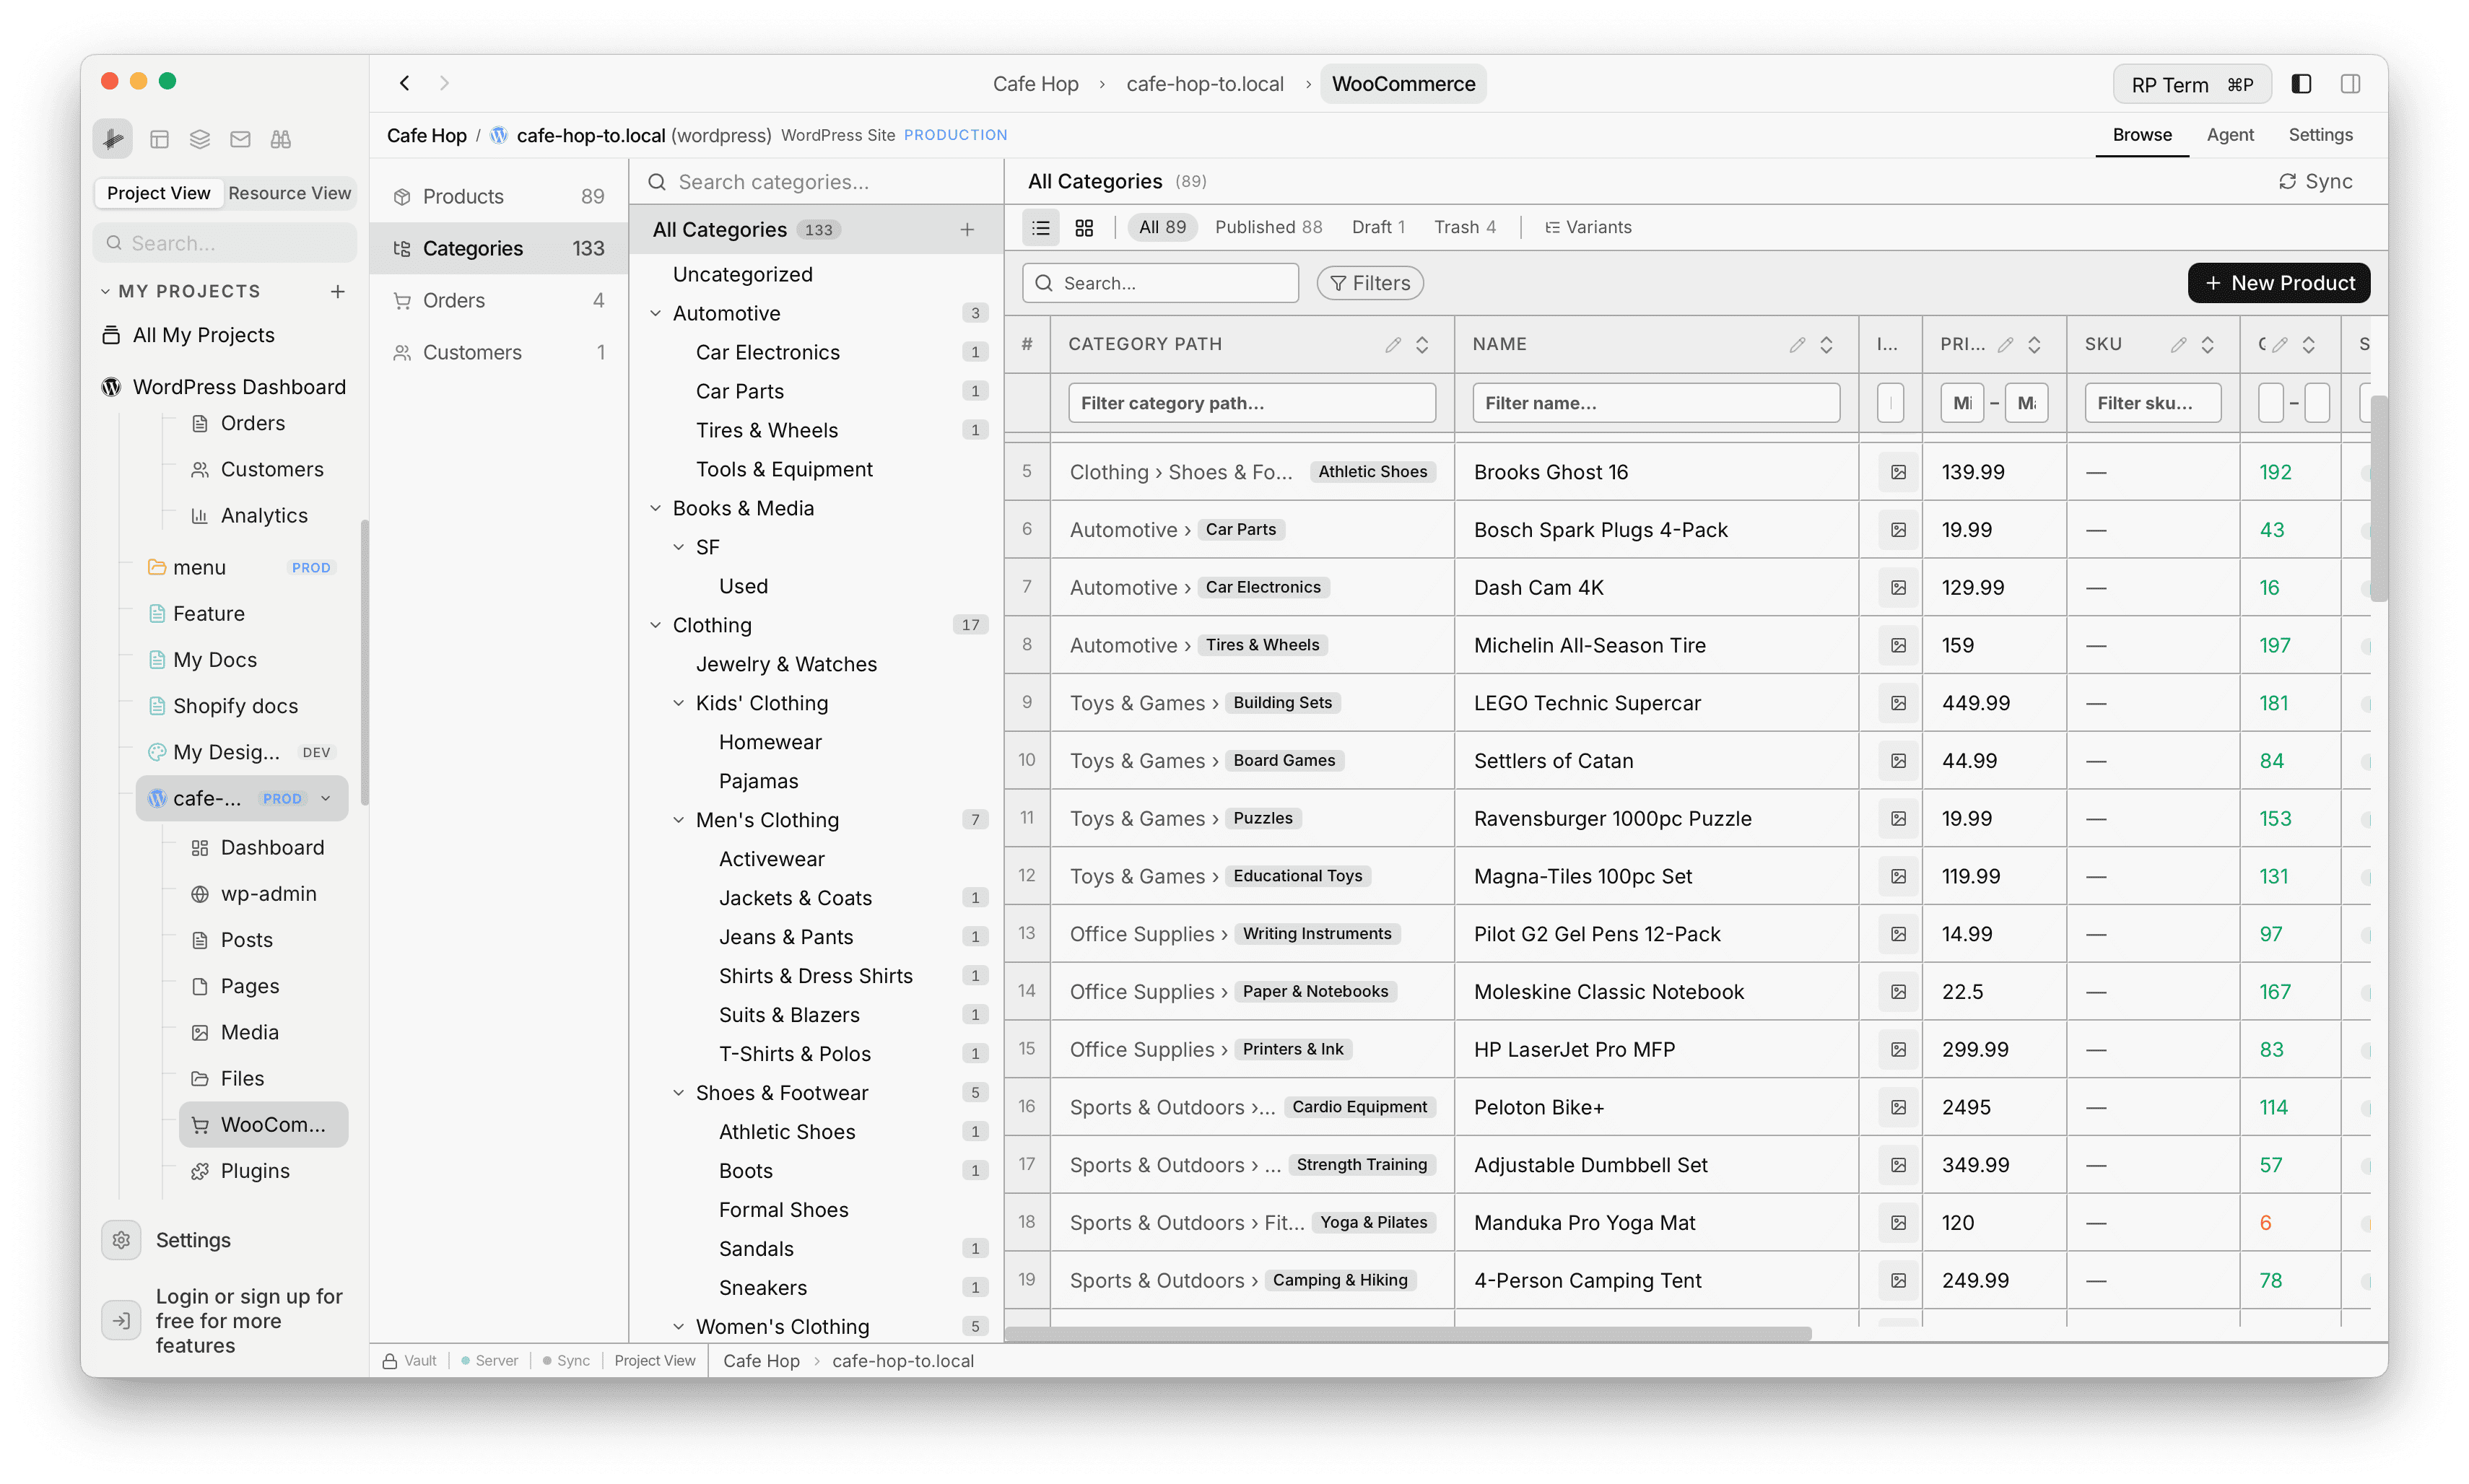
Categories
Tree and product table
- Categories shows a category tree on one side and a product table for the current tree selection on the other
- Search the tree, expand nodes, and switch which category is active to change which products load in the table
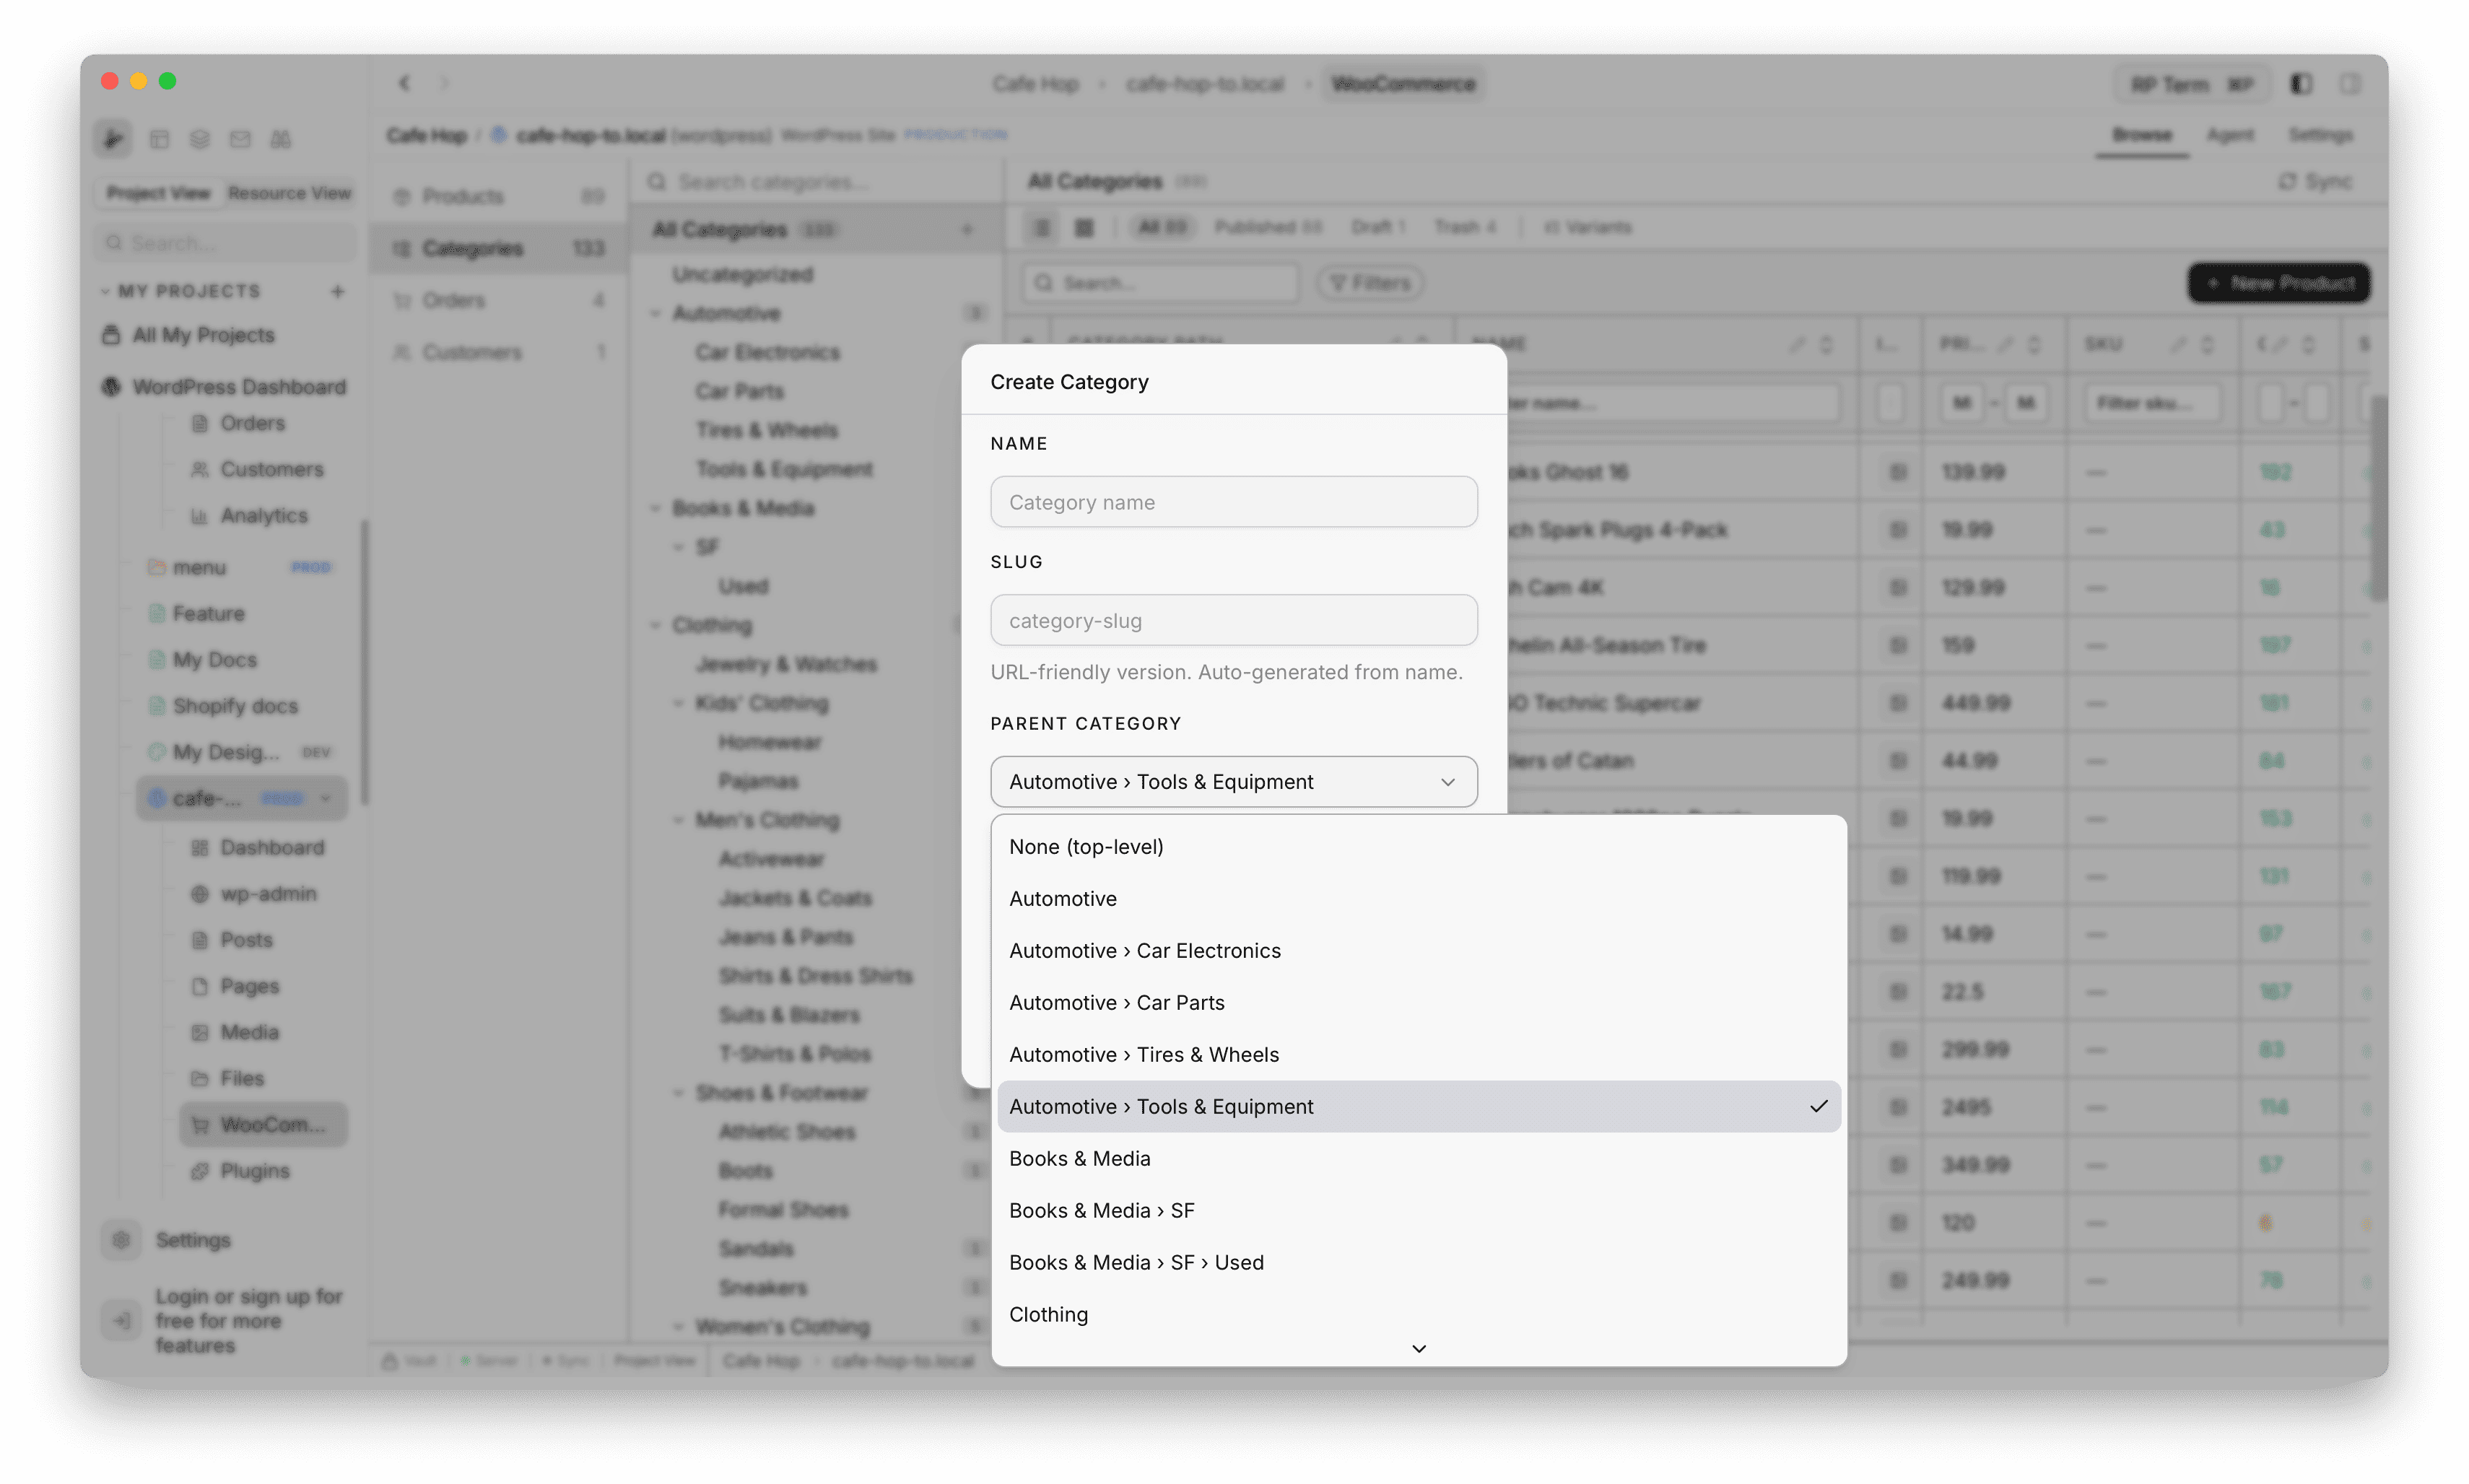
Create a category
- Use + (or the equivalent control next to the tree root) to add a new category without leaving this view
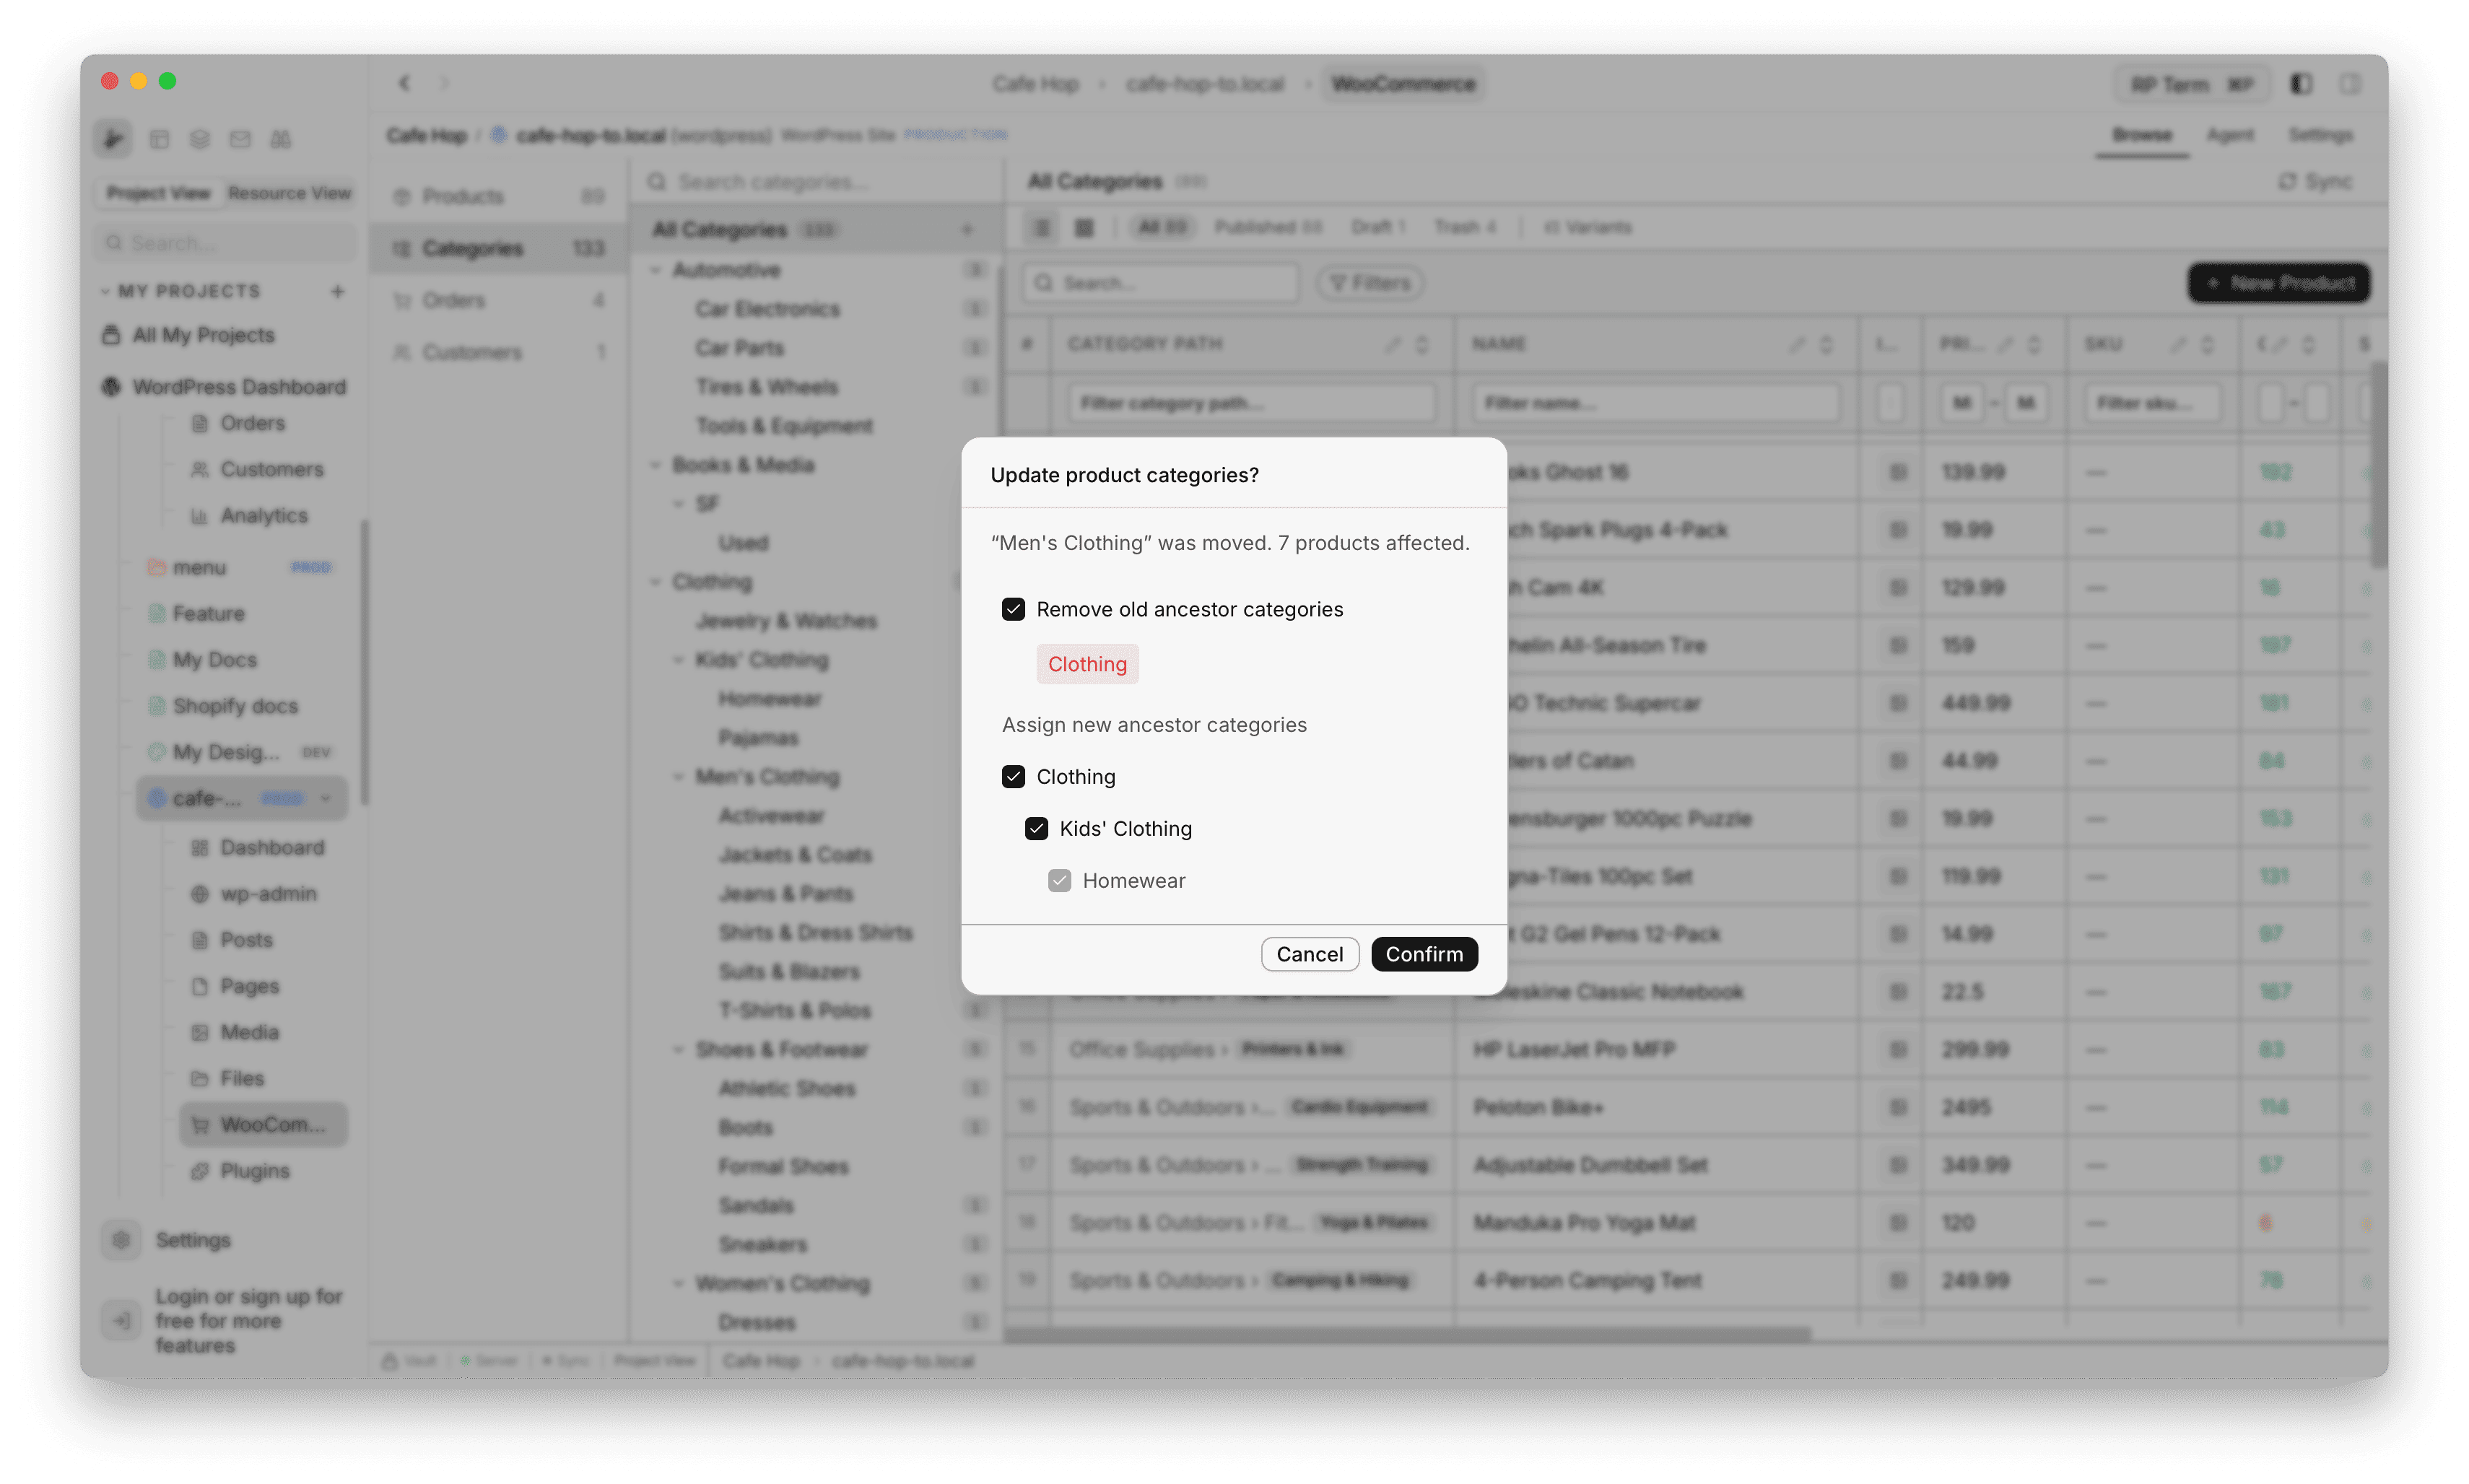
Drag and drop to reparent categories
- Drag a category node onto a new parent. On drop, the app opens Update product categories? so product term assignments stay consistent with the new tree shape
- Summary text names the moved category and how many products are affected
- Remove old ancestor categories (optional) strips previous parent terms from those products
- Assign new ancestor categories lists the new path with checkboxes so you choose which ancestor terms to add
- Confirm applies the bulk update
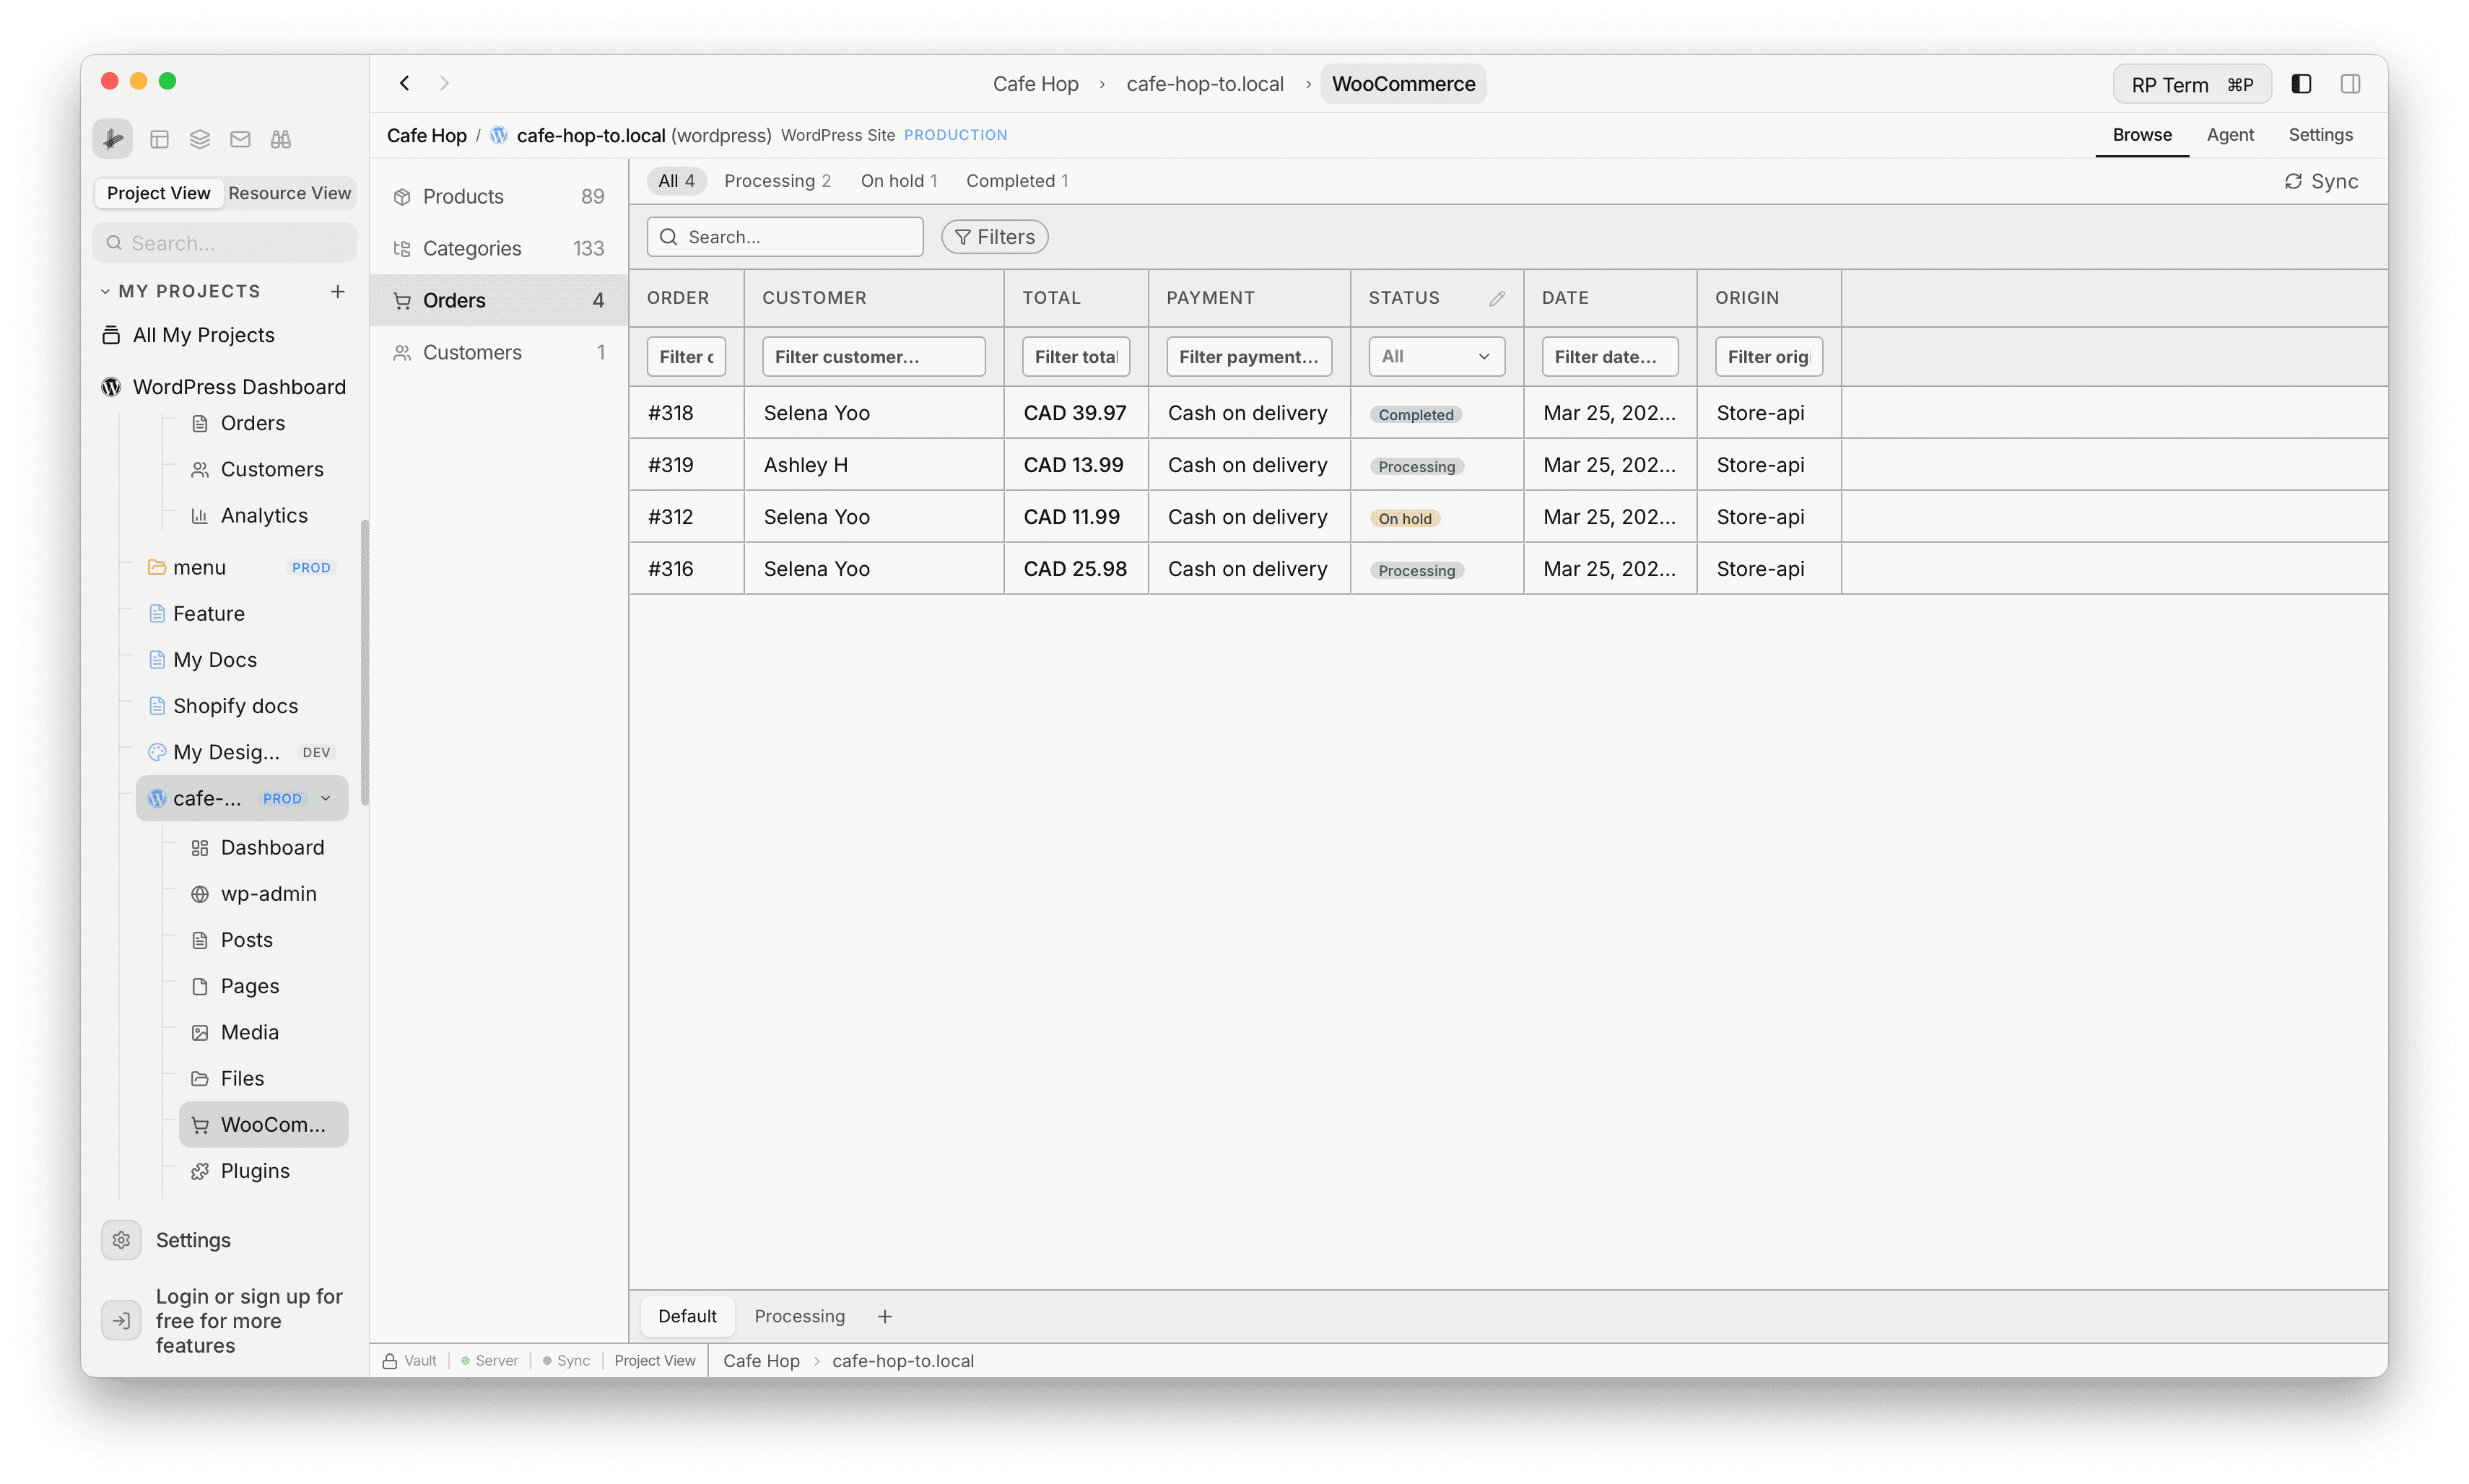
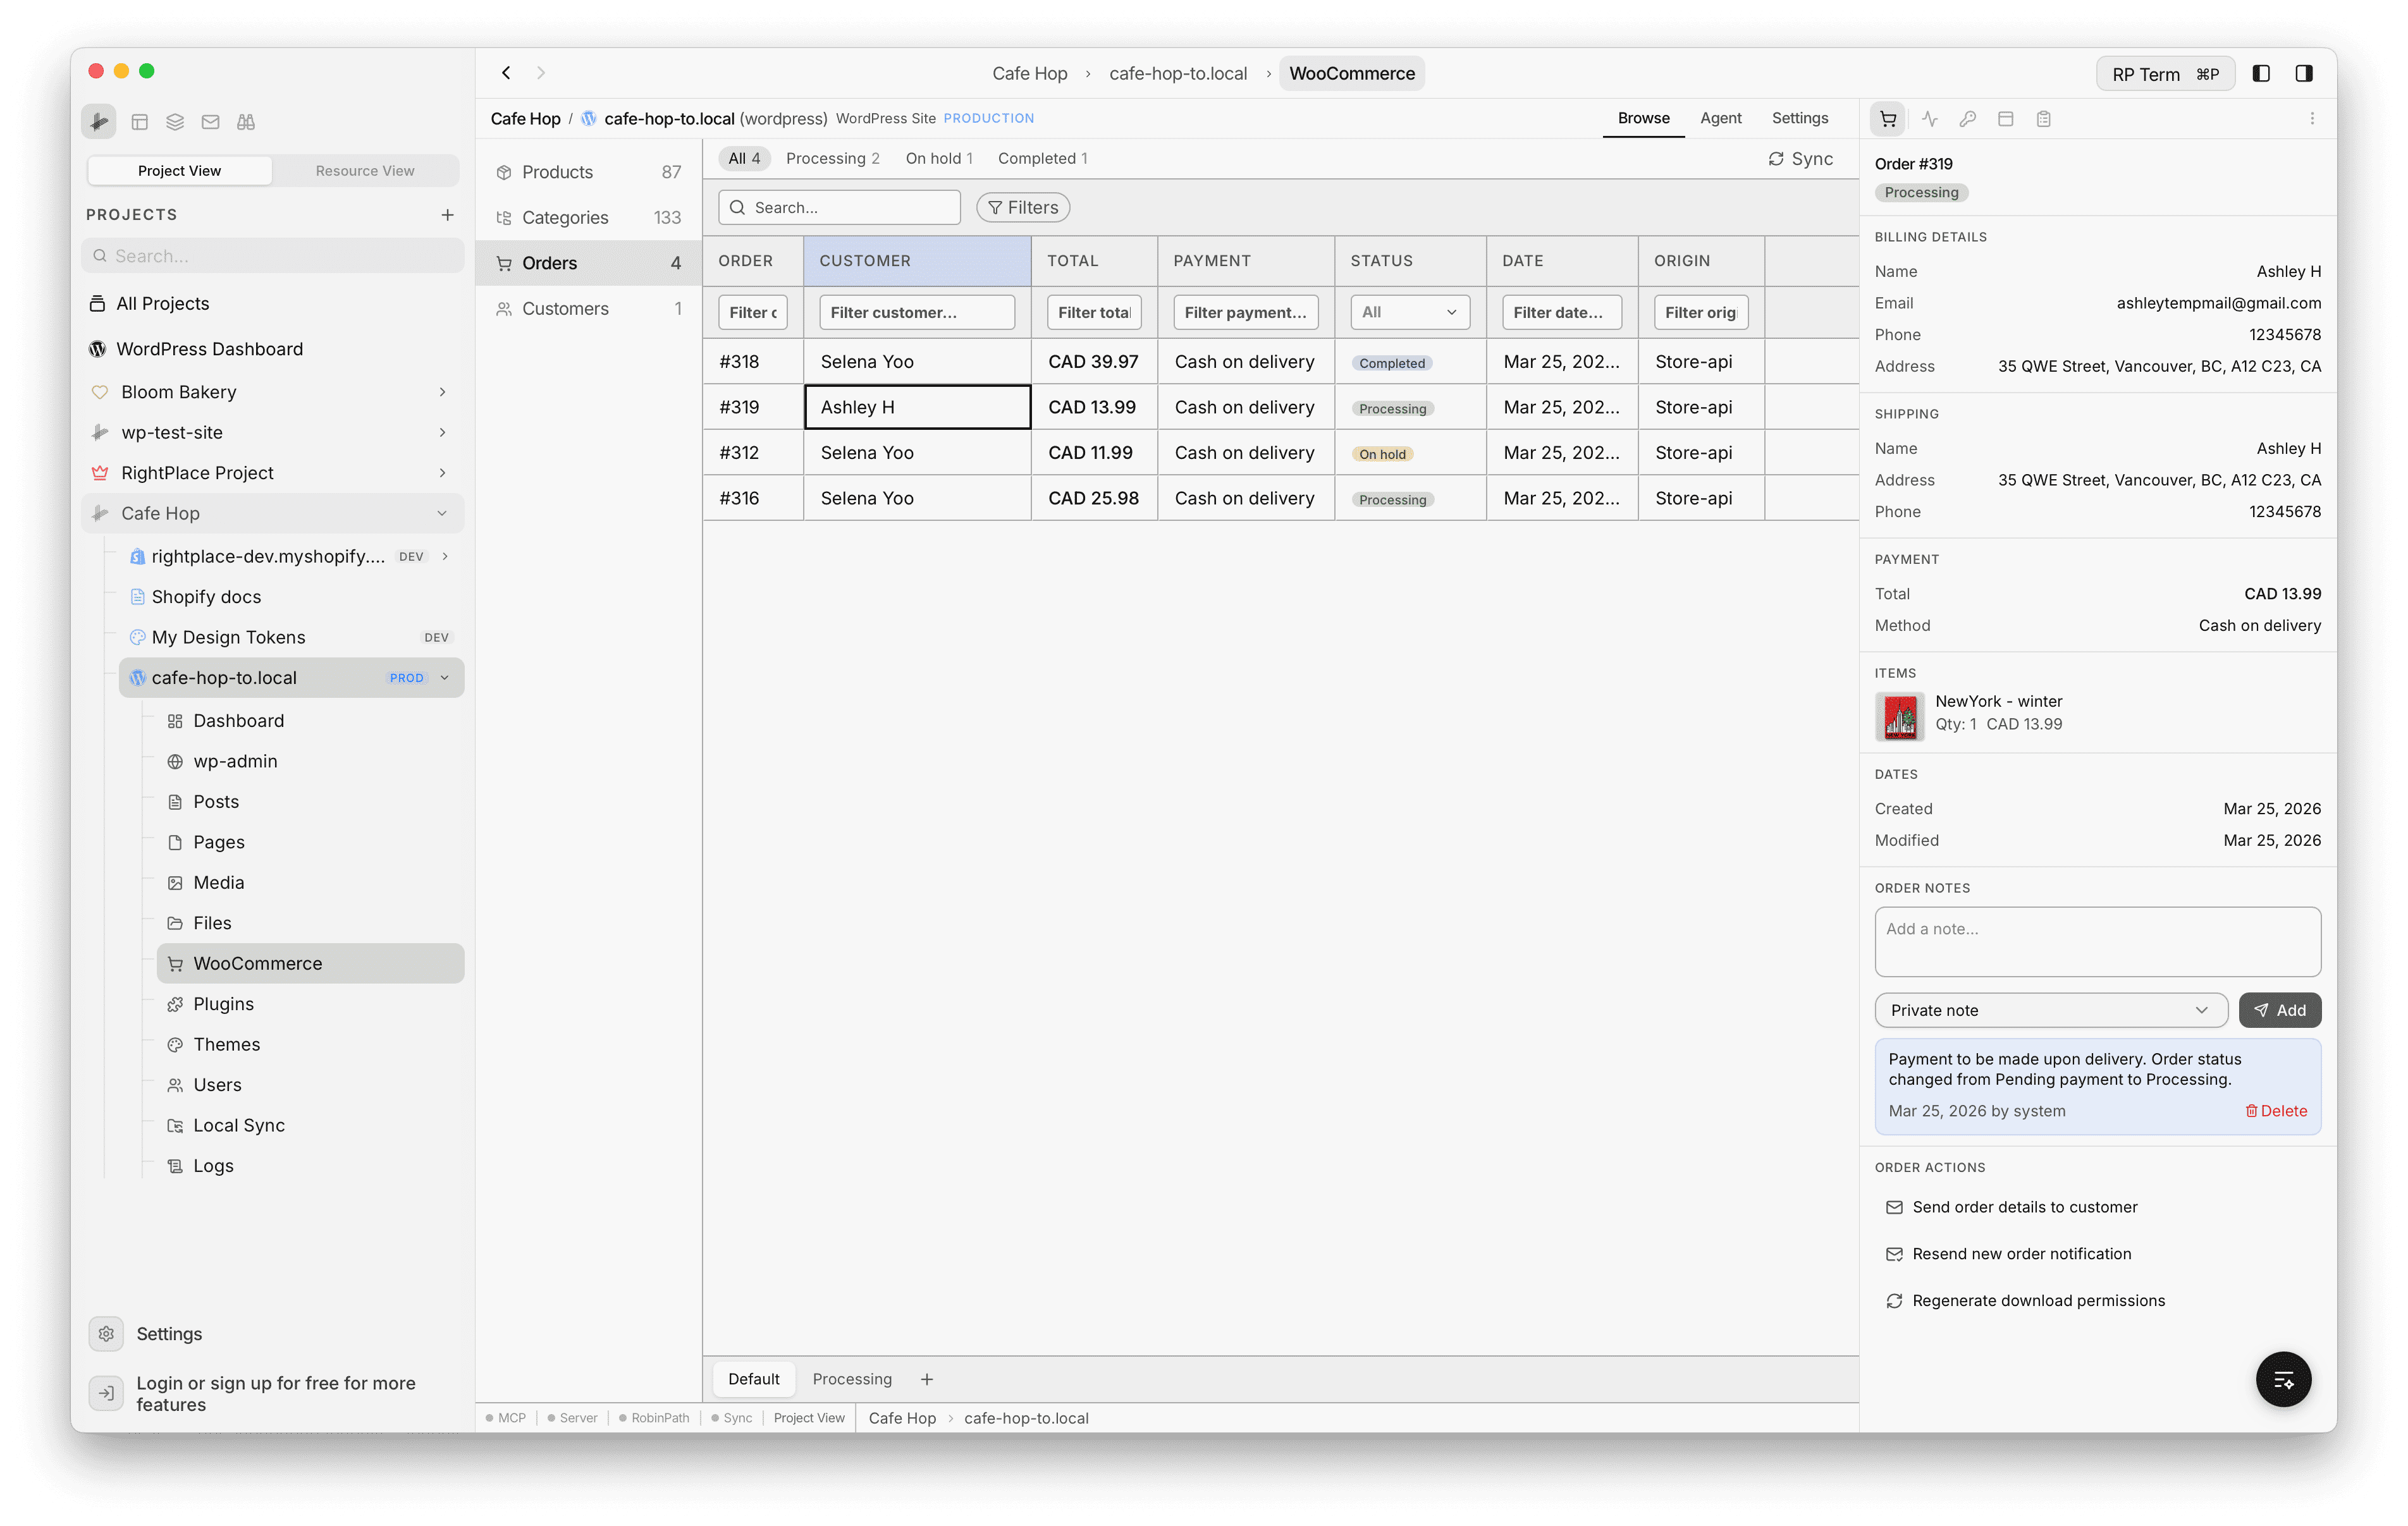
Orders
Orders table
- Orders is a SmartTable with status pills (for example Processing, On hold, Completed), Search, Filters, per-column filter rows, and Sync to refresh from the site
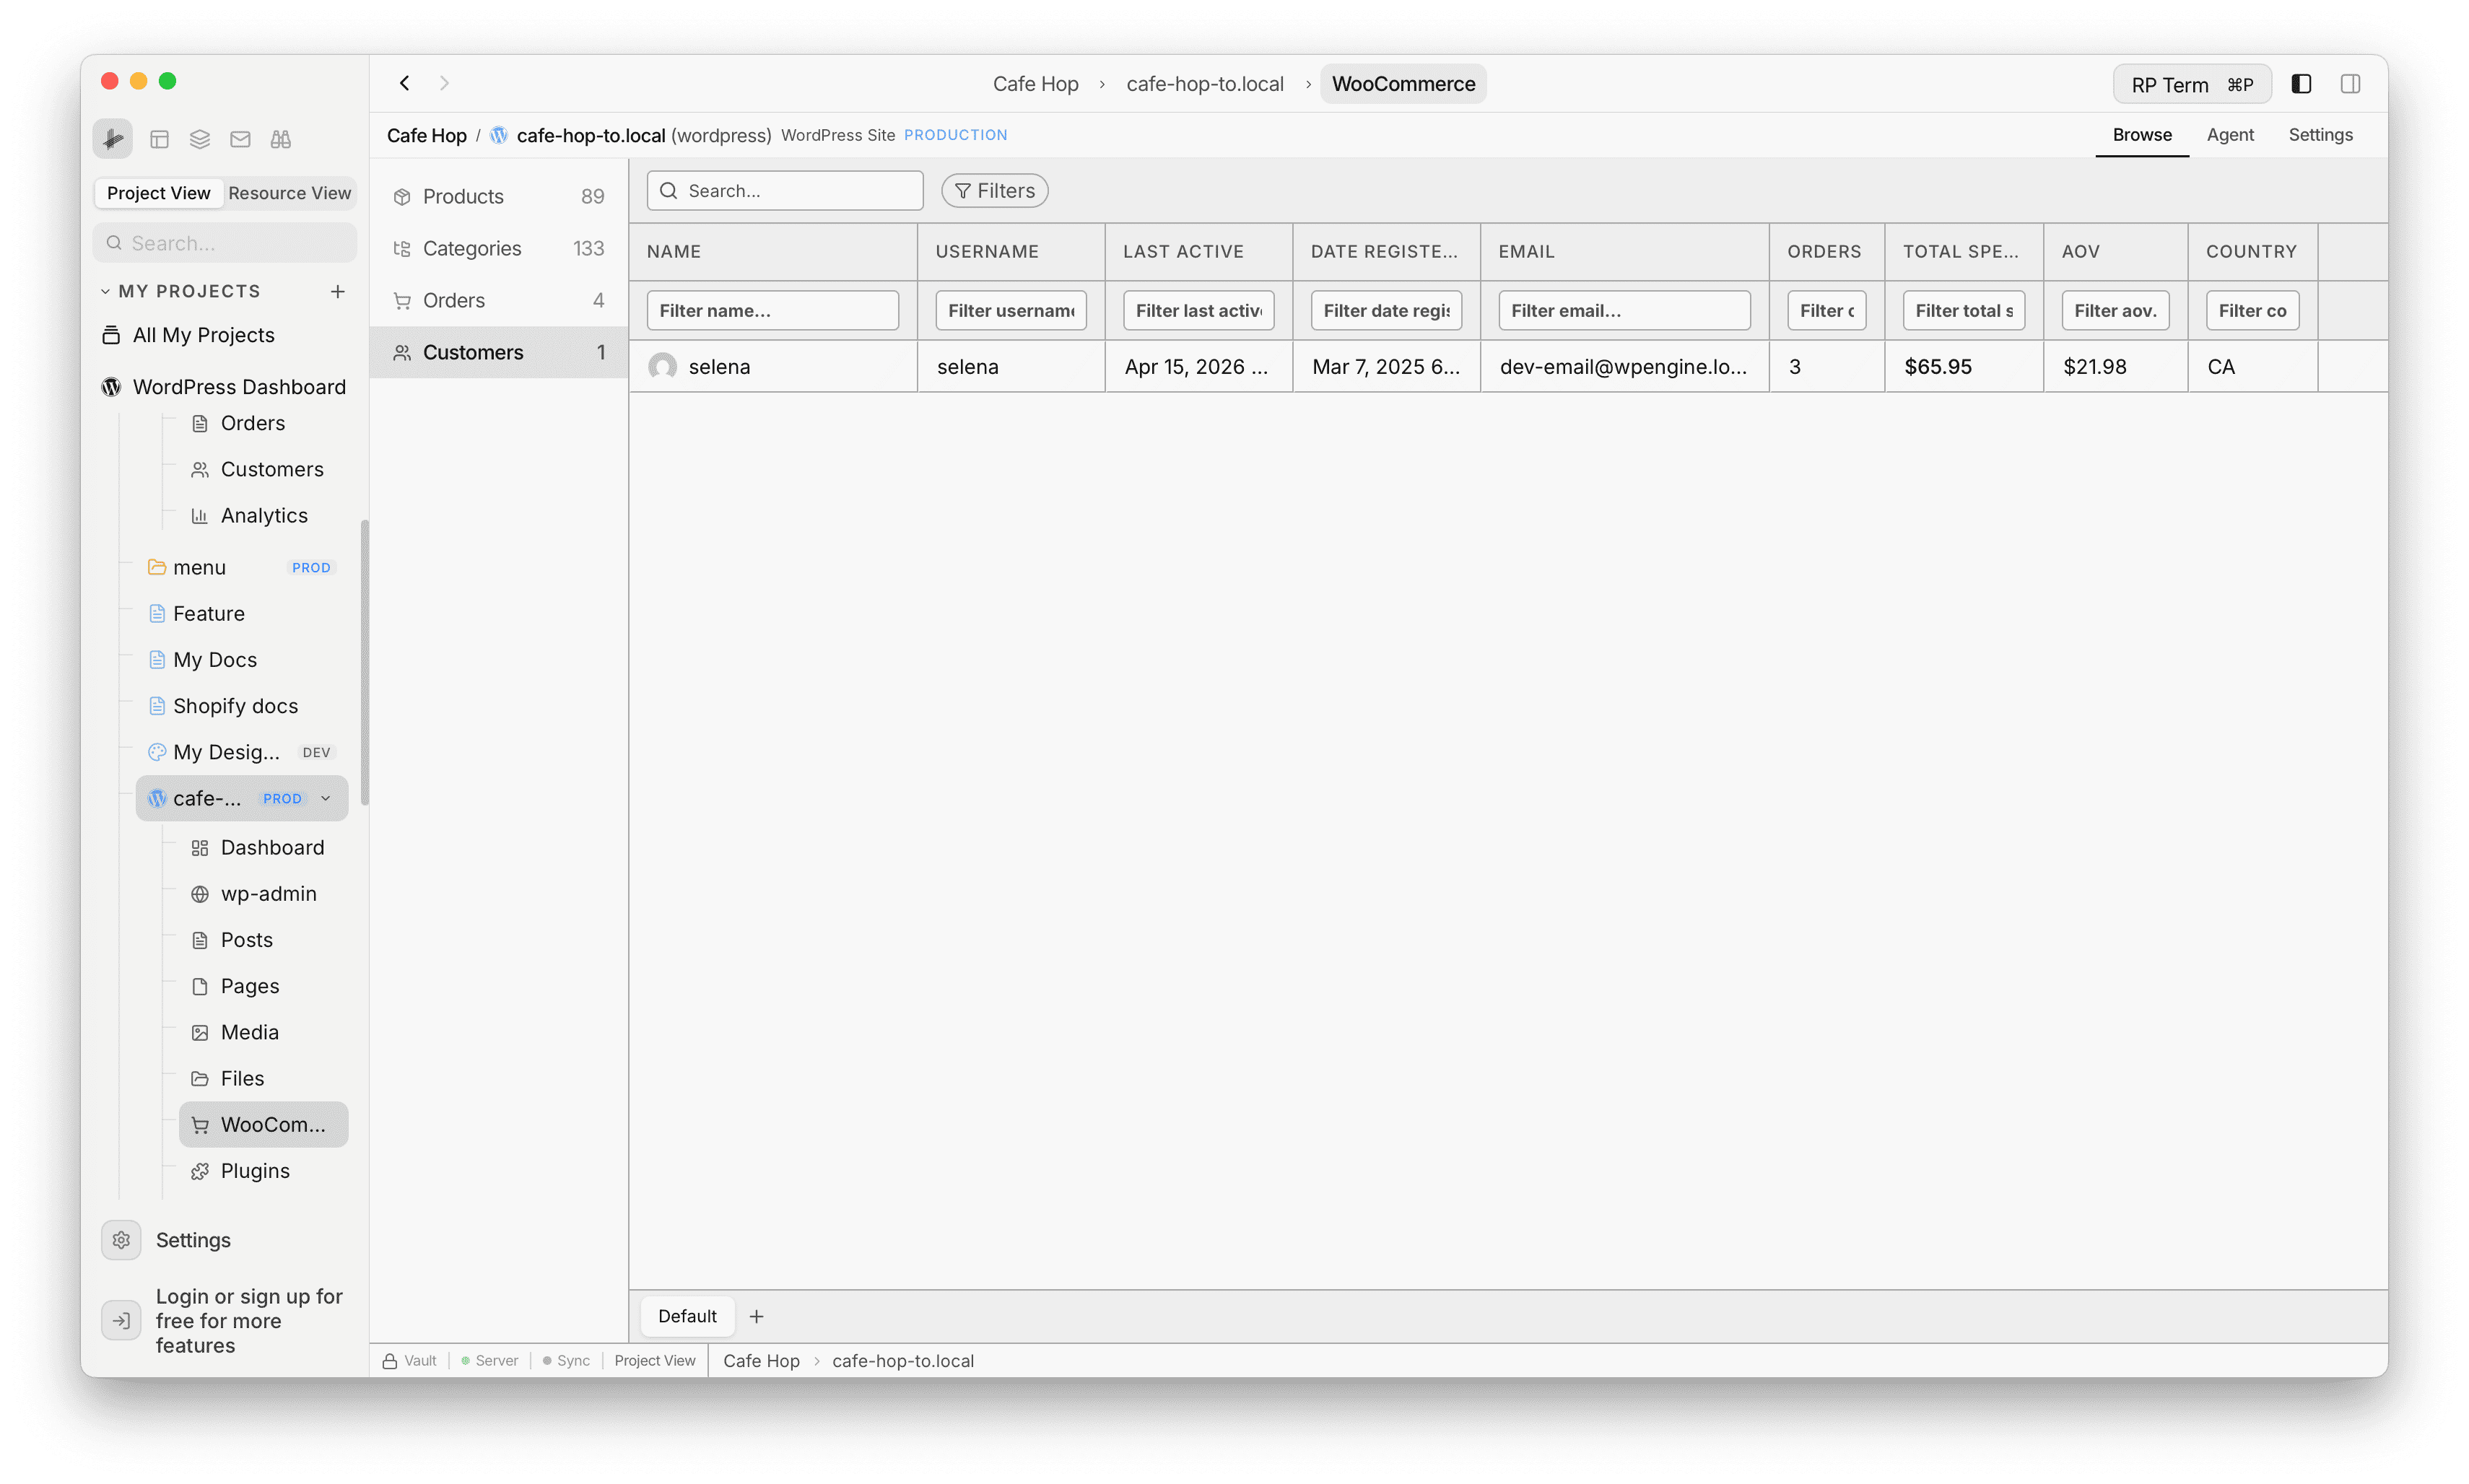
Customers
Customers table
- Customers lists registered WordPress users for the site (same general idea as WooCommerce admin)
- Search, Filters, column filter rows, and saved views work like other SmartTables
- Typical columns include name, username, email, registration and last-active dates, order count, spend, AOV, and country when that data exists
Detail widget
With a WooCommerce table focused, the right WooCommerce widget shows context for the active row.
Product mode
Click a product row (list or grid) to see title, image, SKU, status, price, stock, categories, tags, gallery controls with the media picker, and custom product meta.
Order mode
Click an order row to see order id, totals, status, customer and shipping details, line items, and order notes.
Customer mode
Click a customer row to see avatar, display name, username, contact fields, Woo stats (orders, total spend, AOV, country), and related CRM-style fields when present. There is no separate screenshot for this mode in the docs set (same right-hand panel layout as product and order modes).