Database
Connect to databases and browse data visually. Run SQL queries and inspect tables.
Features
- Table browser with column inspection
- SQL query editor with results grid
- MySQL, PostgreSQL, SQLite support
The Database applet lets you connect to databases and work with them inside RightPlace. You can browse tables, edit data, run custom SQL queries, and manage table structure without leaving the app.
Supported Database Types
- SQLite: local database files, with optional encryption
- MySQL: remote MySQL connections
- PostgreSQL: remote PostgreSQL connections
- Supabase: managed PostgreSQL via Supabase project URL
- D1: Cloudflare Workers database
Adding a Database
To add a database to your project, open the Add Applet dialog and select Database under the Data & Storage category.
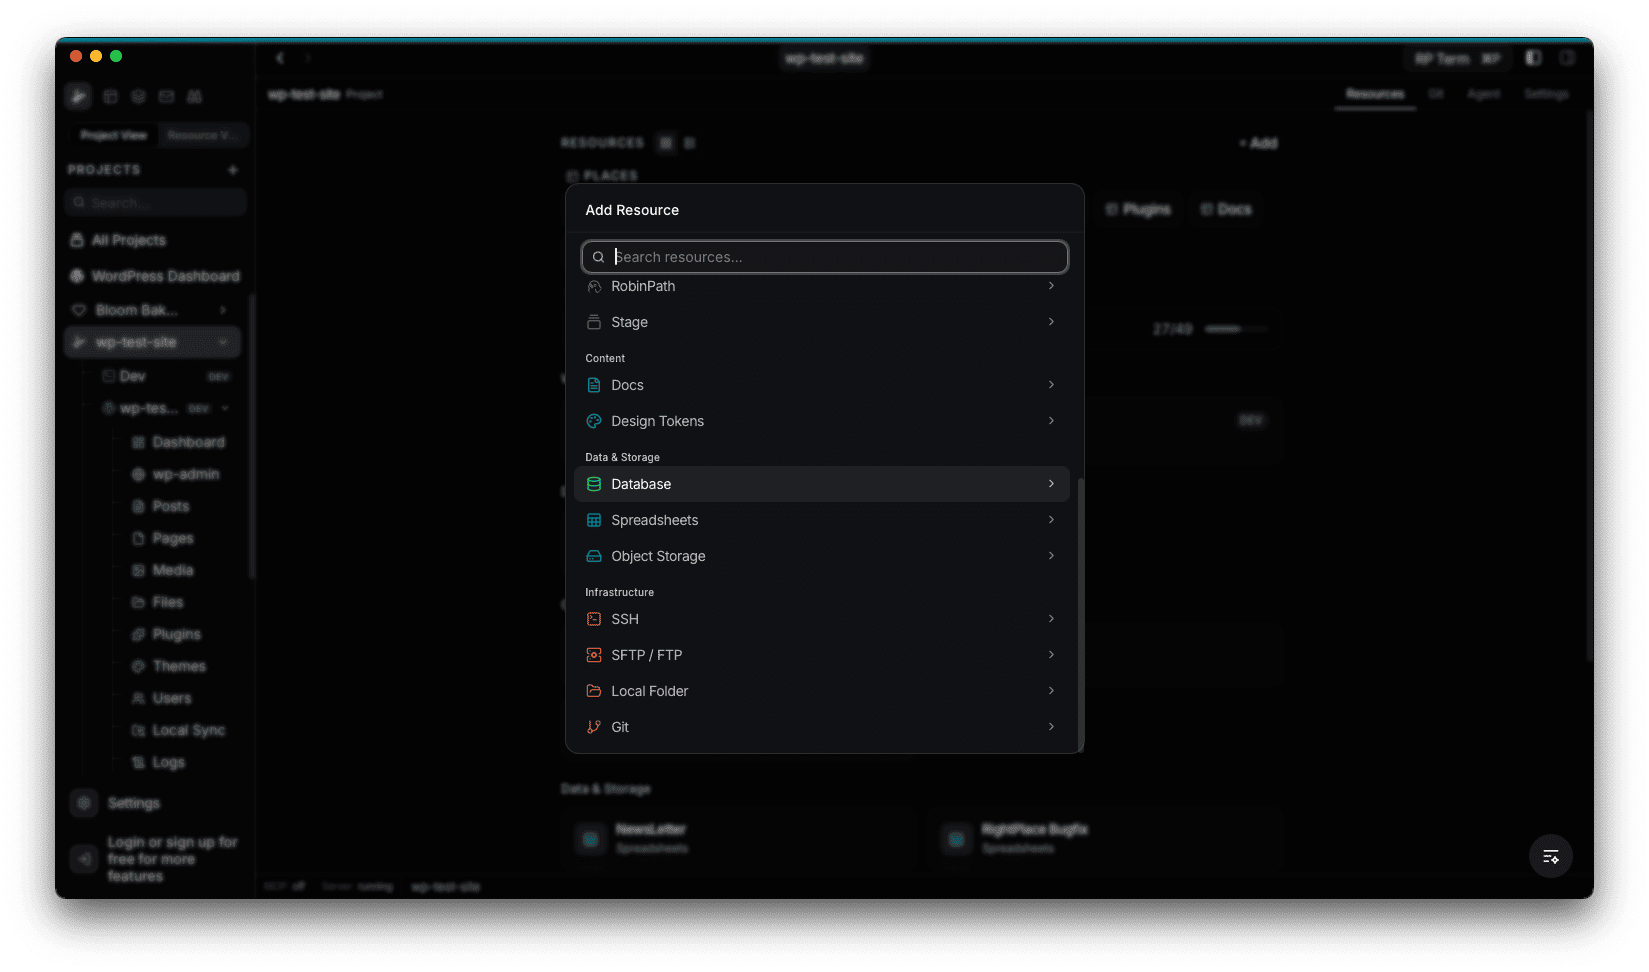
The form fields depend on the database type you select. Use the tabs at the top to switch between types.
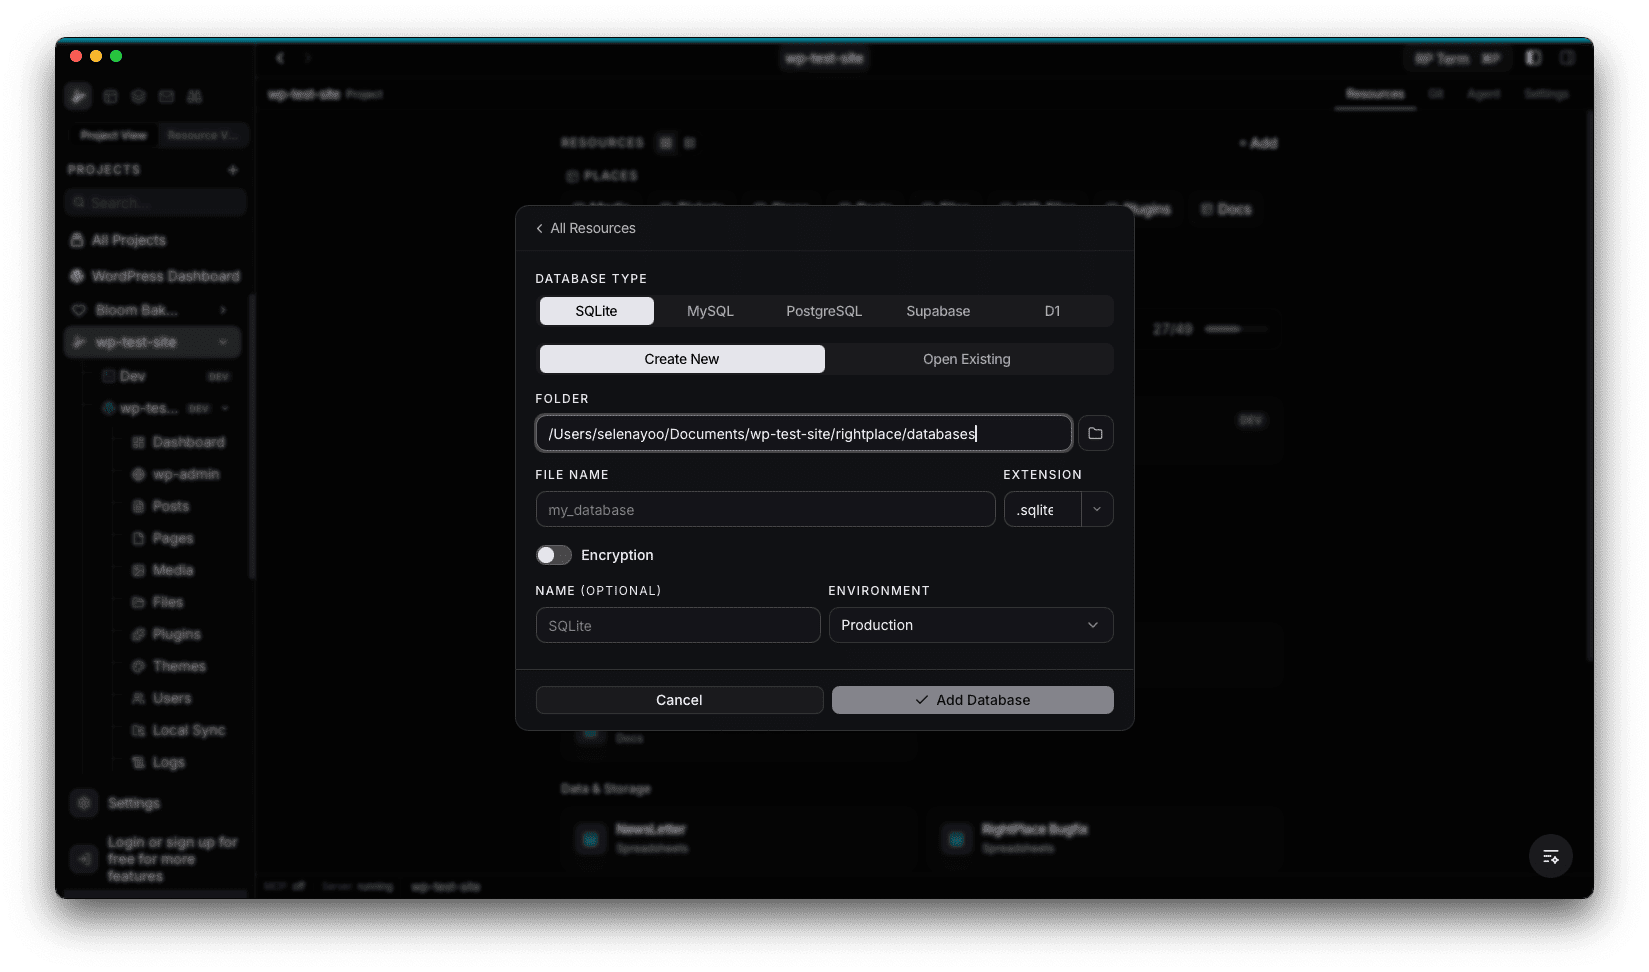
SQLite
Create a new SQLite file or open an existing one. New files are stored in your project’s rightplace/databases/ folder by default. You can choose the file extension (.sqlite, .db, .sqlite3, .db3) and optionally enable encryption with a key (minimum 8 characters).
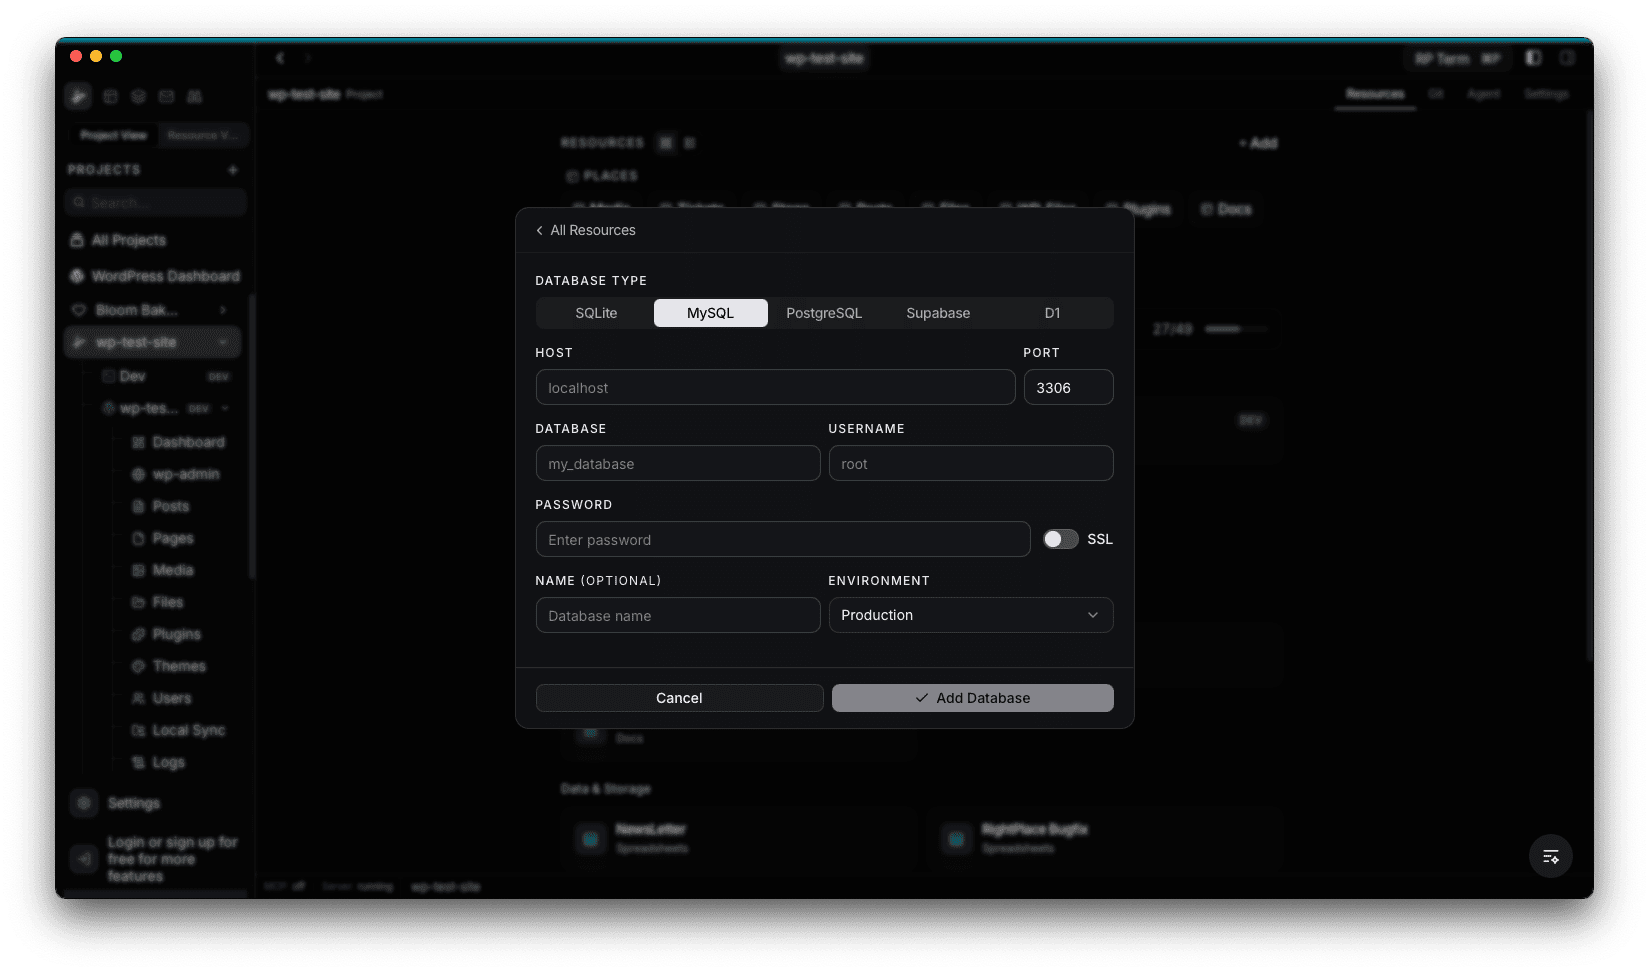
MySQL
Connect to a remote MySQL server. Enter the host, port, database name, username, and password. Toggle SSL if your server requires it.
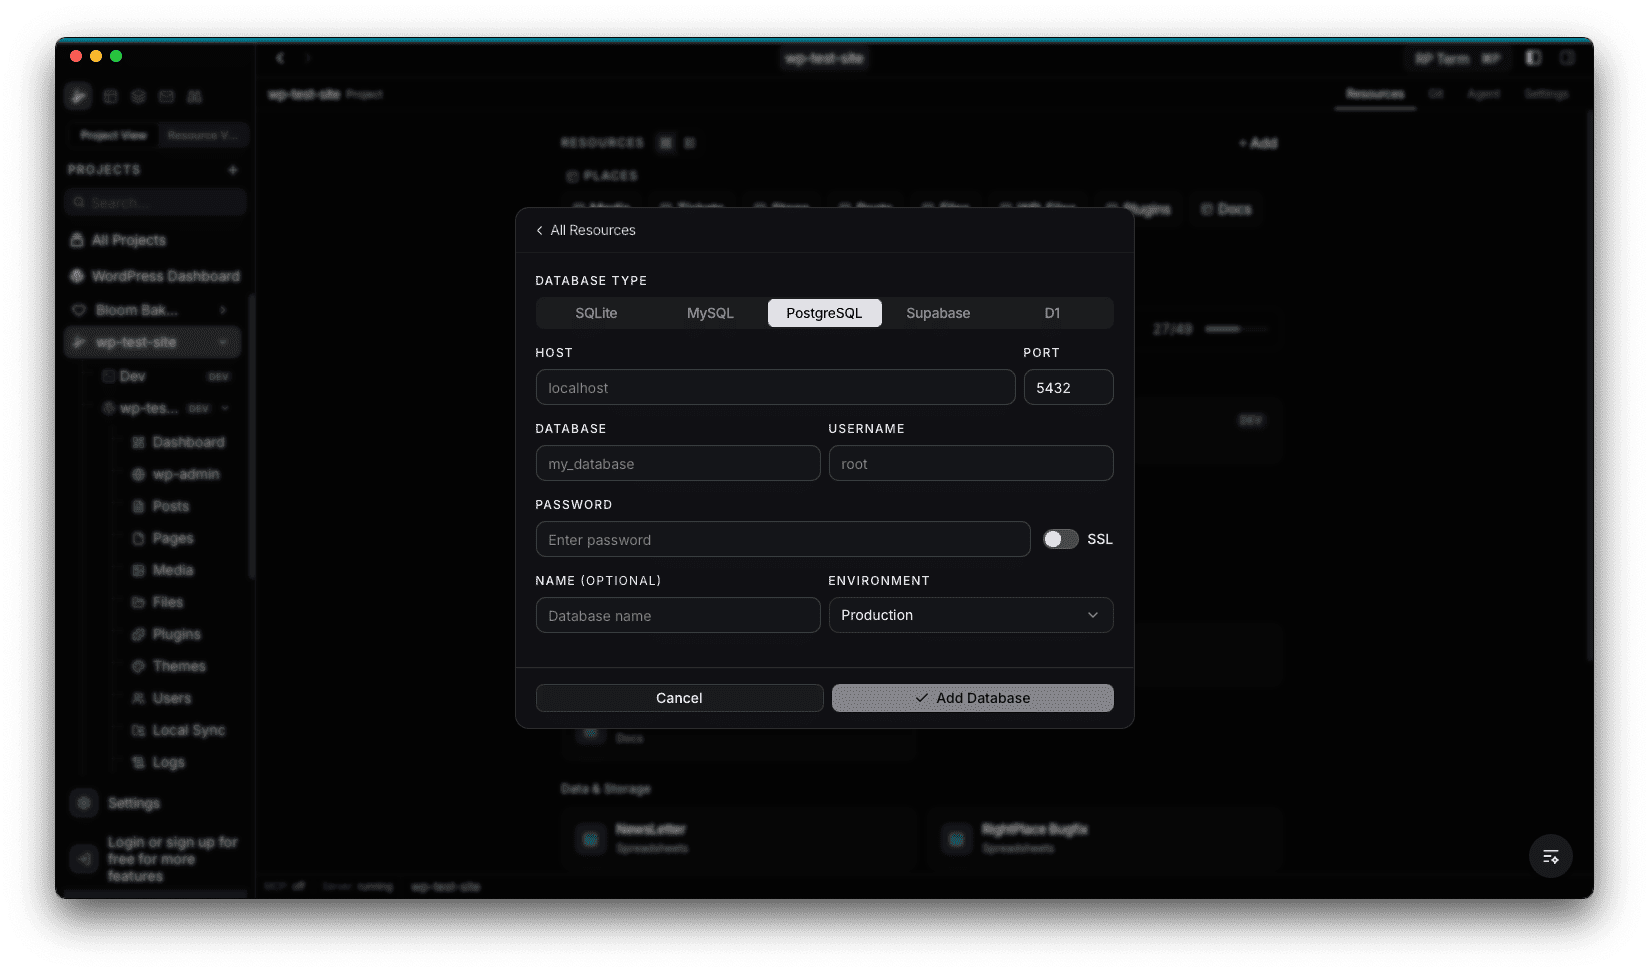
PostgreSQL
Connect to a remote PostgreSQL server. The fields are the same as MySQL, with the default port set to 5432.
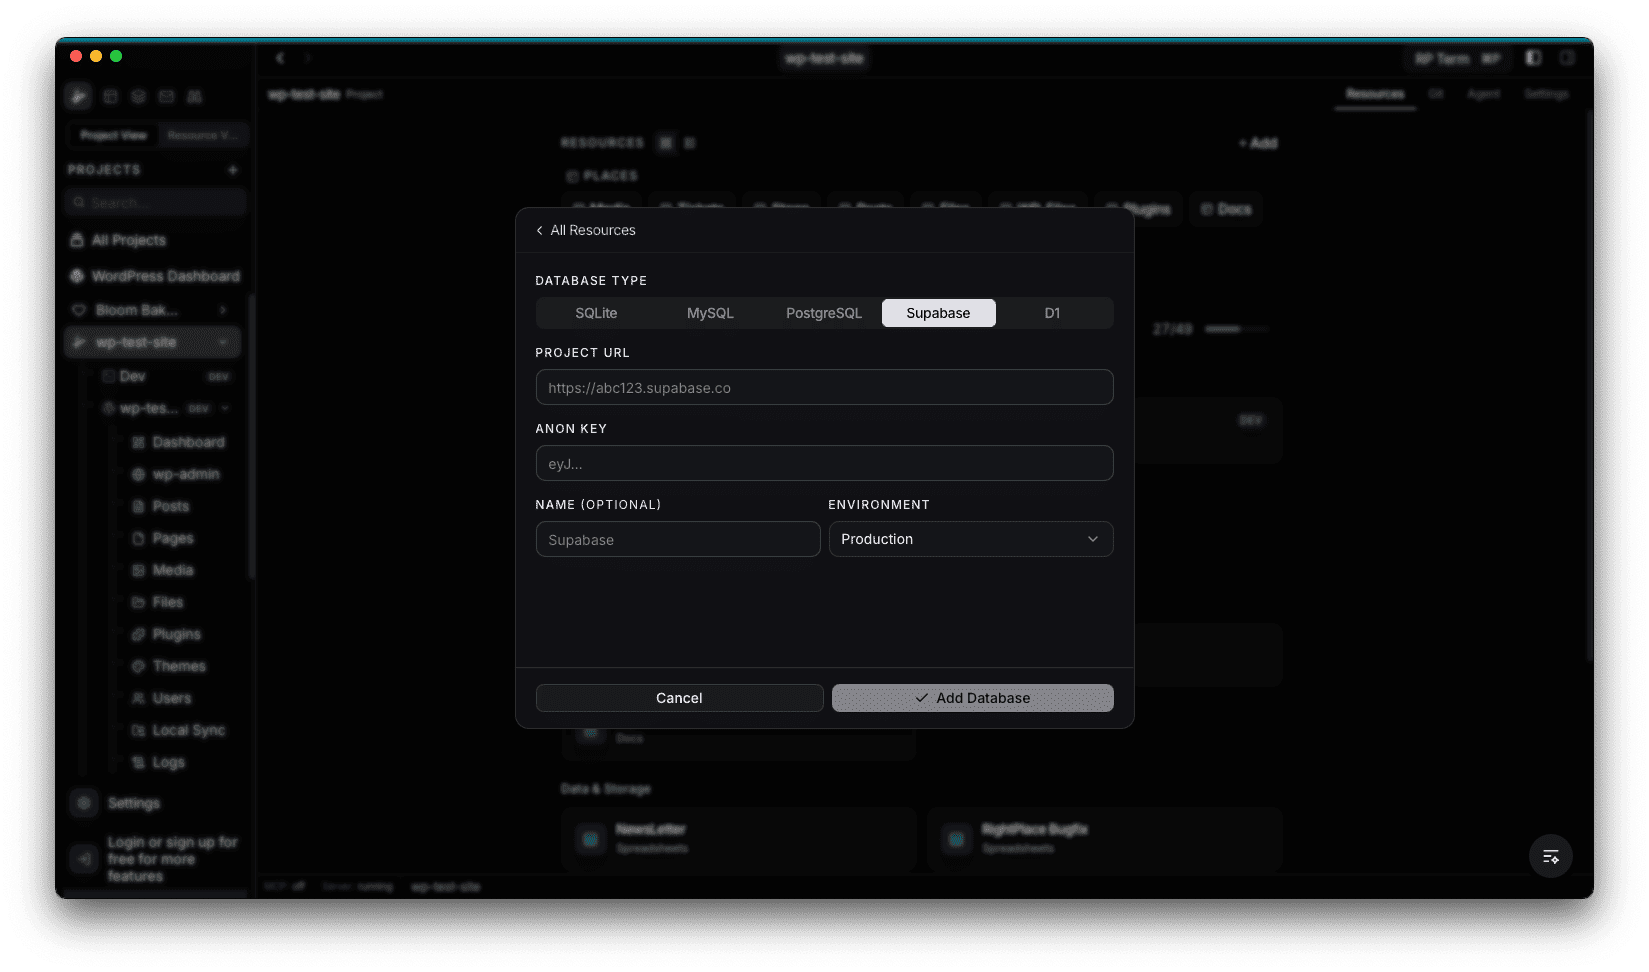
Supabase
Connect to a Supabase project. Enter the project URL and anon key from your Supabase dashboard.
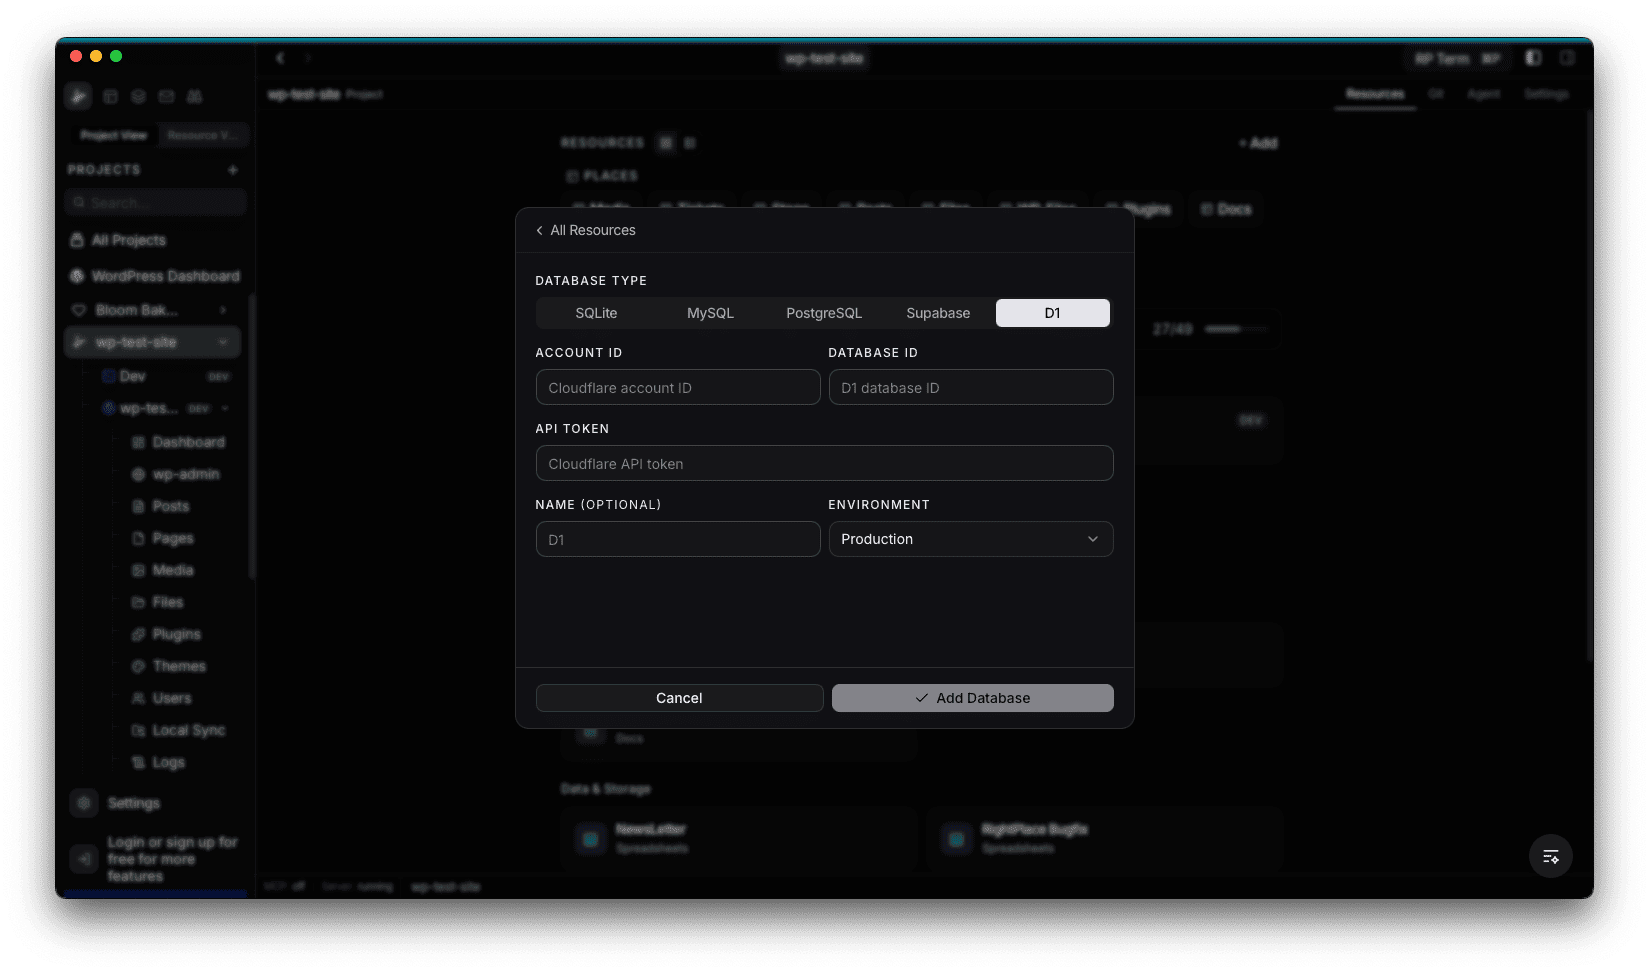
D1
Connect to a Cloudflare D1 database. Enter the account ID, database ID, and API token from your Cloudflare dashboard.
All database types support an optional name and environment tag (Development, Staging, Production). Credentials are stored in an encrypted vault and never appear in config files or logs.
Tables Browser
The main view when you open a database applet is the tables browser. The left sidebar lists all tables in the database with row counts. Select a table to view its data in the grid.
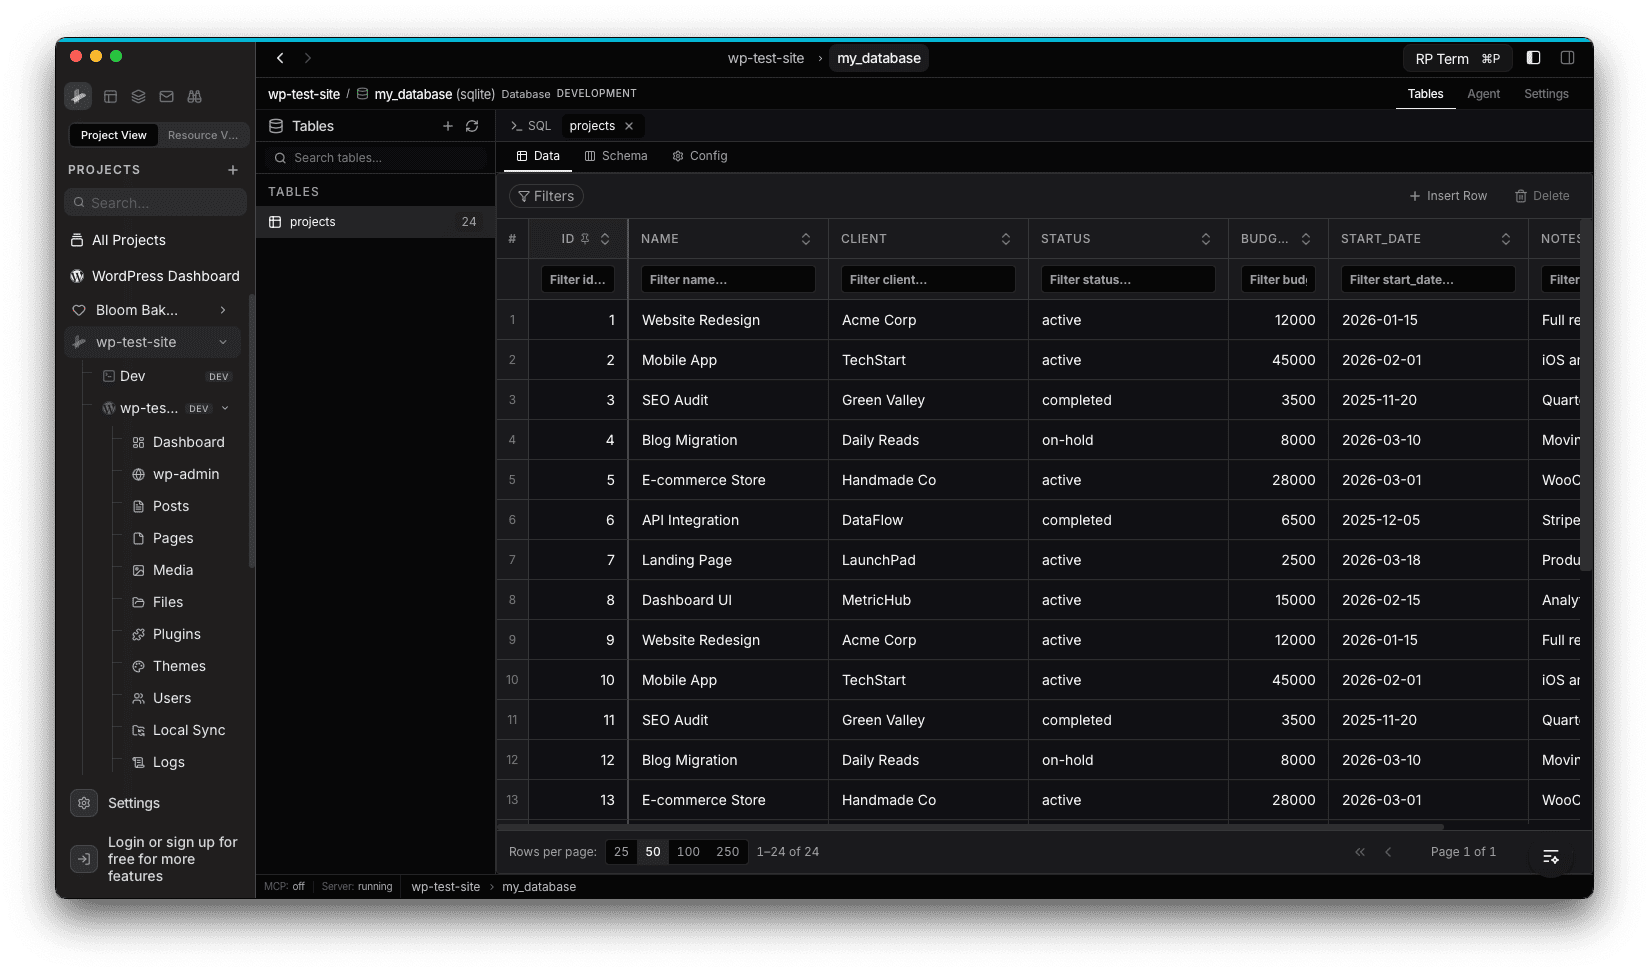
Features:
- Browse all tables in the database
- Sort by any column (click the column header)
- Filter rows per column using the filter inputs below each header
- Paginate with configurable rows per page (25, 50, 100, 250)
- Insert new rows
- Edit individual cells inline
- Delete rows
- Run custom SQL queries via the SQL tab
Table Schema
Switch to the Schema tab to inspect the structure of a table. The schema view shows each column’s name, type, nullable status, default value, primary key, and auto-increment flags. You can also add new columns from this view.
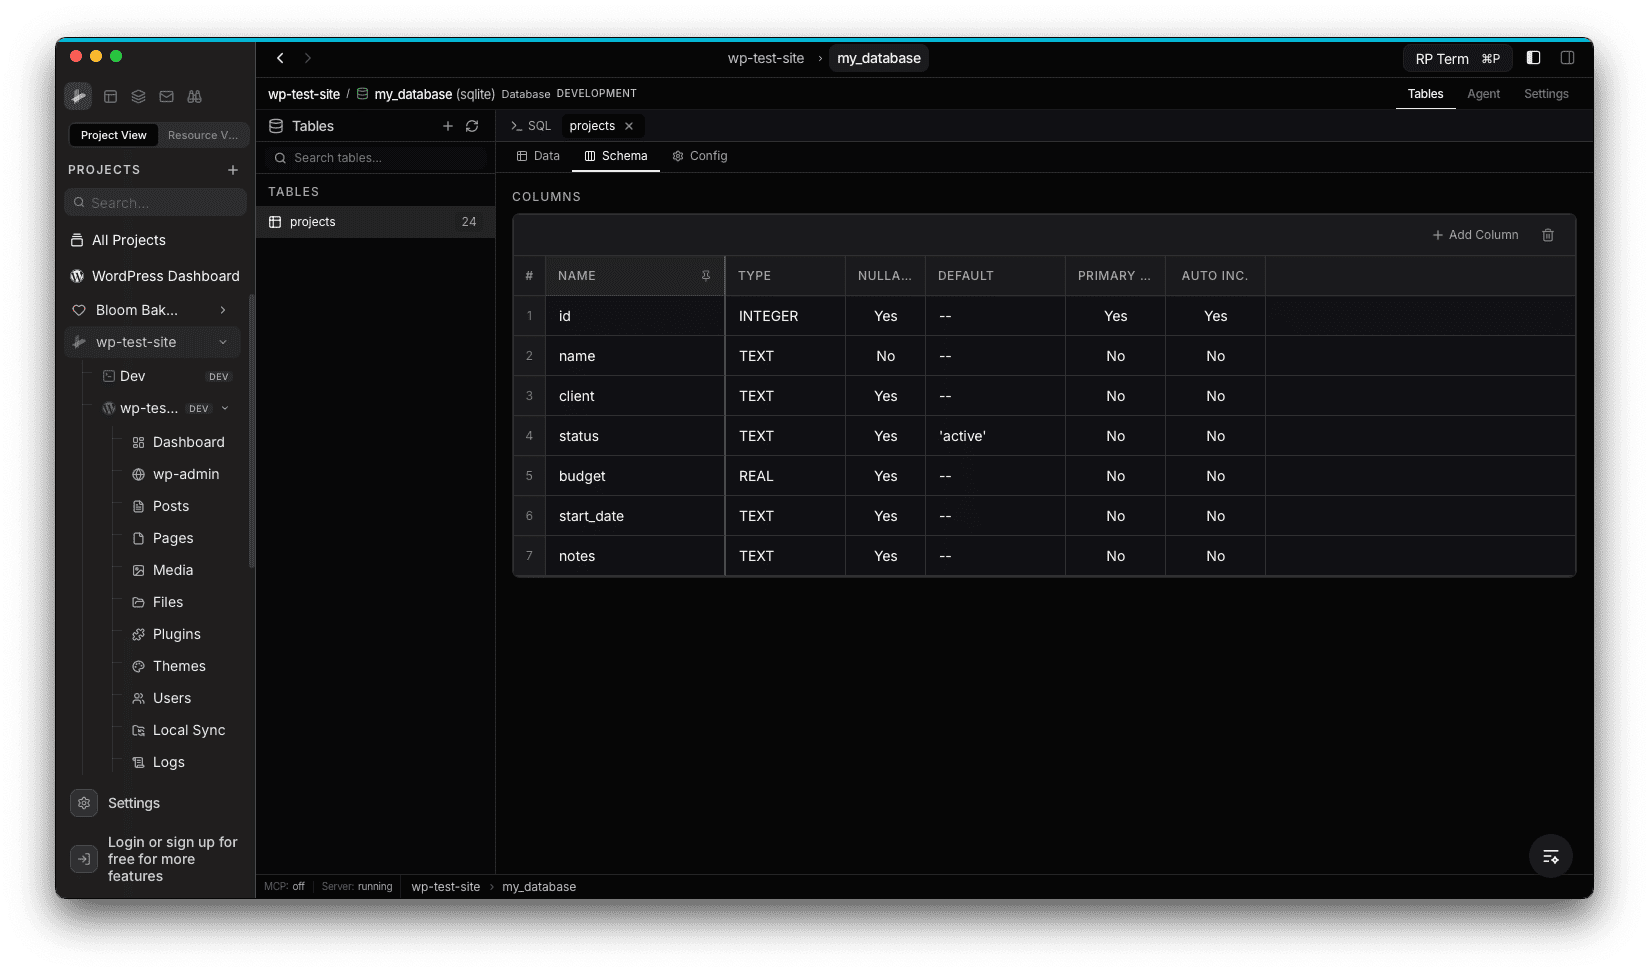
Table Management
Right-click a table in the sidebar or use the table menu to access management actions:
- Rename table
- Duplicate table (with or without data)
- Truncate table (clear all rows)
- Drop table (delete permanently)
Agent tools
Every action this applet exposes as a typed, permissioned tool that agents can discover and run over MCP, the same actions your team uses in the UI.